OpenVPN source based routing

I already spoke about installing OpenVPN on a Raspberry Pi in another blog post.

I only connect to this VPN server to access content that requires a french IP address. I use OpenVPN Connect App on my iPad and Tunnelblick on my mac. It works nicely but how to use this VPN on my Apple TV 4? There is no VPN client available...

End of last year I finally received my Turris Omnia that I supported on Indiegogo. It's a nice router running a free operating system based on OpenWrt with automatic updates. If you haven't heard about it, you should check it out.

Configuring OpenVPN client on OpenWrt

Installing an OpenVPN client on OpenWrt is not very difficult. Here is a quick summary.

  1. Install openvpn-openssl package (via the webinterface or the command line)

  2. I already have a custom client config that I generated with Ansible in this post. To use this config, create the file /etc/config/openvpn:

    # cat /etc/config/openvpn
    package openvpn
    
    config openvpn myvpn
            # Set to 1 to enable this instance:
            option enabled 1
            # Include OpenVPN configuration
            option config /etc/openvpn/myclientconfig.ovpn
  3. Add a new interface in /etc/config/network:

    config interface 'myvpn'
           option proto 'none'
           option ifname 'tun0'
  4. Add a new zone to /etc/config/firewall:

    config zone
            option forward 'REJECT'
            option output 'ACCEPT'
            option name 'VPN_FW'
            option input 'REJECT'
            option masq '1'
            option network 'myvpn'
            option mtu_fix '1'
    
    config forwarding
            option dest 'VPN_FW'
            option src 'lan'
  5. An easy way to configure DNS servers is to add fixed DNS for the WAN interface of the router. To use Google DNS, add the following two lines to the wan interface in /etc/config/network:

    # diff -u network.save network
    @@ -20,6 +20,8 @@
     config interface 'wan'
             option ifname 'eth1'
             option proto 'dhcp'
    +        option peerdns '0'
    +        option dns '8.8.8.8 8.8.4.4'

If you run /etc/init.d/openvpn start with this config, you should connect successfully! All the traffic will go via the VPN. That's nice but it's not what I want. I only want my Apple TV traffic to go via the VPN. How to achieve that?

Source based routing

I quickly found this wiki page to implement source based routing. Exactly what I want. What took me some time to realize is that before to do that I had to ignore the routes pushed by the server.

With my configuration, when the client connects, the server pushes some routes among which a default route that makes all the traffic go via the VPN:

Kernel IP routing table
Destination     Gateway         Genmask         Flags Metric Ref    Use Iface
default         10.8.0.21       128.0.0.0       UG    0      0        0 tun0
...

Ignoring the routes pushed by the server can be done with the --route-noexec option. I tried to add option route_noexec 1 to my /etc/config/openvpn file but it had no effect. It looks like that when using a custom config, you can't add other options there. You have to set everything in the custom config. I added route-noexec to my /etc/openvpn/myclientconfig.ovpn file and it worked! No more route added. No traffic sent via the VPN.

We can now apply the changes described in the Routing wiki page.

  1. Install the ip package

  2. Add the 10 vpn line to /etc/iproute2/rt_tables so that it looks like this:

    # cat /etc/iproute2/rt_tables
    #
    # reserved values
    #
    255  local
    254  main
    253  default
    10   vpn
    0    unspec
    #
    # local
    #
    #1  inr.ruhep
  3. We now need to add a new rule and route when starting the client. We can do so using the openvpn up command. Create the /etc/openvpn/upvpn script:

    # cat /etc/openvpn/upvpn
    #!/bin/sh
    
    client=192.168.75.20
    
    tun_dev=$1
    tun_mtu=$2
    link_mtu=$3
    ifconfig_local_ip=$4
    ifconfig_remote_ip=$5
    
    echo "Routing client $client traffic through VPN"
    ip rule add from $client priority 10 table vpn
    ip route add $client dev $tun_dev table vpn
    ip route add default via $ifconfig_remote_ip dev $tun_dev table vpn
    ip route flush cache
  4. Create the /etc/openvpn/downvpn script to properly remove the rule and route:

    # cat /etc/openvpn/downvpn
    #!/bin/sh
    
    client=192.168.75.20
    
    tun_dev=$1
    tun_mtu=$2
    link_mtu=$3
    ifconfig_local_ip=$4
    ifconfig_remote_ip=$5
    
    echo "Delete client $client traffic routing through VPN"
    ip rule del from $client priority 10 table vpn
    ip route del $client dev $tun_dev table vpn
    ip route del default via $ifconfig_remote_ip dev $tun_dev table vpn
    ip route flush cache
  5. We now have to add those scripts to the client config. Here is everything I added to my /etc/openvpn/myclientconfig.ovpn file:

    # Don't add or remove routes automatically
    # Source based routing for specific client added in up script
    route-noexec
    # script-security 2 needed to run up and down scripts
    script-security 2
    # Script to run after successful TUN/TAP device open
    up /etc/openvpn/upvpn
    # Call down script before to close TUN to properly remove the routing
    down-pre
    down /etc/openvpn/downvpn

Notice that the machine IP address that we want to route via the VPN is hard-coded in the the upvpn and downvpn scripts. This IP shall be fixed. You can easily do that by associating it to the required MAC address in the DHCP settings.

The tunnel remote IP is automatically passed in parameter to the up and down scripts by openvpn.

If we run /etc/init.d/openvpn start with this config, only the traffic from the 192.168.75.20 IP address will go via the VPN!

Run /etc/init.d/openvpn stop to close the tunnel.

Conclusion

This is a nice way to route traffic through a VPN based on the source IP address.

You can of course use the router webinterface to stop and start openvpn. In another post, I'll talk about an even more user friendly way to control it.

Parsing and indexing PDF in Python

I have a Doxie Go scanner and I scan all the documents I receive in paper. That's nice, but it creates another problem. All the resulting PDF files have to be named, organized and stored... Doing that manually is boring and time consuming. Of course that's something I want to automate!

I even bought Hazel a while ago. It's a nice software that monitors files in a folder and performs specific instructions based on the rules you defined. It works well but I felt a bit limited and I thought I could probably write something more tailored to my use case. And that would be more fun :-)

Parsing PDF in Python

A quick solution I found was to run pdftotext using subprocess. I looked at PDFMiner, a pure Python PDF parser but I found pdftotext output to be more accurate. On MacOS, you can install it using Homebrew:

$ brew install Caskroom/cask/pdftotext

Here is a simple Python function to do that:

In [1]:
import subprocess

def parse_pdf(filename):
    try:
        content = subprocess.check_output(["pdftotext", '-enc', 'UTF-8', filename, "-"])
    except subprocess.CalledProcessError as e:
        print('Skipping {} (pdftotext returned status {})'.format(filename, e.returncode))
        return None
    return content.decode('utf-8')

Let's try to parse a pdf file. We'll use requests to download a sample file.

In [2]:
import requests

url = 'http://www.cbu.edu.zm/downloads/pdf-sample.pdf'
response = requests.get(url)
with open('/tmp/pdf-sample.pdf', 'wb') as f:
    f.write(response.content)

Let's first look at the PDF:

In [3]:
from IPython.display import IFrame
IFrame('http://www.cbu.edu.zm/downloads/pdf-sample.pdf', width=600, height=870)
Out[3]:

Nothing complex. It should be easy to parse.

In [4]:
content = parse_pdf('/tmp/pdf-sample.pdf')
content
Out[4]:
"Adobe Acrobat PDF Files\nAdobe® Portable Document Format (PDF) is a universal file format that preserves all of the fonts, formatting, colours and graphics of any source document, regardless of the application and platform used to create it. Adobe PDF is an ideal format for electronic document distribution as it overcomes the problems commonly encountered with electronic file sharing. • Anyone, anywhere can open a PDF file. All you need is the free Adobe Acrobat Reader. Recipients of other file formats sometimes can't open files because they don't have the applications used to create the documents. PDF files always print correctly on any printing device. PDF files always display exactly as created, regardless of fonts, software, and operating systems. Fonts, and graphics are not lost due to platform, software, and version incompatibilities. The free Acrobat Reader is easy to download and can be freely distributed by anyone. Compact PDF files are smaller than their source files and download a page at a time for fast display on the Web.\n\n• •\n\n• •\n\n\x0c"

This works quite well. The layout is not respected but it's the text that matters. It would be easy to define some regex to define rules based on the PDF content.

This could be the first step in naming and organizing the scanned documents. But it would be nice to have an interface to easily search in all the files. I've already used MongoDB full text search in a webapp I wrote and it worked well for my use case. But I read about Elasticsearch and I always wanted to give it a try.

Elasticsearch Ingest Attachment Processor Plugin

I could just index the result from pdftotext, but I know there is a plugin that can parse PDF files.

The Mapper Attachments Type plugin is deprecated in 5.0.0. It has been replaced with the ingest-attachment plugin. So let's look at that.

Running Elasticsearch

To run Elasticsearch, the easiest is to use Docker. As the official image from Docker Hub comes with no plugin, we'll create our own image. See Elasticsearch Plugin Management with Docker for more information.

Here is our Dockerfile:

FROM elasticsearch:5

RUN /usr/share/elasticsearch/bin/elasticsearch-plugin install ingest-attachment

Create the elasticsearch-ingest docker image:

$ docker build -t elasticsearch-ingest .

We can now run elasticsearch with the ingest-attachment plugin:

$ docker run -d -p 9200:9200 elasticsearch-ingest

Python Elasticsearch Client

We'll use elasticsearch-py to interact with our Elasticsearch cluster.

In [5]:
from elasticsearch import Elasticsearch
es = Elasticsearch()

Let's first check that our elasticsearch cluster is alive by asking about its health:

In [6]:
es.cat.health()
Out[6]:
'1479333419 21:56:59 elasticsearch green 1 1 0 0 0 0 0 0 - 100.0%\n'

Nice! We can start playing with our ES cluster.

As described in the documentation, we first have to create a pipeline to use the Ingest Attachment Processor Plugin:

PUT _ingest/pipeline/attachment
{
  "description" : "Extract attachment information",
  "processors" : [
    {
      "attachment" : {
        "field" : "data"
      }
    }
  ]
}

OK, how do we do that using the Python client?

In [7]:
body = {
  "description" : "Extract attachment information",
  "processors" : [
    {
      "attachment" : {
        "field" : "data"
      }
    }
  ]
}
es.index(index='_ingest', doc_type='pipeline', id='attachment', body=body)
Out[7]:
{'acknowledged': True}

Now, we can send a document to our pipeline. Let's start by using the same example as in the documentation:

PUT my_index/my_type/my_id?pipeline=attachment
{
  "data": "e1xydGYxXGFuc2kNCkxvcmVtIGlwc3VtIGRvbG9yIHNpdCBhbWV0DQpccGFyIH0="
}

Using Python client, this gives:

In [8]:
result1 = es.index(index='my_index', doc_type='my_type', pipeline='attachment',
                  body={'data': "e1xydGYxXGFuc2kNCkxvcmVtIGlwc3VtIGRvbG9yIHNpdCBhbWV0DQpccGFyIH0="})
result1
Out[8]:
{'_id': 'AVhvJKzVIvjFWZACJU_t',
 '_index': 'my_index',
 '_shards': {'failed': 0, 'successful': 1, 'total': 2},
 '_type': 'my_type',
 '_version': 1,
 'created': True,
 'result': 'created'}

Let's try to get the created document based on its id:

In [9]:
es.get(index='my_index', doc_type='my_type', id=result1['_id'])
Out[9]:
{'_id': 'AVhvJKzVIvjFWZACJU_t',
 '_index': 'my_index',
 '_source': {'attachment': {'content': 'Lorem ipsum dolor sit amet',
   'content_length': 28,
   'content_type': 'application/rtf',
   'language': 'ro'},
  'data': 'e1xydGYxXGFuc2kNCkxvcmVtIGlwc3VtIGRvbG9yIHNpdCBhbWV0DQpccGFyIH0='},
 '_type': 'my_type',
 '_version': 1,
 'found': True}

We can see that the binary data passed to the pipeline was a Rich Text Format file and that the content was extracted: Lorem ipsum dolor sit amet

Displaying the binary data is not very useful. It doesn't matter in this example as it's quite small. But it would be much bigger even on small files. We can exclude it using _source_exclude:

In [10]:
es.get(index='my_index', doc_type='my_type', id=result1['_id'], _source_exclude=['data'])
Out[10]:
{'_id': 'AVhvJKzVIvjFWZACJU_t',
 '_index': 'my_index',
 '_source': {'attachment': {'content': 'Lorem ipsum dolor sit amet',
   'content_length': 28,
   'content_type': 'application/rtf',
   'language': 'ro'}},
 '_type': 'my_type',
 '_version': 1,
 'found': True}

Indexing PDF files

Let's try to parse the same sample pdf as before.

In [11]:
url = 'http://www.cbu.edu.zm/downloads/pdf-sample.pdf'
response = requests.get(url)

Note that we have to encode the content of the pdf before to pass it to ES. The source field must be a base64 encoded binary.

In [12]:
import base64

data = base64.b64encode(response.content).decode('ascii')
In [13]:
result2 = es.index(index='my_index', doc_type='my_type', pipeline='attachment',
                  body={'data': data})
result2
Out[13]:
{'_id': 'AVhvJMC6IvjFWZACJU_u',
 '_index': 'my_index',
 '_shards': {'failed': 0, 'successful': 1, 'total': 2},
 '_type': 'my_type',
 '_version': 1,
 'created': True,
 'result': 'created'}

We can get the document based on its id:

In [14]:
doc = es.get(index='my_index', doc_type='my_type', id=result2['_id'], _source_exclude=['data'])
doc
Out[14]:
{'_id': 'AVhvJMC6IvjFWZACJU_u',
 '_index': 'my_index',
 '_source': {'attachment': {'author': 'cdaily',
   'content': "Adobe Acrobat PDF Files\n\nAdobe® Portable Document Format (PDF) is a universal file format that preserves all\nof the fonts, formatting, colours and graphics of any source document, regardless of\nthe application and platform used to create it.\n\nAdobe PDF is an ideal format for electronic document distribution as it overcomes the\nproblems commonly encountered with electronic file sharing.\n\n•  Anyone, anywhere can open a PDF file. All you need is the free Adobe Acrobat\nReader. Recipients of other file formats sometimes can't open files because they\ndon't have the applications used to create the documents.\n\n•  PDF files always print correctly on any printing device.\n\n•  PDF files always display exactly as created, regardless of fonts, software, and\noperating systems. Fonts, and graphics are not lost due to platform, software, and\nversion incompatibilities.\n\n•  The free Acrobat Reader is easy to download and can be freely distributed by\nanyone.\n\n•  Compact PDF files are smaller than their source files and download a\npage at a time for fast display on the Web.",
   'content_length': 1073,
   'content_type': 'application/pdf',
   'date': '2000-06-28T23:21:08Z',
   'language': 'en',
   'title': 'This is a test PDF file'}},
 '_type': 'my_type',
 '_version': 1,
 'found': True}

Or with a basic search:

In [15]:
es.search(index='my_index', doc_type='my_type', q='Adobe', _source_exclude=['data'])
Out[15]:
{'_shards': {'failed': 0, 'successful': 5, 'total': 5},
 'hits': {'hits': [{'_id': 'AVhvJMC6IvjFWZACJU_u',
    '_index': 'my_index',
    '_score': 0.45930308,
    '_source': {'attachment': {'author': 'cdaily',
      'content': "Adobe Acrobat PDF Files\n\nAdobe® Portable Document Format (PDF) is a universal file format that preserves all\nof the fonts, formatting, colours and graphics of any source document, regardless of\nthe application and platform used to create it.\n\nAdobe PDF is an ideal format for electronic document distribution as it overcomes the\nproblems commonly encountered with electronic file sharing.\n\n•  Anyone, anywhere can open a PDF file. All you need is the free Adobe Acrobat\nReader. Recipients of other file formats sometimes can't open files because they\ndon't have the applications used to create the documents.\n\n•  PDF files always print correctly on any printing device.\n\n•  PDF files always display exactly as created, regardless of fonts, software, and\noperating systems. Fonts, and graphics are not lost due to platform, software, and\nversion incompatibilities.\n\n•  The free Acrobat Reader is easy to download and can be freely distributed by\nanyone.\n\n•  Compact PDF files are smaller than their source files and download a\npage at a time for fast display on the Web.",
      'content_length': 1073,
      'content_type': 'application/pdf',
      'date': '2000-06-28T23:21:08Z',
      'language': 'en',
      'title': 'This is a test PDF file'}},
    '_type': 'my_type'}],
  'max_score': 0.45930308,
  'total': 1},
 'timed_out': False,
 'took': 75}

Of course Elasticsearch allows much more complex queries. But that's something for another time.

One interesting thing is that by printing the content, we can see that even the layout is quite acurate! Much better than the pdftotext output:

In [16]:
print(doc['_source']['attachment']['content'])
Adobe Acrobat PDF Files

Adobe® Portable Document Format (PDF) is a universal file format that preserves all
of the fonts, formatting, colours and graphics of any source document, regardless of
the application and platform used to create it.

Adobe PDF is an ideal format for electronic document distribution as it overcomes the
problems commonly encountered with electronic file sharing.

•  Anyone, anywhere can open a PDF file. All you need is the free Adobe Acrobat
Reader. Recipients of other file formats sometimes can't open files because they
don't have the applications used to create the documents.

•  PDF files always print correctly on any printing device.

•  PDF files always display exactly as created, regardless of fonts, software, and
operating systems. Fonts, and graphics are not lost due to platform, software, and
version incompatibilities.

•  The free Acrobat Reader is easy to download and can be freely distributed by
anyone.

•  Compact PDF files are smaller than their source files and download a
page at a time for fast display on the Web.

The ingest-attachment plugin uses the Apache text extraction library Tika. It's really powerful. It detects and extracts metadata and text from many file types.

Sending the file directly to Elasticsearch is nice, but in my use case, I'd like to process the file (change its title, move it to a specific location...) based on its content. I could of course update the document in ES after processing it.

It might be better in some case to decorelate the parsing and processing from the indexing. So let's check how to use Tika from Python.

Apache Tika

Tika-Python makes Apache Tika available as a Python library. It can even starts a Tika REST server in the background, but this requires Java 7+ to be installed. I prefer to run the server myself using the prebuilt docker image: docker-tikaserver. Like that I have control of what is running.

$ docker run --rm -p 9998:9998 logicalspark/docker-tikaserver

We can then set Tika-Python to use Client mode only:

In [17]:
import tika
tika.TikaClientOnly = True
from tika import parser
In [18]:
parsed = parser.from_file('/tmp/pdf-sample.pdf', 'http://localhost:9998/tika')
2016-11-16 22:57:14,233 [MainThread  ] [INFO ]  Starting new HTTP connection (1): localhost
In [19]:
parsed
Out[19]:
{'content': "\n\n\n\n\n\n\n\n\n\n\n\n\n\n\n\n\n\n\n\n\n\n\n\n\n\n\n\n\n\n\n\n\n\n\n\n\n\n\n\n\n\nThis is a test PDF file\n\n\nAdobe Acrobat PDF Files\n\nAdobe® Portable Document Format (PDF) is a universal file format that preserves all\nof the fonts, formatting, colours and graphics of any source document, regardless of\nthe application and platform used to create it.\n\nAdobe PDF is an ideal format for electronic document distribution as it overcomes the\nproblems commonly encountered with electronic file sharing.\n\n•  Anyone, anywhere can open a PDF file. All you need is the free Adobe Acrobat\nReader. Recipients of other file formats sometimes can't open files because they\ndon't have the applications used to create the documents.\n\n•  PDF files always print correctly on any printing device.\n\n•  PDF files always display exactly as created, regardless of fonts, software, and\noperating systems. Fonts, and graphics are not lost due to platform, software, and\nversion incompatibilities.\n\n•  The free Acrobat Reader is easy to download and can be freely distributed by\nanyone.\n\n•  Compact PDF files are smaller than their source files and download a\npage at a time for fast display on the Web.\n\n\n",
 'metadata': {'Author': 'cdaily',
  'Content-Type': 'application/pdf',
  'Creation-Date': '2000-06-28T23:21:08Z',
  'Last-Modified': '2013-10-28T19:24:13Z',
  'Last-Save-Date': '2013-10-28T19:24:13Z',
  'X-Parsed-By': ['org.apache.tika.parser.DefaultParser',
   'org.apache.tika.parser.pdf.PDFParser'],
  'X-TIKA:parse_time_millis': '62',
  'access_permission:assemble_document': 'true',
  'access_permission:can_modify': 'true',
  'access_permission:can_print': 'true',
  'access_permission:can_print_degraded': 'true',
  'access_permission:extract_content': 'true',
  'access_permission:extract_for_accessibility': 'true',
  'access_permission:fill_in_form': 'true',
  'access_permission:modify_annotations': 'true',
  'created': 'Wed Jun 28 23:21:08 UTC 2000',
  'creator': 'cdaily',
  'date': '2013-10-28T19:24:13Z',
  'dc:creator': 'cdaily',
  'dc:format': 'application/pdf; version=1.3',
  'dc:title': 'This is a test PDF file',
  'dcterms:created': '2000-06-28T23:21:08Z',
  'dcterms:modified': '2013-10-28T19:24:13Z',
  'meta:author': 'cdaily',
  'meta:creation-date': '2000-06-28T23:21:08Z',
  'meta:save-date': '2013-10-28T19:24:13Z',
  'modified': '2013-10-28T19:24:13Z',
  'pdf:PDFVersion': '1.3',
  'pdf:docinfo:created': '2000-06-28T23:21:08Z',
  'pdf:docinfo:creator': 'cdaily',
  'pdf:docinfo:creator_tool': 'Microsoft Word 8.0',
  'pdf:docinfo:modified': '2013-10-28T19:24:13Z',
  'pdf:docinfo:producer': 'Acrobat Distiller 4.0 for Windows',
  'pdf:docinfo:title': 'This is a test PDF file',
  'pdf:encrypted': 'false',
  'producer': 'Acrobat Distiller 4.0 for Windows',
  'resourceName': 'pdf-sample.pdf',
  'title': 'This is a test PDF file',
  'xmp:CreatorTool': 'Microsoft Word 8.0',
  'xmpMM:DocumentID': 'uuid:0805e221-80a8-459e-a522-635ed5c1e2e6',
  'xmpTPg:NPages': '1'}}
In [20]:
print(parsed['content'].strip())
This is a test PDF file


Adobe Acrobat PDF Files

Adobe® Portable Document Format (PDF) is a universal file format that preserves all
of the fonts, formatting, colours and graphics of any source document, regardless of
the application and platform used to create it.

Adobe PDF is an ideal format for electronic document distribution as it overcomes the
problems commonly encountered with electronic file sharing.

•  Anyone, anywhere can open a PDF file. All you need is the free Adobe Acrobat
Reader. Recipients of other file formats sometimes can't open files because they
don't have the applications used to create the documents.

•  PDF files always print correctly on any printing device.

•  PDF files always display exactly as created, regardless of fonts, software, and
operating systems. Fonts, and graphics are not lost due to platform, software, and
version incompatibilities.

•  The free Acrobat Reader is easy to download and can be freely distributed by
anyone.

•  Compact PDF files are smaller than their source files and download a
page at a time for fast display on the Web.

Not sure why we get the title of the PDF inside the content. Anyway the text is extracted properly and we even get a lot of metadata:

In [21]:
parsed['metadata']
Out[21]:
{'Author': 'cdaily',
 'Content-Type': 'application/pdf',
 'Creation-Date': '2000-06-28T23:21:08Z',
 'Last-Modified': '2013-10-28T19:24:13Z',
 'Last-Save-Date': '2013-10-28T19:24:13Z',
 'X-Parsed-By': ['org.apache.tika.parser.DefaultParser',
  'org.apache.tika.parser.pdf.PDFParser'],
 'X-TIKA:parse_time_millis': '62',
 'access_permission:assemble_document': 'true',
 'access_permission:can_modify': 'true',
 'access_permission:can_print': 'true',
 'access_permission:can_print_degraded': 'true',
 'access_permission:extract_content': 'true',
 'access_permission:extract_for_accessibility': 'true',
 'access_permission:fill_in_form': 'true',
 'access_permission:modify_annotations': 'true',
 'created': 'Wed Jun 28 23:21:08 UTC 2000',
 'creator': 'cdaily',
 'date': '2013-10-28T19:24:13Z',
 'dc:creator': 'cdaily',
 'dc:format': 'application/pdf; version=1.3',
 'dc:title': 'This is a test PDF file',
 'dcterms:created': '2000-06-28T23:21:08Z',
 'dcterms:modified': '2013-10-28T19:24:13Z',
 'meta:author': 'cdaily',
 'meta:creation-date': '2000-06-28T23:21:08Z',
 'meta:save-date': '2013-10-28T19:24:13Z',
 'modified': '2013-10-28T19:24:13Z',
 'pdf:PDFVersion': '1.3',
 'pdf:docinfo:created': '2000-06-28T23:21:08Z',
 'pdf:docinfo:creator': 'cdaily',
 'pdf:docinfo:creator_tool': 'Microsoft Word 8.0',
 'pdf:docinfo:modified': '2013-10-28T19:24:13Z',
 'pdf:docinfo:producer': 'Acrobat Distiller 4.0 for Windows',
 'pdf:docinfo:title': 'This is a test PDF file',
 'pdf:encrypted': 'false',
 'producer': 'Acrobat Distiller 4.0 for Windows',
 'resourceName': 'pdf-sample.pdf',
 'title': 'This is a test PDF file',
 'xmp:CreatorTool': 'Microsoft Word 8.0',
 'xmpMM:DocumentID': 'uuid:0805e221-80a8-459e-a522-635ed5c1e2e6',
 'xmpTPg:NPages': '1'}

Conclusion

We saw different methods to extract text from PDF in Python. Depending on what you want to do, one might suit you better. And this was of course not exhaustive.

If you want to index PDFs, Elasticsearch might be all you need. The ingest-attachment plugin uses Apache Tika which is very powerful.

And thanks to Tika-Python, it's very easy to use Tika directly from Python. You can let the library starts the server or use Docker to start your own.

GitLab Container Registry and proxy

GitLab on Synology

I installed GitLab CE on a Synology RackStation RS815+ at work. It has an Intel Atom C2538 that allows to run Docker on the NAS.

Official GitLab Community Edition docker images are available on Docker Hub. The documentation to use the image is quite clear and can be found here.

The ports 80 and 443 are already used by nginx that comes with DSM. I wanted to access GitLab using HTTPS, so I disabled port 443 in nginx configuration. To do that I had to modify the template /usr/syno/share/nginx/WWWService.mustache and reboot the NAS:

--- WWWService.mustache.org 2016-08-16 23:25:06.000000000 +0100
+++ WWWService.mustache 2016-09-19 13:53:45.256735700 +0100
@@ -1,8 +1,6 @@
 server {
     listen 80 default_server{{#reuseport}} reuseport{{/reuseport}};
     listen [::]:80 default_server{{#reuseport}} reuseport{{/reuseport}};
-    listen 443 default_server ssl{{#reuseport}} reuseport{{/reuseport}};
-    listen [::]:443 default_server ssl{{#reuseport}} reuseport{{/reuseport}};

     server_name _;

The port 22 is also already used by the ssh daemon so I decided to use the port 2222. I created the directory /volume1/docker/gitlab to store all GitLab data. Here are the required variables in the /volume1/docker/gitlab/config/gitlab.rb config file:

external_url "https://mygitlab.example.com"

## GitLab Shell settings for GitLab
gitlab_rails['gitlab_shell_ssh_port'] = 2222

nginx['enable'] = true
nginx['redirect_http_to_https'] = true

And this is how I run the image:

docker run --detach \
    --hostname mygitlab.example.com \
    --publish 443:443 --publish 8080:80 --publish 2222:22 \
    --name gitlab \
    --restart always \
    --volume /volume1/docker/gitlab/config:/etc/gitlab \
    --volume /volume1/docker/gitlab/logs:/var/log/gitlab \
    --volume /volume1/docker/gitlab/data:/var/opt/gitlab \
    gitlab/gitlab-ce:latest

This has been working fine. Since I heard about GitLab Container Registry, I've been wanted to give it a try.

GitLab Container Registry

To enable it, I just added to my gitlab.rb file the registry url:

registry_external_url 'https://mygitlab.example.com:4567'

I use the existing GitLab domain and use the port 4567 for the registry. The TLS certificate and key are in the default path, so no need to specify them.

So let's restart GitLab. Don't forget to publish the new port 4567!

$ docker stop gitlab
$ docker rm gitlab
$ docker run --detach \
    --hostname mygitlab.example.com \
    --publish 443:443 --publish 8080:80 --publish 2222:22 \
    --publish 4567:4567 \
    --name gitlab \
    --restart always \
    --volume /volume1/docker/gitlab/config:/etc/gitlab \
    --volume /volume1/docker/gitlab/logs:/var/log/gitlab \
    --volume /volume1/docker/gitlab/data:/var/opt/gitlab \
    gitlab/gitlab-ce:latest

Easy! Let's test our new docker registry!

$ docker login mygitlab.example.com:4567
Username: user
Password:
Error response from daemon: Get https://mygitlab.example.com:4567/v1/users/: Service Unavailable

Hmm... Not super useful error... I thought about publishing port 4567 in docker, so what is happening? After looking through the logs, I found /volume1/docker/gitlab/logs/nginx/gitlab_registry_access.logi. It's empty... Let's try curl:

$ curl https://mygitlab.example.com:4567/v1/users/

curl: (60) Peer certificate cannot be authenticated with known CA certificates
More details here: http://curl.haxx.se/docs/sslcerts.html

curl performs SSL certificate verification by default, using a "bundle"
 of Certificate Authority (CA) public keys (CA certs). If the default
 bundle file isn't adequate, you can specify an alternate file
 using the --cacert option.
If this HTTPS server uses a certificate signed by a CA represented in
 the bundle, the certificate verification probably failed due to a
 problem with the certificate (it might be expired, or the name might
 not match the domain name in the URL).
If you'd like to turn off curl's verification of the certificate, use
 the -k (or --insecure) option.

OK, I have a self-signed certificate. So let's try with --insecure:

$ curl --insecure https://mygitlab.example.com:4567/v1/users/
404 page not found

At least I get an entry in my log file:

$ cd /volume1/docker/gitlab
$ cat logs/nginx/gitlab_registry_access.log
xxx.xx.x.x - - [21/Sep/2016:14:24:57 +0000] "GET /v1/users/ HTTP/1.1" 404 19 "-" "curl/7.43.0"

So, docker and nginx seem to be configured properly... It looks like docker login is not even trying to access my host...

Let's try with a dummy host:

$ docker login foo
Username: user
Password:
Error response from daemon: Get https://mygitlab.example.com:4567/v1/users/: Service Unavailable

Same error! Why is that? I can ping mygitlab.example.com and even access nginx on port 4567 (using curl) inside the docker container... My machine is on the same network. It can't be a proxy problem. Wait. Proxy?

That's when I remembered I had configured my docker daemon to use a proxy to access the internet! I created the file /etc/systemd/system/docker.service.d/http-proxy.conf with:

[Service]
Environment="HTTP_PROXY=http://proxy.example.com:8080/"

Reading the docker documentation, it's very clear: If you have internal Docker registries that you need to contact without proxying you can specify them via the NO_PROXY environment variable

Let's add the NO_PROXY variable:

[Service]
Environment="HTTP_PROXY=http://proxy.example.com:8080/" "NO_PROXY=localhost,127.0.0.1,mygitlab.example.com"

Flush the changes and restart the docker daemon:

$ sudo systemctl daemon-reload
$ sudo systemctl restart docker

Now let's try to login again:

$ docker login mygitlab.example.com:4567
Username: user
Password:
Error response from daemon: Get https://mygitlab.example.com:4567/v1/users/: x509: certificate signed by unknown authority

This error is easy to fix (after googling). I have to add the self-signed certificate at the OS level. On my Ubuntu machine:

$ sudo cp mygitlab.example.com.crt /usr/local/share/ca-certificates/
$ sudo update-ca-certificates
$ sudo systemctl restart docker

$ docker login mygitlab.example.com:4567
Username: user
Password:
Login Succeeded

Yes! :-)

I can now push docker images to my GitLab Container Registry!

Conclusion

Setting GitLab Container Registry should have been easy but my proxy settings made me lost quite some time... The proxy environment variables (HTTP_PROXY, NO_PROXY...) are not taken into account by the docker commands. The docker daemon has to be configured specifically. Something to remember!

Note that this was with docker 1.11.2. When trying the same command on my Mac with docker 1.12.1, I got a nicer error message:

$ docker --version
Docker version 1.12.1, build 6f9534c
$ docker login foo
Username: user
Password:
Error response from daemon: Get https://foo/v1/users/: dial tcp: lookup foo on xxx.xxx.xx.x:53: no such host

Running background tasks with Flask and RQ

I wrote several webapps but it took me a while to understand how to run a long task and get the result back (without blocking the server). Of course, you should use a task queue like Celery or RQ. It's easy to find examples how to send a task to a queue and... forget about it. But how do you get the result?

I found a great blog post from Miguel Grinberg: Using Celery With Flask. It explains how to use ajax to poll the server for status updates. And I finally got it! As Miguel's post already detailed Celery, I wanted to investigate RQ (Redis Queue), a simple library to queue job.

As a side note, Miguel's blog is really great. I learned Flask following the The Flask Mega-Tutorial. If you are starting with Flask, I highly recommend it, as well as the Flask book.

We'll make a simple app with a form to run some actions.

First version: send a post to the server and wait for the response

Let's start with some boilerplate code. This is gonna be a very simple example, but I'll organize it like I use to for a real application using Blueprints, an application factory and some extensions (Flask-Bootstrap, Flask-Script and Flask-WTF):

├── Dockerfile
├── LICENSE
├── README.rst
├── app
│   ├── __init__.py
│   ├── extensions.py
│   ├── factory.py
│   ├── main
│   │   ├── __init__.py
│   │   ├── forms.py
│   │   └── views.py
│   ├── settings.py
│   ├── static
│   │   └── css
│   │       └── main.css
│   ├── tasks.py
│   └── templates
│       ├── base.html
│       └── index.html
├── docker-compose.yml
├── environment.yml
├── manage.py
└── uwsgi.py

I define all the used extensions in app/extensions.py, my application factory in app/factory.py and my default settings in app/settings.py. Nothing strange in there. You can refer to the GitHub repository.

Here is our main app/main/views.py:

from flask import Blueprint, render_template, url_for, flash, redirect
from .. import tasks
from .forms import TaskForm

bp = Blueprint('main', __name__)


@bp.route('/', methods=['GET', 'POST'])
def index():
    form = TaskForm()
    if form.validate_on_submit():
        task = form.task.data
        try:
            result = tasks.run(task)
        except Exception as e:
            flash('Task failed: {}'.format(e), 'danger')
        else:
            flash(result, 'success')
        return redirect(url_for('main.index'))
    return render_template('index.html', form=form)

As said previously, we create a form. On submit, we run the task and send the response back.

The form is defined in app/main/forms.py:

from flask import current_app
from flask_wtf import Form
from wtforms import SelectField


class TaskForm(Form):
    task = SelectField('Task')

    def __init__(self, *args, **kwargs):
        super().__init__(*args, **kwargs)
        self.task.choices = [(task, task) for task in current_app.config['TASKS']]

In app/tasks.py, we have our run function to start a dummy task:

import random
import time
from flask import current_app


def run(task):
    if 'error' in task:
        time.sleep(0.5)
        1 / 0
    if task.startswith('Short'):
        seconds = 1
    else:
        seconds = random.randint(1, current_app.config['MAX_TIME_TO_WAIT'])
    time.sleep(seconds)
    return '{} performed in {} second(s)'.format(task, seconds)

In app/templates/base.html, we define a fixed to top navbar and a container to show flash messages and our main code. Note that we take advantage of Flask-Bootstrap.

{%- extends "bootstrap/base.html" %}
{% import "bootstrap/utils.html" as utils %}

{% block head %}
  <meta charset="utf-8">
  <meta http-equiv="X-UA-Compatible" content="IE=edge">
  {{super()}}
{% endblock %}

{% block styles %}
  {{super()}}
  <link href="{{ url_for('static', filename='css/main.css') }}" rel="stylesheet">
{% endblock %}

{% block title %}My App{% endblock %}

{% block navbar %}
  <!-- Fixed navbar -->
  <div class="navbar navbar-default navbar-fixed-top" role="navigation">
    <div class="container">
      <div class="navbar-header">
        <button type="button" class="navbar-toggle" data-toggle="collapse" data-target=".navbar-collapse">
          <span class="sr-only">Toggle navigation</span>
          <span class="icon-bar"></span>
          <span class="icon-bar"></span>
          <span class="icon-bar"></span>
        </button>
        <!--img class="navbar-brand" src="../../static/logo.png"-->
        <a class="navbar-brand" href="{{ url_for('main.index') }}">My App</a>
      </div>
    </div>
  </div>
{% endblock %}

{% block content %}
  <div class="container" id="mainContent">
    {{utils.flashed_messages(container=False, dismissible=True)}}
    {% block main %}{% endblock %}
  </div>
{% endblock %}

The html code for our view is in app/templates/index.html:

{%- extends "base.html" %}
{% import "bootstrap/wtf.html" as wtf %}

{% block main %}
      <div class="panel panel-default">
        <!-- Default panel contents -->
        <div class="panel-heading">Select task to run</div>
        <div class="panel-body">
          <div class="col-md-3">
            <form class="form" id="taskForm" method="POST">
              {{ form.hidden_tag() }}
              {{ wtf.form_field(form.task) }}
              <div class="form-group">
                <button type="submit" class="btn btn-default" id="submit">Run</button>
              </div>
            </form>
          </div>
        </div>
      </div>
{% endblock %}

Let's run this first example. We could just create a virtual environment using virtualenv or conda. As we'll soon need Redis, let's directly go for Docker:

$ git clone https://github.com/beenje/flask-rq-example.git
$ cd flask-rq-example
$ git checkout faa61009dbe3bafe49aae473f0fa19ab05a3ab90
$ docker-compose build
$ docker-compose up

Go to http://localhost:5000. You should see the following window:

/images/flask-rq-example.png

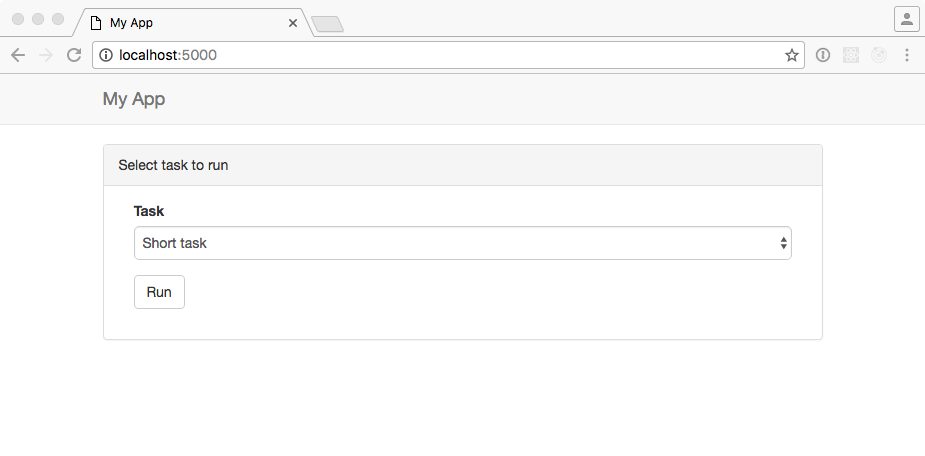
Choose a task and press run. See how The UI is stuck while waiting for the server? Not very nice... Let' improve that a little by using some JavaScript.

Second version: use Ajax to submit the form

Let's write some javascript. Here is the app/static/js/main.js:

$(document).ready(function() {

  // flash an alert
  // remove previous alerts by default
  // set clean to false to keep old alerts
  function flash_alert(message, category, clean) {
    if (typeof(clean) === "undefined") clean = true;
    if(clean) {
      remove_alerts();
    }
    var htmlString = '<div class="alert alert-' + category + ' alert-dismissible" role="alert">'
    htmlString += '<button type="button" class="close" data-dismiss="alert" aria-label="Close">'
    htmlString += '<span aria-hidden="true">&times;</span></button>' + message + '</div>'
    $(htmlString).prependTo("#mainContent").hide().slideDown();
  }

  function remove_alerts() {
    $(".alert").slideUp("normal", function() {
      $(this).remove();
    });
  }

  // submit form
  $("#submit").on('click', function() {
    flash_alert("Running " + $("#task").val() + "...", "info");
    $.ajax({
      url: $SCRIPT_ROOT + "/_run_task",
      data: $("#taskForm").serialize(),
      method: "POST",
      dataType: "json",
      success: function(data) {
        flash_alert(data.result, "success");
      },
      error: function(jqXHR, textStatus, errorThrown) {
        flash_alert(JSON.parse(jqXHR.responseText).message, "danger");
      }
    });
  });

});

To include this file in our html, we add the following block to app/templates/base.html:

{% block scripts %}
  {{super()}}
  <script type=text/javascript>
    $SCRIPT_ROOT = {{ request.script_root|tojson|safe }};
  </script>
  {% block app_scripts %}{% endblock %}
{% endblock %}

And here is a diff for our app/templates/index.html:

               {{ form.hidden_tag() }}
               {{ wtf.form_field(form.task) }}
               <div class="form-group">
-                <button type="submit" class="btn btn-default" id="submit">Run</button>
+                <button type="button" class="btn btn-default" id="submit">Run</button>
               </div>
             </form>
           </div>
         </div>
       </div>
 {% endblock %}
+
+{% block app_scripts %}
+  <script src="{{ url_for('static', filename='js/main.js') }}"></script>
+{% endblock %}

We change the button type from submit to button so that it doesn't send a POST when clicked. We send an Ajax query to $SCRIPT_ROOT/_run_task instead.

This is our new app/main/views.py:

from flask import Blueprint, render_template, request, jsonify
from .. import tasks
from .forms import TaskForm

bp = Blueprint('main', __name__)


@bp.route('/_run_task', methods=['POST'])
def run_task():
    task = request.form.get('task')
    try:
        result = tasks.run(task)
    except Exception as e:
        return jsonify({'message': 'Task failed: {}'.format(e)}), 500
    return jsonify({'result': result})


@bp.route('/')
def index():
    form = TaskForm()
    return render_template('index.html', form=form)

Let's run this new example:

$ git checkout c1ccfe8b3a39079ab80f813b5733b324c8b65c6f
$ docker rm flaskrqexample_web
$ docker-compose up

This time we immediately get some feedback when clicking on Run. There is no reload. That's better, but the server is still busy during the processing. If you try to open a new page, you won't get any answer until the task is done...

To avoid blocking the server, we'll use a task queue.

Third version: setup RQ

As its name indicates, RQ (Redis Queue) is backed by Redis. It is designed to have a low barrier entry. What do we need to integrate RQ in our Flask web app?

Let's first add some variables in app/settings.py:

# The Redis database to use
REDIS_URL = 'redis://redis:6379/0'
# The queues to listen on
QUEUES = ['default']

To execute a background job, we need a worker. RQ comes with the rq worker command to start a worker. To integrate it better with our Flask app, we are going to write a simple Flask-Script command. We add the following to our manage.py:

from rq import Connection, Worker

@manager.command
def runworker():
    redis_url = app.config['REDIS_URL']
    redis_connection = redis.from_url(redis_url)
    with Connection(redis_connection):
        worker = Worker(app.config['QUEUES'])
        worker.work()

The Manager runs the command inside a Flask test context, meaning we can access the app config from within the worker. This is nice because both our web application and workers (and thus the jobs run on the worker) have access to the same configuration variables. No separate config file. No discrepancy. Everything is in app/settings.py and can be overwritten by LOCAL_SETTINGS.

To put a job in a Queue, you just create a RQ Queue and enqueue it. One way to do that is to pass the connection when creating the Queue. This is a bit tedious. RQ has the notion of connection context. We take advantage of that and register a function to push the connection and pop it before and after a request (app/main/views.py):

import redis
from flask import Blueprint, render_template, request, jsonify, current_app, g
from rq import push_connection, pop_connection, Queue


def get_redis_connection():
    redis_connection = getattr(g, '_redis_connection', None)
    if redis_connection is None:
        redis_url = current_app.config['REDIS_URL']
        redis_connection = g._redis_connection = redis.from_url(redis_url)
    return redis_connection


@bp.before_request
def push_rq_connection():
    push_connection(get_redis_connection())


@bp.teardown_request
def pop_rq_connection(exception=None):
    pop_connection()

This makes it easy to create a Queue in a request or application context.

The get_redis_connection function gets the Redis connection and stores it in the flask.g object. This is the same as what is explained for SQLite here.

With that in place, it's easy to enqueue a job. Here are the changes to the run_task function:

 @bp.route('/_run_task', methods=['POST'])
 def run_task():
     task = request.form.get('task')
-    try:
-        result = tasks.run(task)
-    except Exception as e:
-        return jsonify({'message': 'Task failed: {}'.format(e)}), 500
-    return jsonify({'result': result})
+    q = Queue()
+    job = q.enqueue(tasks.run, task)
+    return jsonify({'job_id': job.get_id()})

We enqeue our task and just return the job id for now.

Docker and docker-compose are now gonna come in handy to start eveything (Redis, our web app and a worker). We just have to add the following to our docker-compose.yml file:

 - "5000:5000"
 volumes:
 - .:/app
+    depends_on:
+    - redis
+  worker:
+    image: flaskrqexample
+    container_name: flaskrqexample_worker
+    environment:
+      LOCAL_SETTINGS: /app/settings.cfg
+    command: python manage.py runworker
+    volumes:
+    - .:/app
+    depends_on:
+    - redis
+  redis:
+    image: redis:3.2

Don't forget to add redis and rq to your environment.yml file!

   - dominate==2.2.1
   - flask-bootstrap==3.3.6.0
   - flask-script==2.0.5
+  - redis==2.10.5
+  - rq==0.6.0
   - visitor==0.1.3

Rebuild the docker image and start the app:

$ git checkout 437e710df3df0dd4b153f20027f5f00270b2e1a3
$ docker rm flaskrqexample_web
$ docker-compose build
$ docker-compose up

OK, nice, we started a job in the background! This is fine to run a task and forget about it (like sending an e-mail). But how do we get the result back?

Fourth version: poll job status and get the result

This is the part I have been missing for some time. But, as often, it's not difficult when you have seen it. When launching the job, we return an url to check the status of the job. The trick is to periodically call back the same function until the job is finished or failed.

On the server side, the job_status endpoint uses the job_id to retrieve the job and to get its status and result.

@bp.route('/status/<job_id>')
def job_status(job_id):
    q = Queue()
    job = q.fetch_job(job_id)
    if job is None:
        response = {'status': 'unknown'}
    else:
        response = {
            'status': job.get_status(),
            'result': job.result,
        }
        if job.is_failed:
            response['message'] = job.exc_info.strip().split('\n')[-1]
    return jsonify(response)


@bp.route('/_run_task', methods=['POST'])
def run_task():
    task = request.form.get('task')
    q = Queue()
    job = q.enqueue(tasks.run, task)
    return jsonify({}), 202, {'Location': url_for('main.job_status', job_id=job.get_id())}

The run_task function returns an empty response with the 202 status code. We use the Location response-header field to pass the job_status URL to the client.

On the client side, we retrieve the URL from the header and call the new check_job_status function.

@@ -28,8 +53,11 @@ $(document).ready(function() {
       data: $("#taskForm").serialize(),
       method: "POST",
       dataType: "json",
-      success: function(data) {
-        flash_alert("Job " + data.job_id + " started...", "info", false);
+      success: function(data, status, request) {
+        $("#submit").attr("disabled", "disabled");
+        flash_alert("Running " + task + "...", "info");
+        var status_url = request.getResponseHeader('Location');
+        check_job_status(status_url);
       },
       error: function(jqXHR, textStatus, errorThrown) {
         flash_alert("Failed to start " + task, "danger");

We use setTimeout to call back the same function until the job is done (finished or failed).

function check_job_status(status_url) {
  $.getJSON(status_url, function(data) {
    console.log(data);
    switch (data.status) {
      case "unknown":
          flash_alert("Unknown job id", "danger");
          $("#submit").removeAttr("disabled");
          break;
      case "finished":
          flash_alert(data.result, "success");
          $("#submit").removeAttr("disabled");
          break;
      case "failed":
          flash_alert("Job failed: " + data.message, "danger");
          $("#submit").removeAttr("disabled");
          break;
      default:
        // queued/started/deferred
        setTimeout(function() {
          check_job_status(status_url);
        }, 500);
    }
  });
}

Let's checkout this commit and run our app again:

$ git checkout da8360aefb222afc17417a518ac25029566071d6
$ docker rm flaskrqexample_web
$ docker rm flaskrqexample_worker
$ docker-compose up

Try submitting some tasks. This time you can open another window and the server will answer even when a task is running :-) You can open a console in your browser to see the polling and the response from the job_status function. Note that we only have one worker, so if you start a second task, it will be enqueued and run only when the first one is done.

Conclusion

Using RQ with Flask isn't that difficult. So no need to block the server to get the result of a long task. There are a few more things to say, but this post starts to be a bit long, so I'll keep that for another time.

Thanks again to Miguel Grinberg and all his posts about Flask!

Installing OpenVPN on a Raspberry Pi with Ansible

I have to confess that I initially decided to install a VPN, not to secure my connection when using a free Wireless Acces Point in an airport or hotel, but to watch Netflix :-)

I had a VPS in France where I installed sniproxy to access Netflix. Not that I find the french catalogue so great, but as a French guy living in Sweden, it was a good way for my kids to watch some french programs. But Netflix started to block VPS providers...

I have a brother in France who has a Fiber Optic Internet access. That was a good opportunity to setup a private VPN and I bought him a Raspberry Pi.

There are many resources on the web about OpenVPN. A paper worth mentioning is: SOHO Remote Access VPN. Easy as Pie, Raspberry Pi... It's from end of 2013 and describes Esay-RSA 2.0 (that used to be installed with OpenVPN), but it's still an interesting read.

Anyway, most resources describe all the commands to run. I don't really like installing softwares by running a bunch of commands. Propably due to my professional experience, I like things to be reproducible. That's why I love to automate things. I wrote a lot of shell scripts over the years. About two years ago, I discovered Ansible and it quickly became my favorite tool to deploy software.

So let's write a small Ansible playbook to install OpenVPN on a Raspberry Pi.

First the firewall configuration. I like to use ufw which is quite easy to setup:

- name: install dependencies
  apt: name=ufw state=present update_cache=yes cache_valid_time=3600

- name: update ufw default forward policy
  lineinfile: dest=/etc/default/ufw regexp=^DEFAULT_FORWARD_POLICY line=DEFAULT_FORWARD_POLICY="ACCEPT"
  notify: reload ufw

- name: enable ufw ip forward
  lineinfile: dest=/etc/ufw/sysctl.conf regexp=^net/ipv4/ip_forward line=net/ipv4/ip_forward=1
  notify: reload ufw

- name: add NAT rules to ufw
  blockinfile:
    dest: /etc/ufw/before.rules
    insertbefore: BOF
    block: |
      # Nat table
      *nat
      :POSTROUTING ACCEPT [0:0]

      # Nat rules
      -F
      -A POSTROUTING -s 10.8.0.0/24 -o eth0 -j SNAT --to-source {{ansible_eth0.ipv4.address}}

      # don't delete the 'COMMIT' line or these nat rules won't be processed
      COMMIT
  notify: reload ufw

- name: allow ssh
  ufw: rule=limit port=ssh proto=tcp

- name: allow openvpn
  ufw: rule=allow port={{openvpn_port}} proto={{openvpn_protocol}}

- name: enable ufw
  ufw: logging=on state=enabled

This enables IP forwarding, adds the required NAT rules and allows ssh and openvpn.

The rest of the playbook installs OpenVPN and generates all the keys automatically, except the Diffie-Hellman one that should be generated locally. This is just because it takes for ever on the Pi :-)

- name: install openvpn
  apt: name=openvpn state=present

- name: create /etc/openvpn
  file: path=/etc/openvpn state=directory mode=0755 owner=root group=root

- name: create /etc/openvpn/keys
  file: path=/etc/openvpn/keys state=directory mode=0700 owner=root group=root

- name: create clientside and serverside directories
  file: path="{{item}}" state=directory mode=0755
  with_items:
      - "{{clientside}}/keys"
      - "{{serverside}}"
  become: true
  become_user: "{{user}}"

- name: create openvpn base client.conf
  template: src=client.conf.j2 dest={{clientside}}/client.conf owner=root group=root mode=0644

- name: download EasyRSA
  get_url: url={{easyrsa_url}} dest=/home/{{user}}/openvpn
  become: true
  become_user: "{{user}}"

- name: create scripts
  template: src={{item}}.j2 dest=/home/{{user}}/openvpn/{{item}} owner=root group=root mode=0755
  with_items:
    - create_serverside
    - create_clientside
  tags: client

- name: run serverside script
  command: ./create_serverside
  args:
    chdir: /home/{{user}}/openvpn
    creates: "{{easyrsa_server}}/ta.key"
  become: true
  become_user: "{{user}}"

- name: run clientside script
  command: ./create_clientside {{item}}
  args:
    chdir: /home/{{user}}/openvpn
    creates: "{{clientside}}/files/{{item}}.ovpn"
  become: true
  become_user: "{{user}}"
  with_items: "{{openvpn_clients}}"
  tags: client

- name: install all server keys
  command: install -o root -g root -m 600 {{item.name}} /etc/openvpn/keys/
  args:
    chdir: "{{item.path}}"
    creates: /etc/openvpn/keys/{{item.name}}
  with_items:
    - { name: 'ca.crt', path: "{{easyrsa_server}}/pki" }
    - { name: '{{ansible_hostname}}.crt', path: "{{easyrsa_server}}/pki/issued" }
    - { name: '{{ansible_hostname}}.key', path: "{{easyrsa_server}}/pki/private" }
    - { name: 'ta.key', path: "{{easyrsa_server}}" }

- name: copy Diffie-Hellman key
  copy: src="{{openvpn_dh}}" dest=/etc/openvpn/keys/dh.pem owner=root group=root mode=0600

- name: create openvpn server.conf
  template: src=server.conf.j2 dest=/etc/openvpn/server.conf owner=root group=root mode=0644
  notify: restart openvpn

- name: start openvpn
  service: name=openvpn state=started

The create_clientside script generates all the required client keys and creates an ovpn file that includes them. It makes it very easy to install on any device: just one file to drop.

One thing I stumbled upon is the ns-cert-type server option that I initially used in the server configuration. This prevented the client to connect. As explained here, this option is a deprecated "Netscape" cert attribute. It's not enabled by default with Easy-RSA 3.

Fortunately, the mentioned howto and the Easy-RSA github page are good references for Easy-RSA 3.

One important thing to note is that I create all the keys with no password. That's obviously not the most secure and recommended way. Anyone accessing the CA could sign new requests. But it can be stored offline on an USB stick. I actually think that for my use case it's not even worth keeping the CA. Sure it means I can't easily add a new client or revoke a certificate. But with the playbook, it's super easy to throw all the keys and regenerate everything. That forces to replace all clients configuration but with 2 or 3 clients, this is not a problem.

For sure don't leave all the generated keys on the Pi! After copying the clients ovpn files, remove the /home/pi/openvpn directory (save it somewhere safe if you want to add new clients or revoke a certificate without regenerating everything).

The full playbook can be found on github. The README includes some quick instructions.

I now have a private VPN in France and one at home that I can use to securely access my NAS from anywhere!

uWSGI, send_file and Python 3.5

I have a Flask app that returns an in-memory bytes buffer (io.Bytesio) using Flask send_file function.

The app is deployed using uWSGI behind Nginx. This was working fine with Python 3.4.

When I updated Python to 3.5, I got the following exception when trying to download a file:

io.UnsupportedOperation: fileno

During handling of the above exception, another exception occurred:

Traceback (most recent call last):
  File "/webapps/bowser/miniconda3/envs/bowser/lib/python3.5/site-packages/flask/app.py", line 1817, in wsgi_app
    response = self.full_dispatch_request()
  File "/webapps/bowser/miniconda3/envs/bowser/lib/python3.5/site-packages/flask/app.py", line 1477, in full_dispatch_request
    rv = self.handle_user_exception(e)
  File "/webapps/bowser/miniconda3/envs/bowser/lib/python3.5/site-packages/flask/app.py", line 1381, in handle_user_exception
    reraise(exc_type, exc_value, tb)
  File "/webapps/bowser/miniconda3/envs/bowser/lib/python3.5/site-packages/flask/_compat.py", line 33, in reraise
    raise value
  File "/webapps/bowser/miniconda3/envs/bowser/lib/python3.5/site-packages/flask/app.py", line 1475, in full_dispatch_request
    rv = self.dispatch_request()
  File "/webapps/bowser/miniconda3/envs/bowser/lib/python3.5/site-packages/flask/app.py", line 1461, in dispatch_request
    return self.view_functions[rule.endpoint](**req.view_args)
  File "/webapps/bowser/miniconda3/envs/bowser/lib/python3.5/site-packages/flask_login.py", line 758, in decorated_view
    return func(*args, **kwargs)
  File "/webapps/bowser/miniconda3/envs/bowser/lib/python3.5/site-packages/flask_security/decorators.py", line 194, in decorated_view
    return fn(*args, **kwargs)
  File "/webapps/bowser/bowser/app/bext/views.py", line 116, in download
    as_attachment=True)
  File "/webapps/bowser/miniconda3/envs/bowser/lib/python3.5/site-packages/flask/helpers.py", line 523, in send_file
    data = wrap_file(request.environ, file)
  File "/webapps/bowser/miniconda3/envs/bowser/lib/python3.5/site-packages/werkzeug/wsgi.py", line 726, in wrap_file
    return environ.get('wsgi.file_wrapper', FileWrapper)(file, buffer_size)
SystemError: <built-in function uwsgi_sendfile> returned a result with an error set

I quickly found the following post with the same exception, but no answer... A little more googling brought me to this github issue: In python3, uwsgi fails to respond a stream from BytesIO object

As described, you should run uwsgi with the --wsgi-disable-file-wrapper flag to avoid this problem. As with all command line options, you can add the following entry in your uwsgi.ini file:

wsgi-disable-file-wrapper = true

Note that uWSGI 2.0.12 is required.

When searching in uWSGI documentation, I only found one match in uWSGI 2.0.12 release notes.

A problem/option that should be better documented. Probably a pull request to open :-)

UPDATE (2016-07-13): pull request merged

GitLab CI and conda

I setup GitLab to host several projects at work and I have been quite pleased with it. I read that setting GitLab CI for test and deployment was easy so I decided to try it to automatically run the test suite and the sphinx documentation.

I found the official documentation to be quite good to setup a runner so I won't go into details here. I chose the Docker executor.

Here is my first .gitlab-ci.yml test:

image: python:3.4

before_script:
  - pip install -r requirements.txt

tests:
  stage: test
  script:
    - python -m unittest discover -v

Success, it works! Nice. But... 8 minutes 33 seconds build time for a test suite that runs in less than 1 second... that's a bit long.

Let's try using some caching to avoid having to download all the pip requirements every time. After googling, I found this post explaining that the cache path must be inside the build directory:

image: python:3.4

before_script:
  - export PIP_CACHE_DIR="pip-cache"
  - pip install -r requirements.txt

cache:
  paths:
    - pip-cache

tests:
  stage: test
  script:
    - python -m unittest discover -v

With the pip cache, the build time went down to about 6 minutes. A bit better, but far from acceptable.

Of course I knew the problem was not the download, but the installation of the pip requirements. I use pandas which explains why it takes a while to compile.

So how do you install pandas easily? With conda of course! There are even some nice docker images created by Continuum Analytics ready to be used.

So let's try again:

image: continuumio/miniconda3:latest

before_script:
  - conda env create -f environment.yml
  - source activate koopa

tests:
  stage: test
  script:
    - python -m unittest discover -v

Build time: 2 minutes 55 seconds. Nice but we need some cache to avoid downloading all the packages everytime. The first problem is that the cache path has to be in the build directory. Conda packages are saved in /opt/conda/pkgs by default. A solution is to replace that directory with a link to a local directory. It works but the problem is that Gitlab makes a compressed archive to save and restore the cache which takes quite some time in this case...

How to get a fast cache? Let's use a docker volume! I modified my /etc/gitlab-runner/config.toml to add two volumes:

[runners.docker]
  tls_verify = false
  image = "continuumio/miniconda3:latest"
  privileged = false
  disable_cache = false
  volumes = ["/cache", "/opt/cache/conda/pkgs:/opt/conda/pkgs:rw", "/opt/cache/pip:/opt/cache/pip:rw"]

One volume for conda packages and one for pip. My new .gitlab-ci.yml:

image: continuumio/miniconda3:latest

before_script:
  - export PIP_CACHE_DIR="/opt/cache/pip"
  - conda env create -f environment.yml
  - source activate koopa

tests:
  stage: test
  script:
    - python -m unittest discover -v

The build time is about 10 seconds!

Just a few days after my tests, GitLab announced GitLab Container Registry. I already thought about building my own docker image and this new feature would make it even easier than before. But I would have to remember to update my image if I change my requirements. Which I don't have to think about with the current solution.

Switching from git-bigfile to git-lfs

In 2012, I was looking for a way to store big files in git. git-annex was already around, but I found it a bit too complex for my use case. I discovered git-media from Scott Chacon and it looked like what I was looking for. It was in Ruby which made it not super easy to install on some machines at work. I thought it was a good exercise to port it to Python. That's how git-bigfile was born. It was simple and was doing the job.

Last year, I was thinking about giving it some love: port it to Python 3, add some unittests... That's about when I switched from Gogs to Gitlab and read that Gitlab was about to support git-lfs.

Being developed by GitHub and with Gitlab support, git-lfs was an obvious option to replace git-bigfile.

Here is how to switch a project using git-bigfile to git-lfs:

  1. Make a list of all files tracked by git-bigfile:

    $ git bigfile status | awk '/pushed/ {print $NF}' > /tmp/list
  2. Edit .gitattributes to replace the filter. Replace filter=bigfile -crlf with filter=lfs diff=lfs merge=lfs -text:

    $ cat .gitattributes
    *.tar.bz2 filter=lfs diff=lfs merge=lfs -text
    *.iso filter=lfs diff=lfs merge=lfs -text
    *.img filter=lfs diff=lfs merge=lfs -text
  3. Remove all big files from the staging area and add them back with git-lfs:

    $ git rm --cached $(cat /tmp/list)
    $ git add .
    $ git commit -m "Switch to git-lfs"
  4. Check that the files were added using git-lfs. You should see something like that:

    $ git show HEAD
    diff --git a/CentOS_6.4/images/install.img
    b/CentOS_6.4/images/install.img
    index 227ea55..a9cc6a8 100644
    --- a/CentOS_6.4/images/install.img
    +++ b/CentOS_6.4/images/install.img
    @@ -1 +1,3 @@
    -5d243948497ceb9f07b033da62498e52269f4b83
    +version https://git-lfs.github.com/spec/v1
    +oid
    sha256:6fcaac620b82e38e2092a6353ca766a3b01fba7f3fd6a0397c57e979aa293db0
    +size 133255168
  5. Remove git-bigfile cache directory:

    $ rm -rf .git/bigfile

Note: to push files larger than 2.1GB to your gitlab server, wait for this fix. Hopefully it will be in 8.4.3.

crontab and date

The other day, I wanted to add a script to the crontab and to redirect the output to a file including the current date. Easy. I have used the date command many times in bash script like that:

current_date=$(date +"%Y%m%dT%H%M")

So I added the following to my crontab:

0 1 * * * /usr/local/bin/foo > /tmp/foo.$(date +%Y%m%dT%H%M).log 2>&1

And... it didn't work...

I quickly identified that the script was working properly when run from the crontab (it's easy to get a script working from the prompt, not running from the crontab due to incorrect PATH). The problem was the redirection but I couldn't see why.

I googled a bit but didn't find anything...

I finally looked at the man pages:

$  man 5 crontab

     ...
     The  ``sixth''  field  (the  rest of the line) specifies the command to be run.  The entire command portion of the line, up to a
     newline or % character...

Here it was of course! % is a special character. It needs to be escaped:

0 1 * * * /usr/local/bin/foo > /tmp/foo.$(date +\%Y\%m\%dT\%H\%M).log 2>&1

Lesson to remember: check the man pages before to google!

Compile and install Kodi on iPad without jailbreak

With iOS 9 and Xcode 7 it's finally possible to compile and deploy apps on your iPhone/iPad with a free Apple developer account (no paid membership required).

I compiled XBMC/Kodi many times on my mac but had never signed an app with Xcode before and it took me some time to get it right. So here are my notes:

First thanks to memphiz for the iOS9 support!

I compiled from his ios9_workaround branch, but it has been merged to master since:

$ git clone https://github.com/xbmc/xbmc.git Kodi
$ cd Kodi
$ git remote add memphiz https://github.com/Memphiz/xbmc.git
$ git fetch memphiz
$ git checkout -b ios9_workaround memphiz/ios9_workaround

Follow the instructions from the README.ios file:

$ git submodule update --init addons/skin.re-touched
$ cd tools/depends
$ ./bootstrap
$ ./configure --host=arm-apple-darwin
$ make -j4
$ make -j4 -C target/binary-addons
$ cd ../..
$ make -j4 -C tools/depends/target/xbmc
$ make clean
$ make -j4 xcode_depends

Start Xcode and open the Kodi project. Open the Preferences, and add your Apple ID if not already done:

/images/add_account.png

Select the Kodi-iOS target:

/images/kodi_ios_target.png

Change the bundle identifier to something unique and click on Fix Issue to create a provisioning profile.

/images/bundle_identifier.png

Connect your device to your mac and select it:

/images/device.png

Click on Run to compile and install Kodi on your device!