Developing and compiling tango with conda

Conda is a popular package manager that can quickly install binary packages and their dependencies.

Many Tango packages are available on conda-forge: pytango, tango-test, tango-database, tango-starter, tango-admin... Most are still Linux only, but a few are also available for Windows (like pytango and tango-test).

What many people don't know or don't think about is that conda can also be used to setup a development environment. The required compilers and build tools, used by conda-build to compile and create packages, can be installed as any conda package.

This is something I often do before to create a recipe to check how to compile a software.

Installing conda/mamba

If you don't have conda already installed, I recommend using Mambaforge, an alternative to miniconda. Mambaforge is a minimal installer for conda that also inludes mamba and is configured with conda-forge as the default and only channel.

If you haven't heard of mamba before, check https://github.com/mamba-org/mamba. mamba is a fast alternative conda client. You can use it as a drop-in replacement for conda and benefit from faster download and dependency solving.

conda is also gaining from this development as libmamba was integrated in conda 4.12.0: https://www.anaconda.com/blog/a-faster-conda-for-a-growing-community. At this time, it's still an experimental feature that needs to be enabled explicitly.

To install conda and mamba on Unix like platforms:

curl -L -O "https://github.com/conda-forge/miniforge/releases/latest/download/Mambaforge-$(uname)-$(uname -m).sh"
bash Mambaforge-$(uname)-$(uname -m).sh  -f -b -p ~/mambaforge
~/mambaforge/bin/mamba init

On Windows, use the Mambaforge-Windows-x86_64.exe installer.

The rest of this post will assume you have conda/mamba installed and conda-forge set as the default channel:

$ conda config --show channels
channels:
  - conda-forge

If you are used to conda and don't want to install mamba, this isn't an issue. Both are interchangeable. Just run conda instead of mamba. Out of habit I often still run conda activate as this wasn't initially supported by mamba, but this isn't the case anymore.

Compiling cppTango in a conda environment

Let's say you want to compile cppTango to work on a bug fix or new feature. To build it on your Linux distribution, you can of course install all the requirements with your OS package manager (apt, yum, dnf...). Depending of your OS, versions will differ as well as package names between distributions.

Conda provides a solution that is OS independent. Create the following tango-dev environment:

mamba create -y -n tango-dev make cmake cxx-compiler libtool pkg-config jpeg omniorb cppzmq zeromq tango-idl
mamba activate tango-dev

To know the list of packages to install, you can refer to the official cpptango-feedstock. I added jpeg here as it's a new requirement to build the main branch.

Activating the tango-dev environment will export a few variables, like CC, CXX and CMAKE_ARGS. You should pass the latter to cmake:

$ echo $CC
/home/vagrant/mambaforge/envs/tango-dev/bin/x86_64-conda-linux-gnu-cc
$ echo $CXX
/home/vagrant/mambaforge/envs/tango-dev/bin/x86_64-conda-linux-gnu-c++
$ echo $CMAKE_ARGS
-DCMAKE_AR=/home/vagrant/mambaforge/envs/tango-dev/bin/x86_64-conda-linux-gnu-ar -DCMAKE_CXX_COMPILER_AR=/home/vagrant/mambaforge/envs/tango-dev/bin/x86_64-conda-linux-gnu-gcc-ar -DCMAKE_C_COMPILER_AR=/home/vagrant/mambaforge/envs/tango-dev/bin/x86_64-conda-linux-gnu-gcc-ar -DCMAKE_RANLIB=/home/vagrant/mambaforge/envs/tango-dev/bin/x86_64-conda-linux-gnu-ranlib -DCMAKE_CXX_COMPILER_RANLIB=/home/vagrant/mambaforge/envs/tango-dev/bin/x86_64-conda-linux-gnu-gcc-ranlib -DCMAKE_C_COMPILER_RANLIB=/home/vagrant/mambaforge/envs/tango-dev/bin/x86_64-conda-linux-gnu-gcc-ranlib -DCMAKE_LINKER=/home/vagrant/mambaforge/envs/tango-dev/bin/x86_64-conda-linux-gnu-ld -DCMAKE_STRIP=/home/vagrant/mambaforge/envs/tango-dev/bin/x86_64-conda-linux-gnu-strip

Note that when using conda-build even more options are automatically added to CMAKE_ARGS, like CMAKE_INSTALL_PREFIX and CMAKE_INSTALL_LIBDIR. We need to pass those manually in our case. Use CONDA_PREFIX to refer to the current activated environment (this variable is automatically set by conda).

(tango-dev) vagrant@bullseye:~$ git clone https://gitlab.com/tango-controls/cppTango.git
(tango-dev) vagrant@bullseye:~$ cd cppTango
(tango-dev) vagrant@bullseye:~/cppTango$ cmake $CMAKE_ARGS \
      -DCMAKE_BUILD_TYPE=Debug \
      -DCMAKE_INSTALL_PREFIX="$CONDA_PREFIX" \
      -DCMAKE_INSTALL_LIBDIR=lib \
      -S . -B build
-- The C compiler identification is GNU 10.3.0
-- The CXX compiler identification is GNU 10.3.0
-- Detecting C compiler ABI info
-- Detecting C compiler ABI info - done
-- Check for working C compiler: /home/vagrant/mambaforge/envs/tango-dev/bin/x86_64-conda-linux-gnu-cc - skipped
-- Detecting C compile features
-- Detecting C compile features - done
-- Detecting CXX compiler ABI info
-- Detecting CXX compiler ABI info - done
-- Check for working CXX compiler: /home/vagrant/mambaforge/envs/tango-dev/bin/x86_64-conda-linux-gnu-c++ - skipped
-- Detecting CXX compile features
-- Detecting CXX compile features - done
-- Found PkgConfig: /home/vagrant/mambaforge/envs/tango-dev/bin/pkg-config (found version "0.29.2")
-- CMake: version 3.23.2
-- Target platform: Linux 64-bit
-- C++ Compiler: GNU with version 10.3.0
-- C Compiler: GNU with version 10.3.0
-- Build type: Debug
-- Environment: TANGO_HOST=
-- Checking for one of the modules 'tangoidl'
-- Checking for one of the modules 'omniORB4'
-- Checking for one of the modules 'omniCOS4'
-- Checking for one of the modules 'omniDynamic4'
-- Checking for one of the modules 'libzmq'
-- Found JPEG: /home/vagrant/mambaforge/envs/tango-dev/lib/libjpeg.so (found version "90")
-- Check if cppzmq is present and recent enough: TRUE
-- Check if libzmq version is >= 4.0.5: TRUE
-- Looking for pthread.h
-- Looking for pthread.h - found
-- Performing Test CMAKE_HAVE_LIBC_PTHREAD
-- Performing Test CMAKE_HAVE_LIBC_PTHREAD - Failed
-- Looking for pthread_create in pthreads
-- Looking for pthread_create in pthreads - not found
-- Looking for pthread_create in pthread
-- Looking for pthread_create in pthread - found
-- Found Threads: TRUE
-- Looking for io.h
-- Looking for io.h - not found
-- Looking for unistd.h
-- Looking for unistd.h - found
-- Could NOT find Doxygen (missing: DOXYGEN_EXECUTABLE)
CMake Warning at cppapi/doxygen/CMakeLists.txt:10 (message):
  Could not find doxygen/dot, therefore the documentation can not be built.


Using OMNIIDL_PATH=
Using IDL=/home/vagrant/mambaforge/envs/tango-dev/include
HOST_NAME=bullseye
-- Configuring done
-- Generating done
-- Build files have been written to: /home/vagrant/cppTango/build

Note that if you want to build the documentation, you can install doxygen and graphviz: mamba install doxygen graphviz.

To build: cmake --build build -j2

To test: cmake --build build --target test

To install: cmake --build build --target install

Those commands were run on Debian 11.3 but would work on any Linux distribution.

Let's look at another example with TangoDatabase.

Building TangoDatabase with conda

What if you want to work on TangoDatabase? You could build it against the current release of cppTango. Check the requirements in the official tango-database-feedstock:

$ mamba create -y -n tango-stable-dev cmake make cxx-compiler libtool pkg-config cppzmq cpptango mysql-devel omniorb
$ mamba list -n tango-stable-dev | grep cpptango
cpptango                  9.3.5                he78764c_1    conda-forge

What if you want to work against cppTango main branch? You could of course re-use the previous environment where you compiled it yourself. But there is another option! For development purpose, each commit to cppTango main branch, creates and publishes a conda package to the tango-controls channel: https://anaconda.org/tango-controls/cpptango (Linux only). Let's use that package from the tango-controls/label/dev channel.

$ mamba create -y -n tango-main-dev -c tango-controls/label/dev cmake make cxx-compiler libtool pkg-config cppzmq cpptango mysql-devel omniorb
$ mamba list -n tango-main-dev | grep cpptango
cpptango                  9.4.0dev0             g5beab02d    tango-controls/label/dev

We can now build TangoDatabase in the tango-main-dev environment.

(base) vagrant@bullseye:~$ conda activate tango-main-dev
(tango-main-dev) vagrant@bullseye:~$ git clone https://gitlab.com/tango-controls/TangoDatabase.git
(tango-main-dev) vagrant@bullseye:~$ cd TangoDatabase/
(tango-main-dev) vagrant@bullseye:~/TangoDatabase$ cmake $CMAKE_ARGS \
      -DCMAKE_BUILD_TYPE=Debug \
      -DCMAKE_INSTALL_PREFIX=$CONDA_PREFIX \
      -DMYSQL_INCLUDE_DIR=$CONDA_PREFIX/include/mysql \
      -S . -B build
(tango-main-dev) vagrant@bullseye:~/TangoDatabase$ cmake --build build -j2
(tango-main-dev) vagrant@bullseye:~/TangoDatabase$ ./build/Databaseds --help
main(): arrived
usage :  ./build/Databaseds instance_name [-v[trace level]] [-file=<file_name> | -nodb [-dlist <device name list>] ]

Linux is well supported. What about other operating systems?

Building cppTango on macOS

Yes, Tango on macOS! This still isn't supported officially but Thomas Juerges is working on it. At the time of this writing, this hasn't been merged upstream and you need to use the main-macOS_build branch from his repository.

Note that this is not an official Tango Controls blessed repository, nor does Tango Controls officially support macOS.

To build this fork, Thomas created a repository with some scripts to help installing all required dependencies using brew: https://gitlab.com/tjuerges/build_tango

This works nicely, but we'll look here at an alternative with conda.

Conda provides the clang compilers for macOS but the macOS SDK is still required. Due to its license it can't be installed with conda. If you haven't already done, install the Xcode Command Line Tools by running xcode-select --install. All the rest will be installed with conda.

Let's create the same tango-dev environment as on Linux:

mamba create -y -n tango-dev make cmake cxx-compiler libtool pkg-config jpeg omniorb cppzmq zeromq tango-idl
conda activate tango-dev

This environment is actually not exacly identical to the Linux one as the cxx-compiler meta-package will install clang on macOS and gcc/gxx on Linux:

(tango-dev) ➜  ~ $ echo $CC
x86_64-apple-darwin13.4.0-clang
(tango-dev) ➜  ~ $ echo $CXX
x86_64-apple-darwin13.4.0-clang++

Compile the main-macOS_build branch:

(tango-dev) ➜  Tango $ git clone https://gitlab.com/tjuerges/cppTango.git
(tango-dev) ➜  Tango $ cd cppTango
(tango-dev) ➜  cppTango git:(main) $ git checkout main-macOS_build
branch 'main-macOS_build' set up to track 'origin/main-macOS_build'.
Switched to a new branch 'main-macOS_build'
(tango-dev) ➜  cppTango git:(main-macOS_build) $ cmake $CMAKE_ARGS \
      -DCMAKE_BUILD_TYPE=Debug \
      -DCMAKE_INSTALL_PREFIX="$CONDA_PREFIX" \
      -DCMAKE_INSTALL_LIBDIR=lib \
      -S . -B build
-- The C compiler identification is Clang 13.0.1
-- The CXX compiler identification is Clang 13.0.1
-- Detecting C compiler ABI info
-- Detecting C compiler ABI info - done
-- Check for working C compiler: /Users/benjaminbertrand/miniconda/envs/tango-dev/bin/x86_64-apple-darwin13.4.0-clang - skipped
-- Detecting C compile features
-- Detecting C compile features - done
-- Detecting CXX compiler ABI info
-- Detecting CXX compiler ABI info - done
-- Check for working CXX compiler: /Users/benjaminbertrand/miniconda/envs/tango-dev/bin/x86_64-apple-darwin13.4.0-clang++ - skipped
-- Detecting CXX compile features
-- Detecting CXX compile features - done
-- Found PkgConfig: /Users/benjaminbertrand/miniconda/envs/tango-dev/bin/pkg-config (found version "0.29.2")
-- CMake: version 3.23.2
-- Target platform: Darwin 64-bit
-- C++ Compiler: Clang with version 13.0.1
-- C Compiler: Clang with version 13.0.1
-- Build type: Debug
-- Environment: TANGO_HOST=
-- Checking for one of the modules 'tangoidl'
-- Checking for one of the modules 'omniORB4'
-- Checking for one of the modules 'omniCOS4'
-- Checking for one of the modules 'omniDynamic4'
-- Checking for one of the modules 'libzmq'
-- Found JPEG: /Users/benjaminbertrand/miniconda/envs/tango-dev/lib/libjpeg.dylib (found version "90")
-- Check if cppzmq is present and recent enough: TRUE
-- Check if libzmq version is >= 4.0.5: TRUE
-- Looking for pthread.h
-- Looking for pthread.h - found
-- Performing Test CMAKE_HAVE_LIBC_PTHREAD
-- Performing Test CMAKE_HAVE_LIBC_PTHREAD - Success
-- Found Threads: TRUE
-- Looking for io.h
-- Looking for io.h - not found
-- Looking for unistd.h
-- Looking for unistd.h - found
-- Could NOT find Doxygen (missing: DOXYGEN_EXECUTABLE)
CMake Warning at cppapi/doxygen/CMakeLists.txt:10 (message):
  Could not find doxygen/dot, therefore the documentation can not be built.


Using OMNIIDL_PATH=
Using IDL=/Users/benjaminbertrand/miniconda/envs/tango-dev/include
HOST_NAME=benjimbp.local
-- Configuring done
-- Generating done
-- Build files have been written to: /Users/benjaminbertrand/Dev/Tango/cppTango/build

Build and install as on Linux:

cmake --build build -j4
cmake --build build --target install

If you prefer you can also run make directly:

cd build
make -j4
make install

As you can see, the instructions, including how to create the tango-dev environment, were the same as on Linux!

We can now build pytango. Support was recently added to the develop_9.4 branch in MR 459.

We first need to add a few extra dependencies required to build pytango: mamba install -y boost numpy six. six is only required at runtime, not build time, but we add it now as we'll want to run pytango to test it.

cd ..
git clone https://gitlab.com/tango-controls/pytango.git
git checkout -b develop_9.4 origin/develop_9.4
cd pytango

You first need to export the BOOST_PYTHON_LIB variable based on the installed python version. You can check it by running python --version:

(tango-dev) ➜  pytango git:(develop_9.4) $ python --version
Python 3.10.5

(tango-dev) ➜  pytango git:(develop_9.4) $ export BOOST_PYTHON_LIB=boost_python310
(tango-dev) ➜  pytango git:(develop_9.4) $ python -m pip install --no-binary=:all: --ignore-installed --no-deps .

Let's try it:

(tango-dev) ➜  ~ $ python -c "import tango; print(tango.utils.info())"
PyTango 9.3.4 (9, 3, 4, 'dev', 0)
PyTango compiled with:
    Python : 3.10.5
    Numpy  : 1.22.4
    Tango  : 9.4.0
    Boost  : 1.78.0

PyTango runtime is:
    Python : 3.10.5
    Numpy  : 1.22.4
    Tango  : 9.4.0

PyTango running on:
uname_result(system='Darwin', node='benjimbp.local', release='21.4.0', version='Darwin Kernel Version 21.4.0: Fri Mar 18 00:45:05 PDT 2022; root:xnu-8020.101.4~15/RELEASE_X86_64', machine='x86_64')

Hurray!

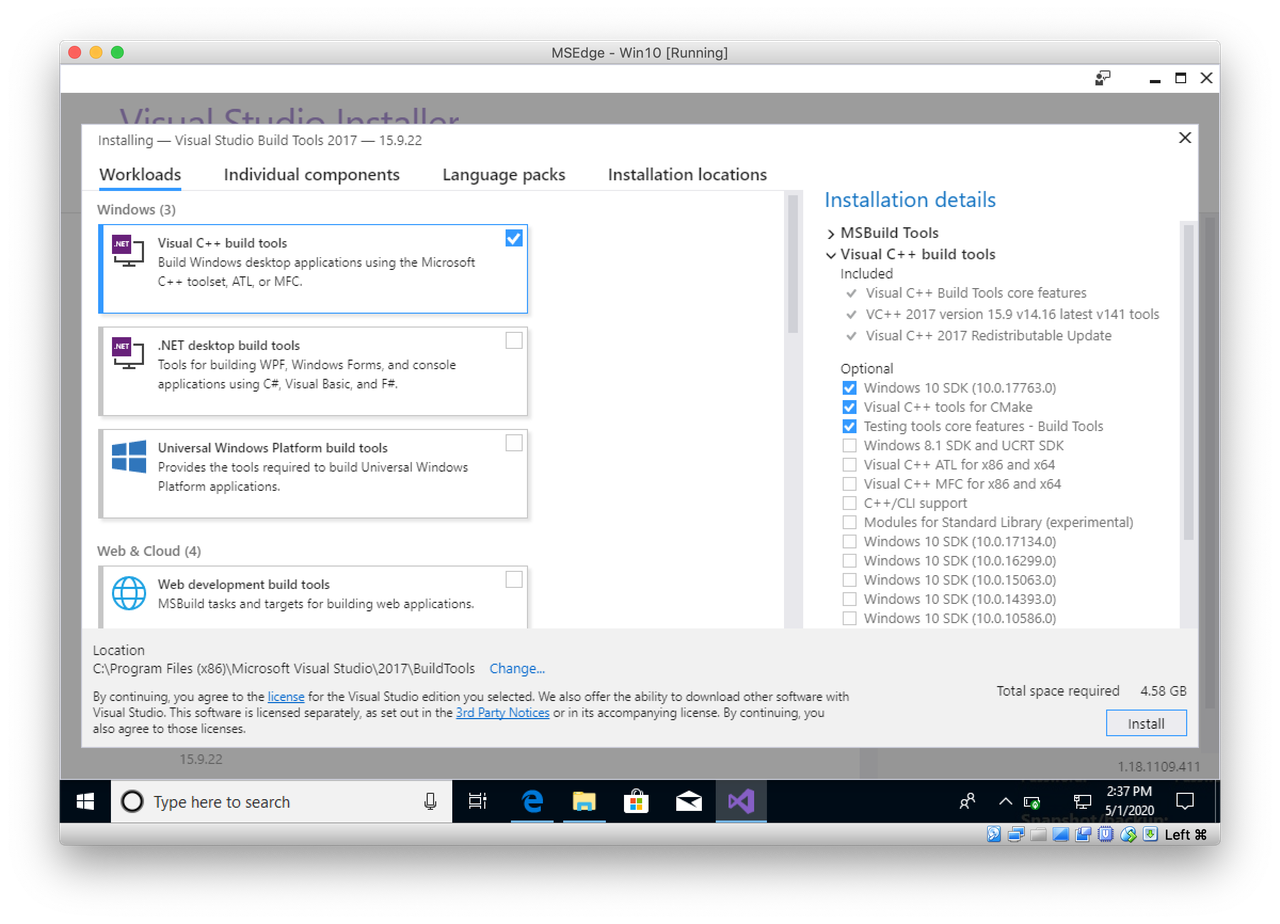
Compiling on Windows

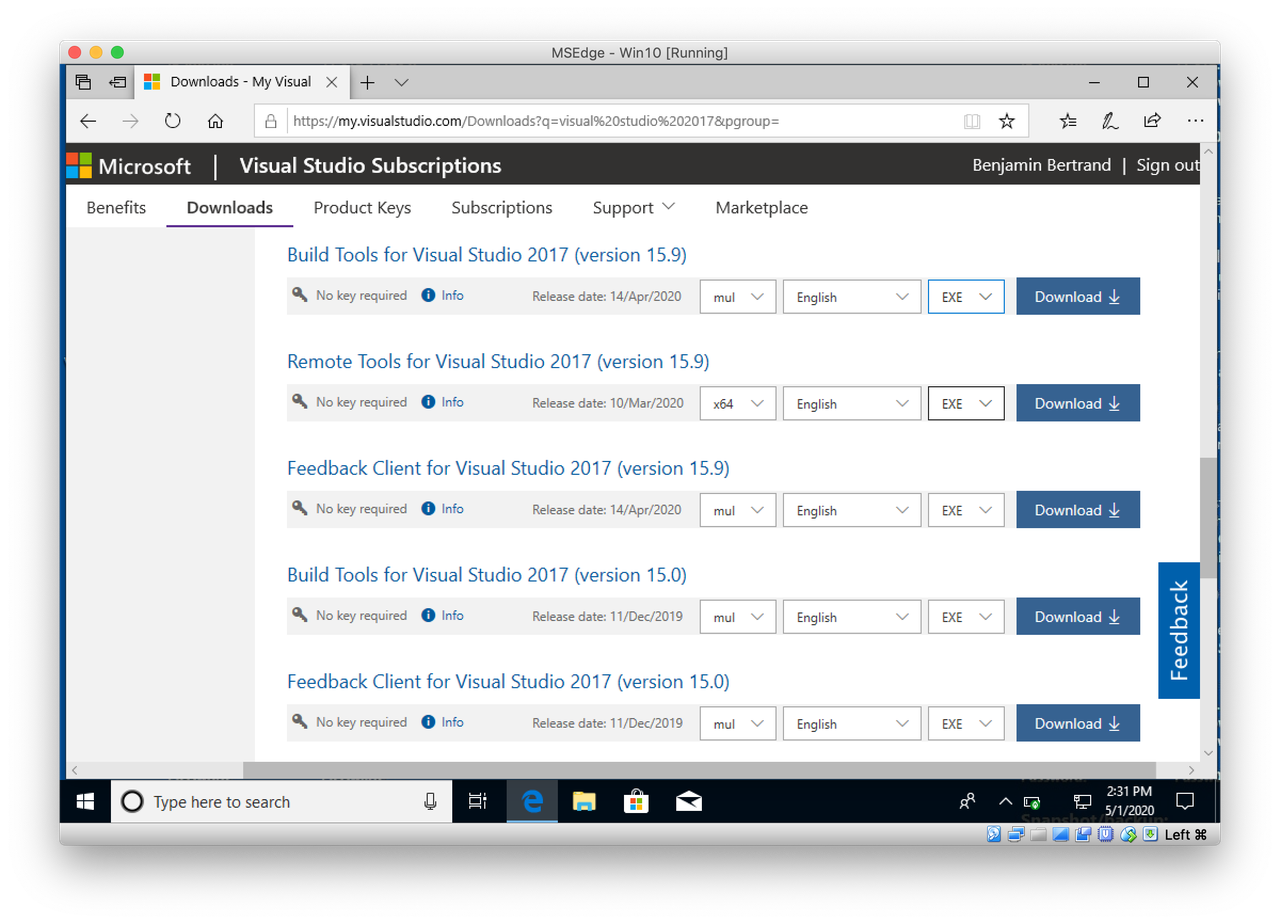
To compile on Windows you first need to install the Build Tools for Visual Studio 2017. This is the version recommended by conda-forge to create Windows packages. To compile locally, you should be able to use a more recent version. I described in a previous post how to create a Windows VM to build conda packages. You can refer to it for more details.

We will compile TangoTest main branch as an example.

(base) Z:\>mamba create -y -n tango-dev cmake cxx-compiler cppzmq cpptango omniorb
(base) Z:\>mamba activate tango-dev
(tango-dev) Z:\>git clone https://gitlab.com/tango-controls/TangoTest.git
(tango-dev) Z:\>cd TangoTest

As there is no pkg-config on Windows, there are a few extra variables to pass to cmake. Let's create a small bld.bat script to make that easier:

setlocal EnableDelayedExpansion

set LIBRARY_PREFIX=%CONDA_PREFIX%\Library
set LIBRARY_LIB=%CONDA_PREFIX%\Library\lib
set LIBRARY_INC=%CONDA_PREFIX%\Library\include

cmake -G "NMake Makefiles" ^
      -DCMAKE_CXX_FLAGS="-DLOG4TANGO_HAS_DLL -DTANGO_HAS_DLL" ^
      -DCMAKE_INSTALL_PREFIX:PATH="%LIBRARY_PREFIX%" ^
      -DCMAKE_PREFIX_PATH:PATH="%LIBRARY_PREFIX%" ^
      -DTANGO_PKG_LIBRARY_DIRS:PATH="%LIBRARY_LIB%" ^
      -DTANGO_PKG_INCLUDE_DIRS:PATH="%LIBRARY_INC%;%LIBRARY_INC%\tango" ^
      -DTANGO_PKG_LIBRARIES="tango;omniORB4_rt;omniDynamic4_rt;COS4_rt;omnithread_rt;libzmq-mt-4_3_4;comctl32;wsock32;Ws2_32" ^
      -S . -B build

This script is based on the one from the official recipe. The variables LIBRARY_PREFIX, LIBRARY_LIB and LIBRARY_INC are automatically set by conda-build. When compiling manually we define them using CONDA_PREFIX.

Run bld.bat:

(tango-dev) Z:\TangoTest>bld.bat
(tango-dev) Z:\TangoTest>setlocal EnableDelayedExpansion
(tango-dev) Z:\TangoTest>set LIBRARY_PREFIX=C:\Users\beenj\mambaforge\envs\tango-dev\Library
(tango-dev) Z:\TangoTest>set LIBRARY_LIB=C:\Users\beenj\mambaforge\envs\tango-dev\Library\lib
(tango-dev) Z:\TangoTest>set LIBRARY_INC=C:\Users\beenj\mambaforge\envs\tango-dev\Library\include
(tango-dev) Z:\TangoTest>cmake -G "NMake Makefiles"       -DCMAKE_CXX_FLAGS="-DLOG4TANGO_HAS_DLL -DTANGO_HAS_DLL"       -DCMAKE_INSTALL_PREFIX:PATH="C:\Users\beenj\mambaforge\envs\tango-dev\Library"       -DCMAKE_PREFIX_PATH:PATH="C:\Users\beenj\mambaforge\envs\tango-dev\Library"       -DTANGO_PKG_LIBRARY_DIRS:PATH="C:\Users\beenj\mambaforge\envs\tango-dev\Library\lib"       -DTANGO_PKG_INCLUDE_DIRS:PATH="C:\Users\beenj\mambaforge\envs\tango-dev\Library\include;C:\Users\beenj\mambaforge\envs\tango-dev\Library\include\tango"       -DTANGO_PKG_LIBRARIES="tango;omniORB4_rt;omniDynamic4_rt;COS4_rt;omnithread_rt;libzmq-mt-4_3_4;comctl32;wsock32;Ws2_32"       -S . -B build
-- The CXX compiler identification is MSVC 19.16.27045.0
-- Detecting CXX compiler ABI info
-- Detecting CXX compiler ABI info - done
-- Check for working CXX compiler: C:/Program Files (x86)/Microsoft Visual Studio/2017/BuildTools/VC/Tools/MSVC/14.16.27023/bin/Hostx64/x64/cl.exe - skipped
-- Detecting CXX compile features
-- Detecting CXX compile features - done
-- Could NOT find PkgConfig (missing: PKG_CONFIG_EXECUTABLE)
-- Configuring done
-- Generating done
-- Build files have been written to: Z:/TangoTest/build

We can now compile:

(tango-dev) Z:\TangoTest>cmake --build build

[100%] Linking CXX executable TangoTest.exe
[100%] Built target TangoTest
(tango-dev) Z:\TangoTest>cd build
(tango-dev) Z:\TangoTest\build>TangoTest.exe --help
usage :  TangoTest.exe instance_name [-v[trace level]] [-file=<file_name> | -nodb [-dlist <device name list>] ]

Build successful on Windows!

Conclusion

Conda gives a reliable way to install binary packages whatever the operating system. The long list of packages maintained by conda-forge includes compilers and build tools, allowing to easily setup a development environment which is OS independent. You can rely on modern versions of those tools even on an older OS.

Naturally conda main goal is to avoid having you to compile by installing pre-build packages :-). This is for development and testing only. Compile only what you need. And if something is missing, submit it to conda-forge staged-recipes!

Conda is of course just an alternative. Sometimes you do have to compile natively to check a platform compatibility. Use the solution that works for you!

Building a GitLab bot using gidgetlab, Starlette and HTTPX

I previously described how to create a GitLab bot using gidgetlab and aiohttp. I recently read and became curious about FastAPI and Starlette. The latter seemed like a good fit for a GitLab bot and a nice way to experiment with it for me.

If you haven't heard about gidgetlab, I recommend starting with my previous post. I won't explain again how to create an access token or configure a webhook.

To build a bot, we need both an HTTP client and server. aiohttp provides both. Starlette is a lightweight ASGI framework. It doesn't include an HTTP client. gidgetlab supports several HTTP clients. I recently added HTTPX, thanks to gidgethub once again. It's described as the next-generation HTTP client for Python and will play well with Starlette.

Let's start by a small example on how to use gidgetlab with HTTPX.

Using gidgetlab with HTTPX on the command line

Install gidgetlab and httpx

Install gidgetlab and httpx if you have not already. Using a virtual environment is recommended.

python3 -m pip install gidgetlab[httpx]

Create an issue

We'll use the same example as in the previous post but replace aiohttp with httpx. Copy the following into the file create_issue.py using your favorite editor:

import asyncio
import os
import httpx
import gidgetlab.httpx


async def main():
    async with httpx.AsyncClient() as client:
        gl = gidgetlab.httpx.GitLabAPI(
            client, "gidgetlab", access_token=os.environ.get("GL_ACCESS_TOKEN")
        )
        await gl.post(
            "/projects/beenje%2Fstrange-relationship/issues",
            data={
                "title": "We got a problem",
                "description": "You should use HTTPX!",
            })


asyncio.run(main())

If you check the example with aiohttp from my previous post, you can see it's pretty similar.

$ diff -u aiohttp_create_issue.py create_issue.py
--- aiohttp_create_issue.py 2020-05-31 21:31:52.000000000 +0200
+++ create_issue.py 2020-05-31 21:26:19.000000000 +0200
@@ -1,12 +1,14 @@
 import asyncio
 import os
-import aiohttp
-from gidgetlab.aiohttp import GitLabAPI
+import httpx
+import gidgetlab.httpx


 async def main():
-    async with aiohttp.ClientSession() as session:
-        gl = GitLabAPI(session, "beenje", access_token=os.getenv("GL_ACCESS_TOKEN"))
+    async with httpx.AsyncClient() as client:
+        gl = gidgetlab.httpx.GitLabAPI(
+            client, "gidgetlab", access_token=os.environ.get("GL_ACCESS_TOKEN")
+        )
         await gl.post(
             "/projects/beenje%2Fstrange-relationship/issues",
             data={
@@ -15,5 +17,4 @@
             })


-loop = asyncio.get_event_loop()
-loop.run_until_complete(main()
+asyncio.run(main())

The only real difference is the use of async with httpx.AsyncClient() as client instead of async with aiohttp.ClientSession() as session. asyncio.run() was introduced in Python 3.7 and is the new way to run an async function.

Save the file and run it in the command line after exporting your GitLab access token.

In Unix / Mac OS:

export GL_ACCESS_TOKEN=<your token>

In Windows:

set GL_ACCESS_TOKEN=<your token>
python3 -m create_issue

There should be a new issue created in the strange-relationship project. Check it out: https://gitlab.com/beenje/strange-relationship/issues

Using Starlette to build a GitLab bot

gidgetlab provides a GitLabBot class to create an aiohttp web server that reponds to GitLab webhooks. Let's build the equivalent of the following aiohttp based bot with Starlette:

from gidgetlab.aiohttp import GitLabBot

bot = GitLabBot("beenje")


@bot.router.register("Issue Hook", action="open")
async def issue_opened_event(event, gl, *args, **kwargs):
    """Whenever an issue is opened, greet the author and say thanks."""
    url = f"/projects/{event.project_id}/issues/{event.object_attributes['iid']}/notes"
    message = f"Thanks for the report @{event.data['user']['username']}! I will look into it ASAP! (I'm a bot)."
    await gl.post(url, data={"body": message})


if __name__ == "__main__":
    bot.run()

Starlette bot

In the same virtual environment as before install Starlette and uvicorn:

python3 -m pip install starlette uvicorn

Save the following in a file named bot.py:

import os
import httpx
import gidgetlab.routing
import gidgetlab.sansio
import gidgetlab.httpx
from starlette.applications import Starlette
from starlette.requests import Request
from starlette.responses import Response
from starlette.routing import Route

router = gidgetlab.routing.Router()


@router.register("Issue Hook", action="open")
async def issue_opened_event(event, gl, *args, **kwargs):
    """Whenever an issue is opened, greet the author and say thanks."""
    url = f"/projects/{event.project_id}/issues/{event.object_attributes['iid']}/notes"
    message = f"Thanks for the report @{event.data['user']['username']}! I will look into it ASAP! (I'm a bot)."
    await gl.post(url, data={"body": message})


async def webhook(request: Request) -> Response:
    """Handler that processes GitLab webhook requests"""
    body = await request.body()
    secret = os.environ.get("GL_SECRET")
    event = gidgetlab.sansio.Event.from_http(request.headers, body, secret=secret)
    async with httpx.AsyncClient() as client:
        gl = gidgetlab.httpx.GitLabAPI(
            client, "gidgetlab", access_token=os.environ.get("GL_ACCESS_TOKEN")
        )
        await router.dispatch(event, gl)
    return Response(status_code=200)


app = Starlette(routes=[Route("/", webhook, methods=["POST"])])

The Issue Hook handler is exactly the same as when using aiohttp. gidgetlab abstracts away the HTTP client used. To implement the bot, the only thing needed is an endpoint to handle webhook POST requests.

Run:

uvicorn --reload bot:app
INFO:     Uvicorn running on http://127.0.0.1:8000 (Press CTRL+C to quit)
INFO:     Started reloader process [40232] using statreload
INFO:     Started server process [40234]
INFO:     Waiting for application startup.
INFO:     Application startup complete.

That's it. We have an ASGI server running on port 8000 that can receive events from GitLab. We could test it by using ngrok as in the previous post. This time we'll just fake some events using httpie.

Testing with httpie

For testing purpose, let's add a dummy event handler that is easy to trigger.

@router.register("Push Hook")
async def dummy_action_on_push(event, gl, *args, **kwargs):
    print(f"Received {event.event}")
    print("Triggering some action...")
    await gl.sleep(1)
    print("Action done")

In one terminal, run:

uvicorn --reload bot:app

In another one:

http POST 127.0.0.1:8000  "X-Gitlab-Event:Push Hook" Content-Type:application/json

You should see the following output in each respective terminal:

Received Push Hook
Triggering some action...
Action done
INFO:     127.0.0.1:58814 - "POST / HTTP/1.1" 200 OK

HTTP/1.1 200 OK
date: Wed, 27 May 2020 20:39:02 GMT
server: uvicorn
transfer-encoding: chunked

If you want to use a secret you should pass it on both sides:

export GL_SECRET=12345
uvicorn --reload bot:app


http POST 127.0.0.1:8000 x-gitlab-token:12345 "X-Gitlab-Event:Push Hook" Content-Type:application/json

You can see both examples on the following screenshot.

/images/gitlab-bot-starlette/httpie-push-hook.png

Starlette startup and shutdown events

Starlette can register event handlers to run on startup and shutdown. Instead of creating a new httpx client on every new request, we could re-use the same.

async def create_client() -> None:
    """Startup handler that creates the GitLabAPI instance"""
    client = httpx.AsyncClient()
    app.state.gl = gidgetlab.httpx.GitLabAPI(
        client, "gidgetlab", access_token=os.environ.get("GL_ACCESS_TOKEN")
    )


async def close_client() -> None:
    """Shutdown handler that closes the httpx client"""
    await app.state.gl._client.aclose()


async def webhook(request: Request) -> Response:
    """Handler that processes GitLab webhook requests"""
    body = await request.body()
    secret = os.environ.get("GL_SECRET")
    event = gidgetlab.sansio.Event.from_http(request.headers, body, secret=secret)
    await router.dispatch(event, request.app.state.gl)
    return Response(status_code=200)


app = Starlette(
    routes=[Route("/", webhook, methods=["POST"])],
    on_startup=[create_client],
    on_shutdown=[close_client],
)

In the create_client function, we also store the GitLabAPI instance on the app.state. This allows us to access it using request.app in the request and to close the httpx client on application shutdown.

Background tasks

In the above code, the Response is only sent when all the dispatched event handlers have been executed. Some event handlers might take some time to run if you trigger many actions or you might want to sleep (asyncio.sleep of course not to block the event loop) between different actions. You probably noticed that's actually exactly what I did in my dummy push hook handler.

To illustrate that let's increase the sleep and print the date in our handler:

import datetime


@router.register("Push Hook")
async def dummy_action_on_push(event, gl, *args, **kwargs):
    print(f"Received {event.event}")
    print(f"Triggering some action at {datetime.datetime.utcnow()}...")
    await gl.sleep(5)
    print(f"Action done at {datetime.datetime.utcnow()}")

If we send a Push Hook event, we'll only get a response after 5 seconds. Not great... We can see that the server isn't blocked. We can send several requests and they are all processed in parallel. But the response is only sent after the event handler is done.

/images/gitlab-bot-starlette/event-blocking-response.png

Action done is printed before the 200 is sent.

When receiving a webhook, you should send the HTTP response as fast as possible. This is stated in GitLab's documentation: Your endpoint should send its HTTP response as fast as possible. If you wait too long, GitLab may decide the hook failed and retry it.

One way to achieve that would be to use a task queue like Celery or RQ to run the event handlers. I'm actually using RQ in an aiohttp bot I created.

A nice feature of Starlette is that you can attach a background task to a response. We can thus run the dispatch function as a BackgroundTask. This will ensure that the response is sent as soon as the event has been received and parsed:

from starlette.background import BackgroundTask


async def webhook(request: Request) -> Response:
    """Handler that processes GitLab webhook requests"""
    body = await request.body()
    secret = os.environ.get("GL_SECRET")
    event = gidgetlab.sansio.Event.from_http(request.headers, body, secret=secret)
    task = BackgroundTask(router.dispatch, event, request.app.state.gl)
    return Response(status_code=200, background=task)

If we perform the same test as before we see that the event is dispatched only after the response was sent. It doesn't matter how long each handler takes.

/images/gitlab-bot-starlette/event-background-task.png

Received Push Hook is printed after the 200 is sent.

Of course handlers shouldn't block the event loop! As router.dispatch is an async function, Starlette will just await on it. If an event handler is performing some blocking action, it should be run in a thread or process pool. Otherwise the above code is all that is required.

Better error handling

One thing we didn't pay attention to is error handling. What happens if gidgetlab.sansio.Event.from_http raises an Exception? Starlette will return a 500 (Internal Server Error) HTTP response. That's the proper thing to do. Your endpoint should ALWAYS return a valid HTTP response.

But in the bot logs, we can see that exception. Not very clean.

/images/gitlab-bot-starlette/unhandled-exception.png

We should catch those exceptions and handle them properly.

from starlette.responses import Response, PlainTextResponse


async def webhook(request: Request) -> Response:
    """Handler that processes GitLab webhook requests"""
    body = await request.body()
    secret = os.environ.get("GL_SECRET")
    try:
        event = gidgetlab.sansio.Event.from_http(request.headers, body, secret=secret)
    except gidgetlab.HTTPException as e:
        return PlainTextResponse(status_code=e.status_code, content=str(e))
    except gidgetlab.GitLabException as e:
        return PlainTextResponse(status_code=500, content=str(e))
    task = BackgroundTask(router.dispatch, event, request.app.state.gl)
    return Response(status_code=200, background=task)
/images/gitlab-bot-starlette/handle-exceptions.png

Much nicer now! Everything is in place for a production ready bot.

Conclusion

I really enjoyed working with Starlette. It made building a GitLab bot with gidgetlab very easy. We saw how to use Events and Backroung Tasks. Being able to run the dispatch function in the background is really perfect for our bot.

HTTPX and Starlette are definitvely my go-to frameworks for my next bot!

You can find the full source code used in this post on both GitLab and GitHub:

Using epics-base with conda on Linux, macOS and Windows

I previously described how to create a Windows VM to build conda packages. I mentioned this was to update the conda-forge epics-base feedstock. In this post, I want to share how to use EPICS Base with conda.

Acknowledgement

I'm not the original author of the epics-base feedstock. I want to thank all the people who contributed to that conda recipe.

All the examples of EPICS usage below come directly from the official website Getting Started page.

Miniconda

This post assumes some basic knowledge of conda. If you never used it before, I recommend starting by checking the documentation.

If you don't have conda already installed, here are some quick instructions. Refer to the official documentation for more detailed information.

Linux

Note that bzip2 is required to run the installation.

curl -LO https://repo.anaconda.com/miniconda/Miniconda3-latest-Linux-x86_64.sh
bash Miniconda3-latest-Linux-x86_64.sh -bp $HOME/miniconda
rm -f Miniconda3-latest-Linux-x86_64.sh
# Let conda update your ~/.bashrc
source $HOME/miniconda/bin/activate
conda init

macOS

curl -LO https://repo.anaconda.com/miniconda/Miniconda3-latest-MacOSX-x86_64.sh
bash Miniconda3-latest-MacOSX-x86_64.sh -bp $HOME/miniconda
rm -f Miniconda3-latest-MacOSX-x86_64.sh
# Let conda update your ~/.bash_profile
source $HOME/miniconda/bin/activate
conda init

Windows

Download and run the Miniconda3 installer from https://docs.conda.io/en/latest/miniconda.html#windows-installers. To use conda, open the Anaconda Prompt from the start menu.

Configuration

On Linux and macOS, if you don't want conda to activate the base environment by default (and modify your PATH), you should run:

conda config --set auto_activate_base false

This doesn't really apply to Windows as you have to start the Anaconda Prompt to use conda.

To be able to install package from conda-forge, add the conda-forge channel to your configuration. This applies to all platforms.

conda config --add channels conda-forge

Installing epics-base

Environment creation

Now that we have conda installed and configured, getting epics-base is as easy as running:

conda create -y -n epics epics-base

Note that you don't need any compiler or to install any other packages. The only requirement is conda. As of may 2020, the version installed should be 7.0.3.1.

Environment activation

To start using EPICS, activate the environment:

conda activate epics

You now have access to all the binaries provided by epics-base:

caget -h
pvget -h
softIocPVA
epics> exit

On Windows, there is currently a small issue. If you run softIocPVA -h, you will see that the compiled-in path to softIocPVA.dbd is incorrect:

(epics) C:\Users\IEUser>softIocPVA -h
Usage: softIocPVA [-D softIoc.dbd] [-h] [-S] [-a ascf]
        [-m macro=value,macro2=value2] [-d file.db]
        [-x prefix] [st.cmd]
Compiled-in path to softIocPVA.dbd is:
        D:/bld/epics-base_1588657178544/_h_env/epics/dbd/softIocPVA.dbd

The path is the one that was used when the epics-base conda package was created. Conda usually automatically replaces this $PREFIX variable when creating an environment. It works on Linux and macOS but not on Windows in this case. You have to give the explicit path to the dbd manually. You can use the %EPICS_BASE% environment variable that is automatically set during the activation of the epics environment:

(epics) C:\Users\IEUser>softIocPVA -D %EPICS_BASE%\dbd\softIocPVA.dbd
epics>

Note that if I understand correctly this tech-talk message, next release should use a relative path and remove this issue.

After activation, you can see that several EPICS environment variables have been set. The PATH was also updated. It includes both $CONDA_PREFIX/bin as well as $EPICS_BASE/bin/$EPICS_HOST_ARCH:

(epics) [tux@964ef40cabbb ~]$ env | grep EPICS
EPICS_BASE_HOST_BIN=/home/tux/miniconda/envs/epics/epics/bin/linux-x86_64
EPICS_BASE_VERSION=7.0.3.1
EPICS_BASE=/home/tux/miniconda/envs/epics/epics
EPICS_HOST_ARCH=linux-x86_64
(epics) [tux@964ef40cabbb ~]$ echo $PATH
/home/tux/miniconda/envs/epics/epics/bin/linux-x86_64:/home/tux/miniconda/envs/epics/bin:/home/tux/miniconda/condabin:/usr/local/bin:/bin:/usr/bin:/usr/local/sbin:/usr/sbin:/home/tux/.local/bin:/home/tux/bin
(epics) [tux@964ef40cabbb ~]$

Those variables are set by the activation script part of the epics-base package. Running conda deactivate will unset those variables:

(epics) [tux@964ef40cabbb ~]$ conda deactivate
(base) [tux@964ef40cabbb ~]$ env | grep EPICS
(base) [tux@964ef40cabbb ~]$ echo $PATH
/home/tux/miniconda/bin:/home/tux/miniconda/condabin:/usr/local/bin:/bin:/usr/bin:/usr/local/sbin:/usr/sbin:/home/tux/.local/bin:/home/tux/bin
(base) [tux@964ef40cabbb ~]$

Simple test

With your editor of choice, create the test.db file that contains:

record(ai, "temperature:water")
{
    field(DESC, "Water temperature in the fish tank")
}

Open a terminal and activate the epics environment.

On Linux and macOS, run:

softIocPVA -d test.db

On Windows, run:

softIocPVA -D %EPICS_BASE%\dbd\softIocPVA.dbd -d test.db

Open another terminal and run:

CI0011906:~ $ conda activate epics
(epics) CI0011906:~ $ caget temperature:water
temperature:water              0
(epics) CI0011906:~ $ caget temperature:water.DESC
temperature:water.DESC         Water temperature in the fish tank
(epics) CI0011906:~ $ caput temperature:water 21
Old : temperature:water              0
New : temperature:water              21
(epics) CI0011906:~ $ caget temperature:water
temperature:water              21
(epics) CI0011906:~ $

The following screenshots show the result on macOS and Windows.

/images/using-epics-base-with-conda/simple-test-macos.png/images/using-epics-base-with-conda/simple-test-windows.png

Compiling a demo IOC

We saw how to use the binaries that come with epics-base. It's worth mentioning that you can also compile code using the installed conda package.

Pre-requisites

The pre-requisites are different depending on the platform.

Linux

There is no distribution specific dependencies to install. All requirements will be installed with conda.

We could use the existing epics environment but we'll create a new one to demonstrate that several environments can coexist in parallel.

Create and activate the epics-dev environment:

conda create -y -n epics-dev epics-base make compilers
conda activate epics-dev

macOS

Conda provides the clang compilers for macOS. But the macOS SDK is still required. The SDK license prevents it from being bundled in the conda package. The SDK has to be installed manually. For compatibility issue, conda packages are built with the 10.9 SDK. To compile code locally that you don't plan to share, using a more recent version should be fine.

Solution 1: current SDK

Install Xcode Command Line Tools by running:

xcode-select --install
Solution 2: 10.9 SDK

As mentioned in conda-build documentation, the 10.9 SDK can be downloaded from:

Download MacOSX10.9.sdk.tar.xz and untar it under /opt/MacOSX10.9.sdk.

Create and activate the epics-dev environment:

conda create -y -n epics-dev epics-base make compilers
conda activate epics-dev

Before to be able to compile, two variables have to be set on macOS: MACOSX_DEPLOYMENT_TARGET and CONDA_BUILD_SYSROOT.

Those variables are usually set automatically by conda-build. When compiling locally, you have to set them manually. CONDA_BUILD_SYSROOT is actually automatically set when activating an environment with the compilers package. It should detect your Xcode installation:

(epics-dev) CI0011906:~ $ echo $CONDA_BUILD_SYSROOT
/Library/Developer/CommandLineTools/SDKs/MacOSX.sdk

If you installed the 10.9 SDK, you might want to point to that instead:

export CONDA_BUILD_SYSROOT=/opt/MacOSX10.9.sdk

The variable MACOSX_DEPLOYMENT_TARGET, you have to set manually:

export MACOSX_DEPLOYMENT_TARGET=10.9

Windows

On Windows, you need to install the Visual C++ compilers. You only need to download the Build Tools for Visual Studio 2017. Refer to the post on how to setup a Windows VM to build conda packages for the instructions on how to install them.

Create and activate the epics-dev environment:

conda create -n epics-dev epics-base epics-base-static-libs make vs2017_win-64
conda activate epics-dev

vs2017_win-64 is a package that contains an activation script to setup VS 2017. Note that we also need to install the epics-base-static-libs to compile on Windows. The static libraries were moved to a subpackage to make epics-base package smaller. They are not needed most of the time on Linux and macOS. Maybe they should be part of the default package on Windows?

IOC creation

Make sure you activated the epics-dev environment you created. Note that we didn't have to specify perl when creating the environment. It's installed with epics-base as run dependency.

On Linux and macOS:

(epics-dev) CI0011906:~ $ mkdir -p $HOME/EPICS/testIoc
(epics-dev) CI0011906:~ $ cd $HOME/EPICS/testIoc
(epics-dev) CI0011906:~/EPICS/testIoc $ makeBaseApp.pl -t example testIoc
(epics-dev) CI0011906:~/EPICS/testIoc $ makeBaseApp.pl -i -t example testIoc
Using target architecture darwin-x86 (only one available)
The following applications are available:
    testIoc
What application should the IOC(s) boot?
The default uses the IOC's name, even if not listed above.
Application name?
(epics-dev) CI0011906:~/EPICS/testIoc $ make
...
(epics-dev) CI0011906:~/EPICS/testIoc $ cd iocBoot/ioctestIoc
(epics-dev) CI0011906:~/EPICS/testIoc/iocBoot/ioctestIoc $ chmod a+x st.cmd
(epics-dev) CI0011906:~/EPICS/testIoc/iocBoot/ioctestIoc $ ./st.cmd
#!../../bin/darwin-x86/testIoc
< envPaths
epicsEnvSet("IOC","ioctestIoc")
epicsEnvSet("TOP","/Users/benjaminbertrand/EPICS/testIoc")
epicsEnvSet("EPICS_BASE","/Users/benjaminbertrand/miniconda3/envs/epics-dev/epics")
cd "/Users/benjaminbertrand/EPICS/testIoc"
## Register all support components
dbLoadDatabase "dbd/testIoc.dbd"
testIoc_registerRecordDeviceDriver pdbbase
## Load record instances
dbLoadTemplate "db/user.substitutions"
dbLoadRecords "db/testIocVersion.db", "user=benjaminbertrand"
dbLoadRecords "db/dbSubExample.db", "user=benjaminbertrand"
#var mySubDebug 1
#traceIocInit
cd "/Users/benjaminbertrand/EPICS/testIoc/iocBoot/ioctestIoc"
iocInit
Starting iocInit
############################################################################
## EPICS R7.0.3.1
## EPICS Base built May  5 2020
############################################################################
iocRun: All initialization complete
## Start any sequence programs
#seq sncExample, "user=benjaminbertrand"
epics> dbl
benjaminbertrand:testIoc:version
benjaminbertrand:xxxExample
benjaminbertrand:circle:step
benjaminbertrand:circle:period
benjaminbertrand:line:b
benjaminbertrand:aiExample
...

On Windows:

(epics-dev) C:\Users\IEUser> mkdir EPICS\testIoc
(epics-dev) C:\Users\IEUser> cd EPICS\testIoc
(epics-dev) C:\Users\IEUser\EPICS\testIoc> perl %EPICS_BASE_HOST_BIN%\makeBaseApp.pl -t example testIoc
(epics-dev) C:\Users\IEUser\EPICS\testIoc> perl %EPICS_BASE_HOST_BIN%\makeBaseApp.pl -i -t example testIoc
Using target architecture windows-x64 (only one available)
The following applications are available:
    testIoc
What application should the IOC(s) boot?
The default uses the IOC's name, even if not listed above.
Application name?
(epics-dev) C:\Users\IEUser\EPICS\testIoc> make
...
(epics-dev) C:\Users\IEUser\EPICS\testIoc> cd iocBoot\ioctestIoc
(epics-dev) C:\Users\IEUser\EPICS\testIoc\iocBoot\ioctestIoc> ..\..\bin\windows-x64\testIoc.exe st.cmd
#!../../bin/windows-x64/testIoc
< envPaths
epicsEnvSet("IOC","ioctestIoc")
epicsEnvSet("TOP","C:/Users/IEUser/EPICS/testIoc")
epicsEnvSet("EPICS_BASE","C:/Users/IEUser/miniconda3/envs/epics-dev/epics")
cd "C:/Users/IEUser/EPICS/testIoc"
## Register all support components
dbLoadDatabase "dbd/testIoc.dbd"
testIoc_registerRecordDeviceDriver pdbbase
## Load record instances
dbLoadTemplate "db/user.substitutions"
dbLoadRecords "db/testIocVersion.db", "user=IEUser"
dbLoadRecords "db/dbSubExample.db", "user=IEUser"
#var mySubDebug 1
#traceIocInit
cd "C:/Users/IEUser/EPICS/testIoc/iocBoot/ioctestIoc"
iocInit
Starting iocInit
############################################################################
## EPICS R7.0.3.1
## EPICS Base built May  5 2020
############################################################################
iocRun: All initialization complete
## Start any sequence programs
#seq sncExample, "user=IEUser"
epics> dbl
IEUser:xxxExample
IEUser:circle:angle
IEUser:line:a
IEUser:circle:x
IEUser:circle:y
IEUser:calcExample
...

We have a running IOC on all 3 platforms!

Summary

I hope this post showed you how easy conda make it to install EPICS Base on Linux, macOS and Windows. We saw that this package can also be used to compile an IOC. That being said, if you want to use various EPICS modules, this is probably not the best solution today. As long as those modules aren't available as conda packages at least. But if all you need is EPICS Base, to interact with IOCs on other machines for example, then I'd really recommend conda.

How to setup a Windows VM to build conda packages

I mostly work on macOS and Linux and I have almost no development experience on Windows. I recently wanted to update the epics-base feedstock on conda-forge. The goal was to have it working on the 3 platforms. A good opportunity to try building on Windows.

As explained in conda-forge documentation, it's possible to test Windows builds even if you don't work on Windows.

Create a Windows Virtual Machine

The first step is to download a Virtual Machine from https://developer.microsoft.com/en-us/microsoft-edge/tools/vms/.

/images/setup-windows-vm-conda/download-vm.png

I'll use VirtualBox as I work on macOS and already have it installed.

  • Download MSEdge.Win10.VirtualBox.zip

  • Unzip the archive

  • Move the MSEdge - Win10 directory under ~/VirtualBox VMs/

  • Open MSEdge - Win10.ovf to import it in VirtualBox

  • Start the new VM

/images/setup-windows-vm-conda/msedge-win10-login.png

As mentioned on the download page, the password is "Passw0rd!".

/images/setup-windows-vm-conda/msedge-win10-home.png

Developer tools installation

Now that we have a Windows VM, we need a few developers tools to build conda packages.

VScode

We'll first need an editor. I've been a Vim user for many years, but have to say I started to use VScode more lately, with VSCodeVim of course :-). Microsoft is really doing a nice job. There are many great extensions. I can only recommend it.

Download VScode from https://code.visualstudio.com/.

/images/setup-windows-vm-conda/download-vscode.png

Obviously, an editor is very personal. Pick the one you prefer!

Git

To work with code, Git is essential. Download and install it from https://git-scm.com/downloads.

/images/setup-windows-vm-conda/download-git.png

Microsoft’s Visual C++

To compile native code (C, C++, etc.) on Windows, we need Microsoft’s Visual C++. As explained in this Python wiki, each Python version uses a specific compiler version.

Since CPython 3.5, Visual C++ 14.X is required. This compiler has been part of Visual Studio since Visual Studio 2015.

As of May 2020, the current version of Visual Studio that you can download from https://visualstudio.microsoft.com/downloads/ is Visual Studio 2019, which comes with Visual C++ 14.2.

We could use that version, but conda-forge currently uses Visual Studio 2017. The transition from vs2015 to vs2017 was done in April 2020. Downloading an older release requires a Microsoft account.

Once logged in, go to https://visualstudio.microsoft.com/vs/older-downloads/ and download the Build Tools for Visual Studio 2017. You don't need to download the full Visual Studio edition.

/images/setup-windows-vm-conda/download-build-tools-for-visual-studio-2017.png

During installation, only select the build tools.

/images/setup-windows-vm-conda/install-build-tools-for-visual-studio-2017.png

The installation process will take some time. Be patient.

/images/setup-windows-vm-conda/visual-studio-installer.png

Miniconda3

Now that we have an editor, Git and Windows C++ compilers, the last tool missing is conda. Download and install Miniconda3 from https://docs.conda.io/en/latest/miniconda.html#windows-installers.

/images/setup-windows-vm-conda/download-miniconda.png

To use conda, start the Anaconda Prompt from the Start menu.

/images/setup-windows-vm-conda/start-anaconda-prompt.png

Just a few more steps to configure conda.

  • Add conda-forge channel:

    conda config --add channels conda-forge
  • Install conda-build:

    conda install -y conda-build
  • Download the conda_build_config.yaml file from conda-forge-pinning-feedstock under the home directory:

    curl -LO https://raw.githubusercontent.com/conda-forge/conda-forge-pinning-feedstock/master/recipe/conda_build_config.yaml

The conda_build_config.yaml file contains the version of compilers to use as well as the globally pinned packages. Notice that the compiler is set to vs2017 for Windows.

/images/setup-windows-vm-conda/conda-build-config-yaml.png

Note that this file contains several versions for Python: 3.6 and 3.7 at the time of writing. This means that when building conda packages with Python, you'll always build 2 packages (except for noarch). You can keep it as is if you want to test every versions. In most cases, testing one version of Python is enough. Especially during development. You can tune that file to your needs. I'll comment out Python 3.6.

python:
#  - 3.6.* *_cpython
  - 3.7.* *_cpython

That's it! We now have all the tools required to build conda packages locally on Windows.

/images/setup-windows-vm-conda/conda-info.png

Testing

To check that everything is setup properly, let's try to build an existing conda recipe that requires a compiler. Start an Anaconda Prompt and run:

mkdir conda-forge
cd conda-forge
git clone https://github.com/conda-forge/cython-feedstock.git
cd cython-feedstock
conda build recipe

The build should succeed and create the cython-0.29.17-py37h1834ac0_0.tar.bz2 package.

/images/setup-windows-vm-conda/cython-build.png

Summary

We now have a VM with all the tools required to build and test locally conda packages on Windows.

In a coming post, I'll detail how I built epics-base on Linux, macOS and Windows.

Searching by date in Elasticsearch

I recently indexed some documents in Elasticsearch at work and had issues retrieving what I wanted by date. Googling didn't get me very useful results, except the official documentation. I thought it was worth sharing what wasn't obvious to me by reading the documentation.

Let's start a single-node Elasticsearch cluster for test:

In [1]:
!docker run -d -p 9200:9200 -p 9300:9300 -e "discovery.type=single-node" docker.elastic.co/elasticsearch/elasticsearch:7.6.0
b7c18b6079414f728d2dbacd8c913fbb212026bc513808e03e75e7a81eda0753

Indexing documents in Elasticsearch

Like in a previous blog post, I'll use the Python Elasticsearch client.

In [2]:
from datetime import datetime
from elasticsearch import Elasticsearch
es = Elasticsearch()

Let's first check the cluster is alive:

In [3]:
es.cat.health()
Out[3]:
'1583959014 20:36:54 docker-cluster green 1 1 0 0 0 0 0 17 1.2s 100.0%\n'

Here is the list of messages we want to index:

In [4]:
messages = [
    {"date": "Fri, 11 Oct 2019 10:30:00 +0200",
    "subject": "Beautiful is better than ugly"
    },
    {"date": "Wed, 09 Oct 2019 11:36:05 +0200",
    "subject": "Explicit is better than implicit"
    },
    {"date": "Thu, 10 Oct 2019 19:16:25 +0200",
    "subject": "Simple is better than complex"
    },
    {"date": "Fri, 01 Nov 2019 18:12:00 +0200",
    "subject": "Complex is better than complicated"
    },
    {"date": "Wed, 09 Oct 2019 21:30:10 +0200",
    "subject": "Flat is better than nested"
    },
    {"date": "Wed, 01 Jan 2020 09:23:00 +0200",
    "subject": "Sparse is better than dense"
    },
    {"date": "Wed, 15 Jan 2020 14:06:07 +0200",
    "subject": "Readability counts"
    },
    {"date": "Sat, 01 Feb 2020 12:00:00 +0200",
    "subject": "Now is better than never"
    },
]

Let's index those messages. Note that we delete the index first to make sure it doesn't exist when running this notebook several times.

In [5]:
es.indices.delete(index="test-index", ignore_unavailable=True)
for id_, message in enumerate(messages):
    es.index(index="test-index", id=id_, body=message, refresh=True)
In [6]:
es.indices.get_mapping(index="test-index")
Out[6]:
{'test-index': {'mappings': {'properties': {'date': {'type': 'text',
     'fields': {'keyword': {'type': 'keyword', 'ignore_above': 256}}},
    'subject': {'type': 'text',
     'fields': {'keyword': {'type': 'keyword', 'ignore_above': 256}}}}}}}

Looking at the mapping, we see that the date field was indexed as text and not date datatype. Formatting the field to the isoformat should help.

In [7]:
for message in messages:
    message["date"] = datetime.strptime(message["date"], "%a, %d %b %Y %H:%M:%S %z").isoformat()
messages
Out[7]:
[{'date': '2019-10-11T10:30:00+02:00',
  'subject': 'Beautiful is better than ugly'},
 {'date': '2019-10-09T11:36:05+02:00',
  'subject': 'Explicit is better than implicit'},
 {'date': '2019-10-10T19:16:25+02:00',
  'subject': 'Simple is better than complex'},
 {'date': '2019-11-01T18:12:00+02:00',
  'subject': 'Complex is better than complicated'},
 {'date': '2019-10-09T21:30:10+02:00',
  'subject': 'Flat is better than nested'},
 {'date': '2020-01-01T09:23:00+02:00',
  'subject': 'Sparse is better than dense'},
 {'date': '2020-01-15T14:06:07+02:00', 'subject': 'Readability counts'},
 {'date': '2020-02-01T12:00:00+02:00', 'subject': 'Now is better than never'}]
In [8]:
es.indices.delete(index="test-index", ignore_unavailable=True)
for id_, message in enumerate(messages):
    es.index(index="test-index", id=id_, body=message, refresh=True)
es.indices.get_mapping(index="test-index")
Out[8]:
{'test-index': {'mappings': {'properties': {'date': {'type': 'date'},
    'subject': {'type': 'text',
     'fields': {'keyword': {'type': 'keyword', 'ignore_above': 256}}}}}}}

This looks better. The date field was properly recognized thanks to the date detection that is enabled by default.

Searching

We can first check that simple queries work as expected. Note that I'll use the query string syntax. I find it more natural and easier to integrate in a web application search box.

In [9]:
es.search(index="test-index", q="complex")
Out[9]:
{'took': 140,
 'timed_out': False,
 '_shards': {'total': 1, 'successful': 1, 'skipped': 0, 'failed': 0},
 'hits': {'total': {'value': 2, 'relation': 'eq'},
  'max_score': 1.2398099,
  'hits': [{'_index': 'test-index',
    '_type': '_doc',
    '_id': '2',
    '_score': 1.2398099,
    '_source': {'date': '2019-10-10T19:16:25+02:00',
     'subject': 'Simple is better than complex'}},
   {'_index': 'test-index',
    '_type': '_doc',
    '_id': '3',
    '_score': 1.2398099,
    '_source': {'date': '2019-11-01T18:12:00+02:00',
     'subject': 'Complex is better than complicated'}}]}}

Let's define a function that just returns the list of hits.

In [10]:
def search(query):
    return es.search(index="test-index", q=query)["hits"]["hits"]
In [11]:
search("complex")
Out[11]:
[{'_index': 'test-index',
  '_type': '_doc',
  '_id': '2',
  '_score': 1.2398099,
  '_source': {'date': '2019-10-10T19:16:25+02:00',
   'subject': 'Simple is better than complex'}},
 {'_index': 'test-index',
  '_type': '_doc',
  '_id': '3',
  '_score': 1.2398099,
  '_source': {'date': '2019-11-01T18:12:00+02:00',
   'subject': 'Complex is better than complicated'}}]

Let's now try to search by date to retrieve the messages from the 9th of October 2019.

In [12]:
search("20191009")
Out[12]:
[]

Nothing... The date format is probably not recognized.

In [13]:
search("2019-10-09")
Out[13]:
[{'_index': 'test-index',
  '_type': '_doc',
  '_id': '1',
  '_score': 1.0,
  '_source': {'date': '2019-10-09T11:36:05+02:00',
   'subject': 'Explicit is better than implicit'}},
 {'_index': 'test-index',
  '_type': '_doc',
  '_id': '4',
  '_score': 1.0,
  '_source': {'date': '2019-10-09T21:30:10+02:00',
   'subject': 'Flat is better than nested'}}]

So we have to use -. OK, let's try to retrieve all messages from January 2020.

In [14]:
search("2020-01")
Out[14]:
[{'_index': 'test-index',
  '_type': '_doc',
  '_id': '5',
  '_score': 1.0,
  '_source': {'date': '2020-01-01T09:23:00+02:00',
   'subject': 'Sparse is better than dense'}}]

That's not really what we expected. There is a message the 15th of January. This shows that 2020-01 is in fact equivalent to 2020-01-01. This would be the same with 2020.

In [15]:
search("date:2020")
Out[15]:
[{'_index': 'test-index',
  '_type': '_doc',
  '_id': '5',
  '_score': 1.0,
  '_source': {'date': '2020-01-01T09:23:00+02:00',
   'subject': 'Sparse is better than dense'}}]

To get the full month, we have to use a range query.

In [16]:
search("[2020-01-01 TO 2020-01-31]")
Out[16]:
[{'_index': 'test-index',
  '_type': '_doc',
  '_id': '5',
  '_score': 1.0,
  '_source': {'date': '2020-01-01T09:23:00+02:00',
   'subject': 'Sparse is better than dense'}},
 {'_index': 'test-index',
  '_type': '_doc',
  '_id': '6',
  '_score': 1.0,
  '_source': {'date': '2020-01-15T14:06:07+02:00',
   'subject': 'Readability counts'}}]

Which is equivalent to:

In [17]:
search("[2020-01 TO 2020-02}")
Out[17]:
[{'_index': 'test-index',
  '_type': '_doc',
  '_id': '5',
  '_score': 1.0,
  '_source': {'date': '2020-01-01T09:23:00+02:00',
   'subject': 'Sparse is better than dense'}},
 {'_index': 'test-index',
  '_type': '_doc',
  '_id': '6',
  '_score': 1.0,
  '_source': {'date': '2020-01-15T14:06:07+02:00',
   'subject': 'Readability counts'}}]

Note that }, in the range query, excludes the 1st of February. Using ] would give us an additional message:

In [18]:
search("[2020-01 TO 2020-02]")
Out[18]:
[{'_index': 'test-index',
  '_type': '_doc',
  '_id': '5',
  '_score': 1.0,
  '_source': {'date': '2020-01-01T09:23:00+02:00',
   'subject': 'Sparse is better than dense'}},
 {'_index': 'test-index',
  '_type': '_doc',
  '_id': '6',
  '_score': 1.0,
  '_source': {'date': '2020-01-15T14:06:07+02:00',
   'subject': 'Readability counts'}},
 {'_index': 'test-index',
  '_type': '_doc',
  '_id': '7',
  '_score': 1.0,
  '_source': {'date': '2020-02-01T12:00:00+02:00',
   'subject': 'Now is better than never'}}]

Another way to retrieve messages from a specific period is to use date math:

In [19]:
search("2020-01\|\|\/M")
Out[19]:
[{'_index': 'test-index',
  '_type': '_doc',
  '_id': '5',
  '_score': 1.0,
  '_source': {'date': '2020-01-01T09:23:00+02:00',
   'subject': 'Sparse is better than dense'}},
 {'_index': 'test-index',
  '_type': '_doc',
  '_id': '6',
  '_score': 1.0,
  '_source': {'date': '2020-01-15T14:06:07+02:00',
   'subject': 'Readability counts'}}]
In [20]:
search("date:2020\|\|\/y")
Out[20]:
[{'_index': 'test-index',
  '_type': '_doc',
  '_id': '5',
  '_score': 1.0,
  '_source': {'date': '2020-01-01T09:23:00+02:00',
   'subject': 'Sparse is better than dense'}},
 {'_index': 'test-index',
  '_type': '_doc',
  '_id': '6',
  '_score': 1.0,
  '_source': {'date': '2020-01-15T14:06:07+02:00',
   'subject': 'Readability counts'}},
 {'_index': 'test-index',
  '_type': '_doc',
  '_id': '7',
  '_score': 1.0,
  '_source': {'date': '2020-02-01T12:00:00+02:00',
   'subject': 'Now is better than never'}}]

This is a nice solution but it's not super easy to make occasional users remember the syntax, especially the quoting of the | and / characters. Range queries are probably more natural.

One thing that could be nice is if both 2019-10-09 and 20191009 were recognized. This is possible by adding the format we want to accept in the mapping.

Let's recreate the index with the new mapping.

In [21]:
mapping = {
    "date": {
        "type": "date",
        "format": "strict_date_optional_time||yyyyMMdd||yyyyMM",
    },
    "subject": {"type": "text", "fields": {"keyword": {"type": "keyword"}}},
}
es.indices.delete(index="test-index", ignore_unavailable=True)
es.indices.create(index="test-index", body={"mappings": {"dynamic": "strict", "properties": mapping}})
for id_, message in enumerate(messages):
    es.index(index="test-index", id=id_, body=message, refresh=True)
In [22]:
search("20191009")
Out[22]:
[{'_index': 'test-index',
  '_type': '_doc',
  '_id': '1',
  '_score': 1.0,
  '_source': {'date': '2019-10-09T11:36:05+02:00',
   'subject': 'Explicit is better than implicit'}},
 {'_index': 'test-index',
  '_type': '_doc',
  '_id': '4',
  '_score': 1.0,
  '_source': {'date': '2019-10-09T21:30:10+02:00',
   'subject': 'Flat is better than nested'}}]
In [23]:
search("2019-10-09")
Out[23]:
[{'_index': 'test-index',
  '_type': '_doc',
  '_id': '1',
  '_score': 1.0,
  '_source': {'date': '2019-10-09T11:36:05+02:00',
   'subject': 'Explicit is better than implicit'}},
 {'_index': 'test-index',
  '_type': '_doc',
  '_id': '4',
  '_score': 1.0,
  '_source': {'date': '2019-10-09T21:30:10+02:00',
   'subject': 'Flat is better than nested'}}]
In [24]:
search("date:[202002 TO now]")
Out[24]:
[{'_index': 'test-index',
  '_type': '_doc',
  '_id': '7',
  '_score': 1.0,
  '_source': {'date': '2020-02-01T12:00:00+02:00',
   'subject': 'Now is better than never'}}]
In [25]:
search("date:[2020-02 TO now]")
Out[25]:
[{'_index': 'test-index',
  '_type': '_doc',
  '_id': '7',
  '_score': 1.0,
  '_source': {'date': '2020-02-01T12:00:00+02:00',
   'subject': 'Now is better than never'}}]

As seen above, both formats work now.

Conclusion

  • The mapping is used when indexing new documents. It's also used by the search. Define in the mapping all the date formats you want the search to support (not only the ones required to ingest documents).
  • A year 2020 or month 2020-01 is converted to the first day of the year/month: 2020-01-01.
  • To search by period, use either date math 2020-01\|\|\/M or a range query [2020-01-01 TO 2020-01-31]
In [ ]:
 

Building a GitLab bot using gidgetlab and aiohttp

At PyCon 2018, Mariatta held a Build-a-GitHub-Bot Workshop. The full documentation can be found on GitHub.

I went through the tutorial and really enjoyed it. This is how I discovered gidgethub from Brett Cannon, an async GitHub API library for Python.

I use GitLab at work and really wanted to do the same thing. So I created gidgetlab, a clone of gidgethub for GitLab.

In this post I want to demonstrate how to build a GitLab bot in the exact same way. My goal is not to repeat the full github-bot-tutorial but to show the differences for GitLab. So I strongly suggest that you check the github-bot-tutorial first. I won't go in as much details.

Note that this post will describe how to interact with gitlab.com but gidgetlab can of course be used with a private GitLab instance!

Using gidgetlab on the command line

This is the equivalent of using gidgethub on the command line. So let's create an issue on GitLab using the API via the command line, instead of the GitLab website.

Install gidgetlab and aiohttp

Install gidgetlab and aiohttp if you have not already. Using a virtual environment is recommended.

python3.6 -m pip install gidgetlab[aiohttp]

Create a GitLab Personal Access Token

In order to use GitLab's API, you'll need to create a personal access token that will be used to authenticate yourself to GitLab.

  1. Go to https://gitlab.com/profile/personal_access_tokens

    Or, from GitLab, go to your Settings > Access Tokens.

  2. Under Name, enter a short description, to identify the purpose of this token. I recommend something like: bot tutorial.

  1. Under Scopes, check the api scope.

  2. Click Create personal access token. You will see your new personal access token (a 21 characters string). Click on the copy to clipboard icon and and paste it locally in a text file for now. If you have a password manager like 1password, use that.

    This is the only time you'll see this token in GitLab. If you lose it, you'll need to revoke it and create another one.

Store the Personal Access Token as an environment variable

In Unix / Mac OS:

export GL_ACCESS_TOKEN=your token

In Windows:

set GL_ACCESS_TOKEN=your token

Note that these will only set the token for the current process. If you want this value stored permanently, you have to edit the bashrc file.

Create an issue

Open a new file, for example create_issue.py in your favorite editor.

Copy the following into create_issue.py. Instead of "beenje" however, use your own GitLab username:

import asyncio
import os
import aiohttp
from gidgetlab.aiohttp import GitLabAPI

async def main():
    async with aiohttp.ClientSession() as session:
        gl = GitLabAPI(session, "beenje", access_token=os.getenv("GL_ACCESS_TOKEN"))

loop = asyncio.get_event_loop()
loop.run_until_complete(main())

We only instantiate a GitLabAPI class from gidgetlab by passing who we are ("beenje" in this example) and our GitLab personal access token stored in the GL_ACCESS_TOKEN environment variable. Note that to interact with a private GitLab instance, you just have to pass the url to GitLabAPI:

gl = GitLabAPI(session, "beenje", access_token=os.getenv("GL_ACCESS_TOKEN"),
               url="https://mygitlab.example.com")

By default, the url is set to https://gitlab.com.

So let's create an issue in one of my personal repo. Take a look at GitLab's documentation for creating a new issue.

To create an issue, you should make a POST request to the url /projects/:id/issues and supply the parameters title (required) and description. The id can be the project ID or URL-encoded path of the project owned by the authenticated user.

With gidgetlab, this looks like the following:

await gl.post(
    "/projects/beenje%2Fstrange-relationship/issues",
    data={
        "title": "We got a problem",
        "description": "Use more emoji!",
    })

beenje%2Fstrange-relationship is the URL-encoded path of the project. We could have used the id 7898119 instead. The project ID can be found on the project main page.

Add the above code right after you instantiate GitLabAPI. Your file should now look like the following:

import asyncio
import os
import aiohttp
from gidgetlab.aiohttp import GitLabAPI


async def main():
    async with aiohttp.ClientSession() as session:
        gl = GitLabAPI(session, "beenje", access_token=os.getenv("GL_ACCESS_TOKEN"))
        await gl.post(
            "/projects/beenje%2Fstrange-relationship/issues",
            data={
                "title": "We got a problem",
                "description": "Use more emoji!",
            })


loop = asyncio.get_event_loop()
loop.run_until_complete(main())

Feel free to change the title and the body of the message. Save and run it in the command line:

python3.6 -m create_issue

There should be a new issue created in the strange-relationship project. Check it out: https://gitlab.com/beenje/strange-relationship/issues

Comment on issue

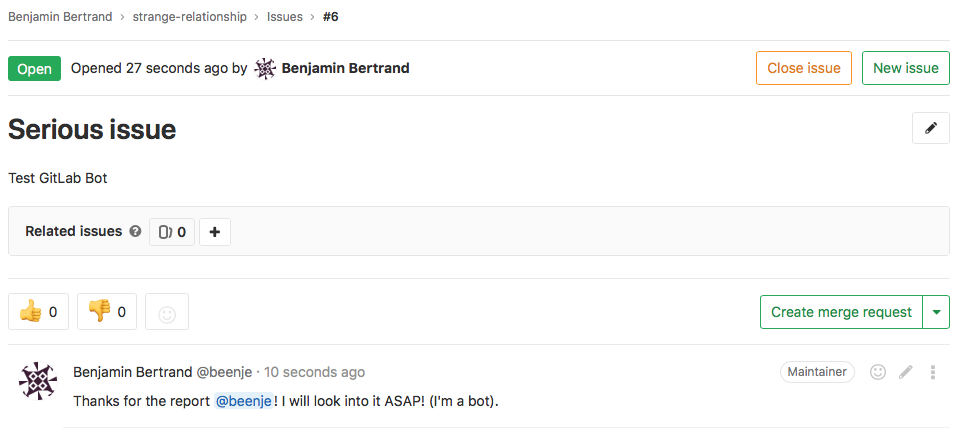
Let's try a different exercise, to get ourselves more familiar with GitLab's API. Take a look at GitLab's create a comment documentation: POST /projects/:id/issues/:issue_iid/notes

Leave a comment in the issue you just created:

await gl.post(
    "/projects/beenje%2Fstrange-relationship/issues/1/notes",
    data={"body": "This is a comment"},
)

Replace 1 with the issue number you created.

Close the issue

Let's now close the issue that you've just created.

Take a look at the documentation to edit an issue.

The method for editing an issue is PUT instead of POST, which we've seen in the previous two examples. In addition, to close an issue, you're basically editing an issue, and setting the state_event to close.

Use gidgetlab to close the issue:

await gl.put(
    "/projects/beenje%2Fstrange-relationship/issues/1",
    data={"state_event": "close"},
)

Replace 1 with the issue number you created.

Using gidgetlab to respond to webhooks

In the previous example, we've been interacting with GitLab by doing actions: making requests to GitLab. And we've been doing that locally on our own machine.

In this section we'll use what we know so far and start building an actual bot: a webserver that responds to GitLab webhook events.

GitLabBot

gidgetlab actually provides a GitLabBot class to easily create an aiohttp web server that reponds to GitLab webhooks.

Save the following in a file named bot.py:

from gidgetlab.aiohttp import GitLabBot

bot = GitLabBot("beenje")


if __name__ == "__main__":
    bot.run()

And run:

python3 bot.py
======== Running on http://0.0.0.0:8080 ========
(Press CTRL+C to quit)

That's it. You have an aiohttp web server running on port 8080. Of course, it won't do that much. You'll have to register some events if you want the bot to perform some actions. We'll see that later.

Webhook events

When an event is triggered in GitLab, GitLab can notify you about the event by sending a POST request along with the payload.

Some example events are:

  • Issues events: any time an issue is created or an existing issue was updated/closed/reopened

  • Push events: when you push to the repository except when pushing tags

  • Tag events: when you create (or delete) tags to the repository

  • Build events: triggered on status change of a Build

The complete list of events is listed here.

Since GitLab needs to send you POST requests for the webhook, you should have a service running somewhere that GitLab can reach. That's usually not on your laptop.

GitHub bot tutorial describes how to deploy your webservice to Heroku. Heroku is a platform as a service and makes it easy to deploy and run your app in the cloud. There are alternatives and you can of course use on your own servers if you want.

For testing purpose, you can actually use your own laptop thanks to ngrok.

Ngrok

Ngrok exposes local servers behind NATs and firewalls to the public internet over secure tunnels. It's an easy way to test locally a webservice.

Check the installation instructions from the website. Note that for simple tests, you don't have to register an account.

If you have a webserver running locally on port 8080, you can expose it by running:

ngrok http 8080

Something similar will appear:

ngrok by @inconshreveable                                       (Ctrl+C to quit)

Session Status                online
Session Expires               7 hours, 59 minutes
Version                       2.2.8
Region                        United States (us)
Web Interface                 http://127.0.0.1:4040
Forwarding                    http://fb7fec7c.ngrok.io -> localhost:8080
Forwarding                    https://fb7fec7c.ngrok.io -> localhost:8080

You can access your local webservice using HTTP and even HTTPS!

curl -X GET https://fb7fec7c.ngrok.io

This address can be accessed from anywhere!. You could give it to a friend or use it as a GitLab webhook.

Ngrok even gives you a web interface on the port 4040 that allows you to inspect all the requests made to the service. Just open http://127.0.0.1:4040 in your browser.

/images/gitlab-bot/ngrok-web-ui.png

If your bot is still running and you tried to send a GET, you should get a 405 as reply. Only POST methods are handled by the bot.

If you don't have any service listening on port 8080 and try to access the URL given by ngrok, you'll get a 502.

Add the GitLab Webhook

Now that we have a local webservice that can receive requests thanks to ngrok, let's create a webhook on GitLab. If you haven't done so yet, create your own project on GitLab.

Go to your project settings and select Integrations to create a webhook:

  • In the URL field, enter the ngrok URL you got earlier.

  • For security reasons, type in some random characters under Secret Token (you can use Python secrets.token_hex(16) function)

  • Under Trigger, select Issues events, Comments and Merge request events

  • Leave Enable SSL verification enabled

  • Click Add webhook

Update the Config Variables in your environment

First, export the secret webhook token you just created:

export GL_SECRET=<secret token>

Then, if not already done, export your GitLab personal access token:

export GL_ACCESS_TOKEN=<acess token>

Your first GitLab bot!

Let's start with a bot that responds to every newly created issue in your project. For example, whenever someone creates an issue, the bot will automatically say something like: "Thanks for the report, @user. I will look into this ASAP!"

To respond to webhooks events, we have to register a coroutine using the @bot.router.register decorator:

@bot.router.register("Issue Hook", action="open")
async def issue_opened_event(event, gl, *args, **kwargs):
    pass

In this example we subscribe to the GitLab Issue Hook events, and more specifically to the "open" issues event.

The two important parameters here are: event and gl.

  • event here is the representation of GitLab's webhook event. We can access the event payload by doing event.data.

  • gl is the gidgetlab GitLabAPI instance, which we can use to make API calls to GitLab, as in the first section.

We already saw that to create a comment on an issue, we need to send: POST /projects/:id/issues/:issue_iid/notes.

Let's look at the Issues events payload to see how we can retrieve the required information:

{
  "object_kind": "issue",
  "user": {
    "name": "Administrator",
    "username": "root",
    "avatar_url": "http://www.gravatar.com/avatar/e64c7d89f26bd1972efa854d13d7dd61?s=40\u0026d=identicon"
  },
  "project": {
    "id": 1,
    "name":"Gitlab Test",
    "description":"Aut reprehenderit ut est.",
    "web_url":"http://example.com/gitlabhq/gitlab-test",
    "avatar_url":null,
    "git_ssh_url":"git@example.com:gitlabhq/gitlab-test.git",
    "git_http_url":"http://example.com/gitlabhq/gitlab-test.git",
    "namespace":"GitlabHQ",
    ...
  },
  "repository": {
    "name": "Gitlab Test",
    "url": "http://example.com/gitlabhq/gitlab-test.git",
    "description": "Aut reprehenderit ut est.",
    "homepage": "http://example.com/gitlabhq/gitlab-test"
  },
  "object_attributes": {
    "id": 301,
    "title": "New API: create/update/delete file",
    ...
    "state": "opened",
    "iid": 23,
    "url": "http://example.com/diaspora/issues/23",
    "action": "open"
  },
  ...
}

The project id can be retrieved as event.data["project"]["id"]. As this is quite common, gidgetlab procures a project_id property to access it directly: event.project_id.

To get the issue id, we can use event.data["object_attributes"]["iid"]. Again as accessing event.data["object_attributes"] is quite common, we can use the object_attributes property: event.object_attributes["iid"].

The url to use is thus:

url = f"/projects/{event.project_id}/issues/{event.object_attributes['iid']}/notes"

To greet the author, we have to retrieve the username from the event: event.data["user"]["username"]

Open your bot.py file and add the following coroutine to be called when a new issue is opened:

@bot.router.register("Issue Hook", action="open")
async def issue_opened_event(event, gl, *args, **kwargs):
    """Whenever an issue is opened, greet the author and say thanks."""
    url = f"/projects/{event.project_id}/issues/{event.object_attributes['iid']}/notes"
    message = f"Thanks for the report @{event.data['user']['username']}! I will look into it ASAP! (I'm a bot)."
    await gl.post(url, data={"body": message})

The full file should look like:

from gidgetlab.aiohttp import GitLabBot

bot = GitLabBot("beenje")


@bot.router.register("Issue Hook", action="open")
async def issue_opened_event(event, gl, *args, **kwargs):
    """Whenever an issue is opened, greet the author and say thanks."""
    url = f"/projects/{event.project_id}/issues/{event.object_attributes['iid']}/notes"
    message = f"Thanks for the report @{event.data['user']['username']}! I will look into it ASAP! (I'm a bot)."
    await gl.post(url, data={"body": message})


if __name__ == "__main__":
    bot.run()

Run:

python3 bot.py

Go to your project and open an issue. Wait a few seconds and refresh the page. You should see a new comment added to the issue!

/images/gitlab-bot/gitlab-bot-say-thanks.png

Congrats! You wrote your first GitLab bot!

Of course, using ngrok on your laptop was for testing only. To use it in production, you should deploy it to a server or the cloud. You can check the GitHub bot tutorial to see how to deploy your webservice to Heroku.

Conclusion

Hopefully this gave you an idea of what can be done with gidgetlab.

If you are interested, try to perform the other exercices described in the github-bot-tutorial but using GitLab. Don't hesitate to let me know if you use gidgetlab to build something cool :-) And check my post about building a GitLab bot with Starlette and HTTPX

Again, a big thanks to Mariatta for her tutorial and to Brett Cannon for gidgethub! This project wouldn't exist otherwise.

Parsing JavaScript rendered pages in Python with pyppeteer

Parsing JavaScript rendered pages in Python with pyppeteer

Where is my table?

I already wrote a blog post about Parsing HTML Tables in Python with pandas. Using requests or even directly pandas was working nicely.

I wanted to play with some data from a race I recently run: Lundaloppet. The results are available here: http://results.neptron.se/#/lundaloppet2018/?sortOrder=Place&raceId=99&page=0&pageSize=25 Results Lundaloppet 2018

Let's try to get that table!

In [1]:
import pandas as pd
In [2]:
dfs = pd.read_html('http://results.neptron.se/#/lundaloppet2018/?sortOrder=Place&raceId=99&page=0&pageSize=25')
---------------------------------------------------------------------------
ValueError                                Traceback (most recent call last)
<ipython-input-2-881110a1fe3d> in <module>()
----> 1 dfs = pd.read_html('http://results.neptron.se/#/lundaloppet2018/?sortOrder=Place&raceId=99&page=0&pageSize=25')

~/miniconda3/envs/notebook/lib/python3.6/site-packages/pandas/io/html.py in read_html(io, match, flavor, header, index_col, skiprows, attrs, parse_dates, tupleize_cols, thousands, encoding, decimal, converters, na_values, keep_default_na, displayed_only)
    985                   decimal=decimal, converters=converters, na_values=na_values,
    986                   keep_default_na=keep_default_na,
--> 987                   displayed_only=displayed_only)

~/miniconda3/envs/notebook/lib/python3.6/site-packages/pandas/io/html.py in _parse(flavor, io, match, attrs, encoding, displayed_only, **kwargs)
    813             break
    814     else:
--> 815         raise_with_traceback(retained)
    816 
    817     ret = []

~/miniconda3/envs/notebook/lib/python3.6/site-packages/pandas/compat/__init__.py in raise_with_traceback(exc, traceback)
    401         if traceback == Ellipsis:
    402             _, _, traceback = sys.exc_info()
--> 403         raise exc.with_traceback(traceback)
    404 else:
    405     # this version of raise is a syntax error in Python 3

ValueError: No tables found

No tables found... So what is going on? Let's look at what is returned by requests.

In [3]:
import requests
from IPython.display import display_html
In [4]:
r = requests.get('http://results.neptron.se/#/lundaloppet2018/?sortOrder=Place&raceId=99&page=0&pageSize=25')
r.text
Out[4]:
'<!DOCTYPE html>\r\n<html xmlns="http://www.w3.org/1999/xhtml" ng-app="app">\r\n<head>\r\n    <title ng-bind="event.name || \'Neptron Timing\'">Neptron Timing</title>\r\n\r\n    <meta charset="utf-8">\r\n    <meta http-equiv="X-UA-Compatible" content="IE=edge">\r\n    <meta name="viewport" content="width=device-width, initial-scale=1">\r\n    <meta name="description" content="Neptron Timing event results">\r\n\r\n    <link rel="shortcut icon" href="favicon.ico">\r\n    <link rel="stylesheet" href="https://cdnjs.cloudflare.com/ajax/libs/twitter-bootstrap/3.3.6/css/bootstrap.min.css">\r\n    <link rel="stylesheet" href="content/app.min.css">\r\n    <script src="scripts/iframeResizer.contentWindow.min.js"></script>\r\n    <script src="https://cdnjs.cloudflare.com/ajax/libs/es6-shim/0.35.0/es6-shim.min.js"></script>\r\n    <script src="https://cdnjs.cloudflare.com/ajax/libs/jquery/2.1.4/jquery.min.js"></script>\r\n    <script src="https://cdnjs.cloudflare.com/ajax/libs/twitter-bootstrap/3.3.6/js/bootstrap.min.js"></script>\r\n    <script src="https://cdnjs.cloudflare.com/ajax/libs/angular.js/1.4.8/angular.min.js"></script>\r\n    <script src="https://cdnjs.cloudflare.com/ajax/libs/angular.js/1.4.8/angular-route.min.js"></script>\r\n    <script src="https://cdnjs.cloudflare.com/ajax/libs/moment.js/2.13.0/moment.min.js"></script>\r\n    <script src="https://cdnjs.cloudflare.com/ajax/libs/Chart.js/2.0.2/Chart.min.js"></script>\r\n    <script src="https://maps.googleapis.com/maps/api/js?key=AIzaSyD7OPJoYN6W9qUHU1L_fEr_5ut8tQN8r2A"></script>\r\n</head>\r\n<body>\r\n    <div class="navbar navbar-inverse navbar-static-top" role="navigation">\r\n        <div class="container">\r\n            <div class="navbar-header">\r\n                <button type="button" class="navbar-toggle" data-toggle="collapse" data-target=".navbar-collapse">\r\n                    <span class="sr-only">Toggle navigation</span>\r\n                    <span class="icon-bar"></span>\r\n                    <span class="icon-bar"></span>\r\n                    <span class="icon-bar"></span>\r\n                </button>\r\n                <a class="navbar-brand" href="#">Neptron Timing</a>\r\n            </div>\r\n            <div class="collapse navbar-collapse">\r\n                <ul class="nav navbar-nav">\r\n                    <li><a href="#/">Events</a></li>\r\n                    <li ng-show="event.id"><a href="#/{{event.id}}/event">Info</a></li>\r\n                    <li ng-show="event.id"><a href="#/{{event.id}}/results">Results</a></li>\r\n                    <li ng-show="event.id"><a href="#/{{event.id}}/leaderboard">Leaderboard</a></li>\r\n                    <li ng-show="event.id && event.tracking"><a href="#/{{event.id}}/tracking">Tracking</a></li>\r\n                    <li ng-show="event.id"><a href="#/{{event.id}}/favorites">Favorites</a></li>\r\n                    <li ng-show="event.id && event.sprints.length > 0"><a href="#/{{event.id}}/sprint">Sprint</a></li>\r\n                    <li ng-show="event.id && event.teamCompetitions.length > 0"><a href="#/{{event.id}}/teams">Teams</a></li>\r\n                </ul>\r\n            </div><!--/.nav-collapse -->\r\n        </div>\r\n    </div>\r\n  <script type="text/javascript">\r\n\r\nvar fixLidingloppetMessage = function() {\r\n\tvar str = window.location.href || \'\';\r\n\tvar cssStyle = (str.match(\'lidingolor2017\') ? \'\' : \'none\');\r\n\t//console.log(\'changed: \'+str, cssStyle);\r\n\t$(\'#nytamin-fix\').css(\'display\', cssStyle);\r\n}\r\n$(window).bind(\'hashchange\', function() {\r\n\tfixLidingloppetMessage();\r\n});\r\nwindow.setInterval(fixLidingloppetMessage, 1000);\r\n\r\n</script>\r\n\r\n<div class="container-fluid">\r\n\t<div id="nytamin-fix" class="panel panel-primary" style="display: none; margin: 2em;">\r\n\t  <div class="panel-heading">Liding&ouml;loppet.se</div>\r\n\t  <div class="panel-body">\r\n\t\t\r\n\t\t<strong><a href="http://213.39.39.152">Click here to get back to Liding&ouml;loppet\'s homepage!</a></strong>\r\n\r\n\t  </div>\r\n\t</div>\r\n</div>\r\n    <div class="container-fluid" ng-view></div>\r\n  <div class="nt-app-links" style="margin:10px 20px">\r\n    <a href="https://www.raceone.com/redirect" id="download-icon-footer-ios" target="_blank">\r\n      <img class="download-icon" src="https://www.raceone.com/wp-content/uploads/2016/09/app-store-e1475238488598.png" alt="">\r\n    </a>\r\n    <a href="https://www.raceone.com/redirect" id="download-icon-footer-android" target="_blank">\r\n      <img class="download-icon" src="https://www.raceone.com/wp-content/uploads/2016/09/google-play-e1475238513871.png" alt="">\r\n    </a>\r\n  </div>\r\n\r\n    <script type="text/javascript" src="scripts/app.js"></script>\r\n\r\n    <!-- AddThis Button BEGIN -->\r\n    <div class="addthis_toolbox addthis_default_style addthis_32x32_style">\r\n        <a class="addthis_button_facebook"></a>\r\n        <a class="addthis_button_twitter"></a>\r\n        <a class="addthis_button_linkedin"></a>\r\n        <a class="addthis_button_email"></a>\r\n        <a class="addthis_button_print"></a>\r\n        <a class="addthis_button_textme"></a>\r\n        <a class="addthis_button_compact"></a>\r\n    </div>\r\n    <script type="text/javascript" src="//s7.addthis.com/js/300/addthis_widget.js#pubid=ra-5364e093794f9d2f"></script>\r\n    <!-- AddThis Button END -->\r\n\r\n    <!--<div class="applinks">\r\n        <a href="https://itunes.apple.com/se/app/neptron-timing/id709776903" target="_blank"><img class="appstore" alt="Get it on iTunes" src="content/appstore.svg" /></a>\r\n        <a href="https://play.google.com/store/apps/details?id=se.neptron.timing" target="_blank"><img class="playstore" alt="Get it on Google Play" src="content/playstore.png" /></a>\r\n    </div>-->\r\n\r\n</body>\r\n</html>\r\n'
In [5]:
display_html(r.text, raw=True)
 Neptron Timing

There is no table in the HTML sent by the server. The table is rendered on the client side by AngularJS. We can check that by looking at the page source in Chrome: Results Lundaloppet 2018 source

How do you parse JavaScript rendered page in Python? Don't we need a browser to run the JavaScript code? By googling, I found Requests-HTML that has JavaScript support!

Requests-HTML

In [6]:
from requests_html import HTMLSession
In [7]:
session = HTMLSession()
r = session.get('http://results.neptron.se/#/lundaloppet2018/?sortOrder=Place&raceId=99&page=0&pageSize=25')
r.html.render()
table = r.html.find('table', first=True)
In [8]:
display_html(table.html, raw=True)
  Place
(race)
Place
(cat)
Bib no Category Name Association Progress Time Status
1
1
6922
P10
Hans Larsson
MAI
Finish
33:22
Finished
2
2
6514
P10
Filip Helmroth
IK Lerum Friidrott
Finish
33:37
Finished
3
3
3920
P10
David Hartman
Björnstorps IF
Finish
33:39
Finished
4
4
3926
P10
Henrik Orre
Björnstorps IF
Finish
34:24
Finished
5
5
2666
P10
Jesper Bokefors
Malmö AI
Finish
34:51
Finished
6
6
5729
P10
Juan Negreira
Lunds universitet
Finish
35:19
Finished
7
7
3649
P10
Jim Webb
Finish
35:23
Finished
8
8
3675
P10
Nils Wetterberg
Ekmans Löpare i Lund
Finish
35:39
Finished
9
9
4880
P10
Hannes Hjalmarsson
Lunds kommun
Finish
35:41
Finished
10
10
6929
P10
Freyi Karlsson
Ekmans löpare i lund
Finish
35:42
Finished
11
11
5995
P10
Shijie Xu
Lunds universitet
Finish
35:43
Finished
12
12
5276
P10
Stuart Ansell
Lunds universitet
Finish
36:02
Finished
13
13
3917
P10
Christer Friberg
Björnstorps IF
Finish
36:15
Finished
14
14
5647
P10
Roger Lindskog
Lunds universitet
Finish
36:15
Finished
15
15
3616
P10
Andreas Thell
Ystads IF Friidrott
Finish
36:20
Finished
16
16
6382
P10
Tommy Olofsson
Tetra Pak IF
Finish
36:20
Finished
17
17
3183
P10
Kristoffer Loo
Finish
36:36
Finished
18
18
2664
P10
Alfred Bodenäs
Triathlon Syd
Finish
36:44
Finished
19
19
6979
P10
Daniel Jonsson
Finish
36:54
Finished
20
20
4977
P10
Johan Lindgren
Lunds kommun
Finish
36:58
Finished
21
21
3495
P10
Erik Schultz-Eklund
Agape Lund
Finish
37:20
Finished
22
22
3571
P10
Daniel Strandberg
Malmö AI
Finish
37:28
Finished
23
23
3121
P10
Martin Larsson
inQore-part of Qgroup
Finish
37:32
Finished
24
24
5955
P10
Johan Vallon-Christersson
Lunds universitet
Finish
37:33
Finished
25
25
6675
P10
Kristian Haggärde
Björnstorps IF
Finish
37:34
Finished

Wow! Isn't that magic? We'll explore a bit later how this works.

What I want to get is all the results, not just the first 25. I tried increasing the pageSize passed in the URL, but that didn't help. Even passing a lower value always returns 25 rows. Not sure how the API is implemented...

An issue I had with requests-html is that sometimes r.html.find('table', first=True) returned None or an empty table...

In [9]:
r = session.get('http://results.neptron.se/#/lundaloppet2018/?sortOrder=Place&raceId=99&page=63&pageSize=25')
r.html.render()
table = r.html.find('table', first=True)
pd.read_html(table.html)[0]
---------------------------------------------------------------------------
IndexError                                Traceback (most recent call last)
<ipython-input-9-e9d6c036862c> in <module>()
      2 r.html.render()
      3 table = r.html.find('table', first=True)
----> 4 pd.read_html(table.html)[0]

IndexError: list index out of range

That's probably a timing issue (the rendering might take longer sometimes). I tried playing with the wait and sleep arguments of r.html.render(wait=1, sleep=1) but couldn't make the problem completetly go away. This is an issue because I don't need just one page but 135.

I started to look at requests-html code to see how this was implemented. That's how I discovered pyppeteer.

Pyppeteer

Pyppeteer is an unofficial Python port of puppeteer JavaScript (headless) chrome/chromium browser automation library.

Puppeteer is a Node library which provides a high-level API to control headless Chrome or Chromium over the DevTools Protocol.

Pyppeteer allows you to do the same from Python. So there is no magic. You just let Chromium load and render the page with the latest JavaScript and browser features. This is super powerful.

The first time you run pyppeteer, it even downloads a recent version of Chromium. So no initial setup is required.

Pyppeteer is based on asyncio. This is hidden by requests-html that gives you a simple interface but of course less flexibility.

So let's explore pyppeteer. The first example from the documentation is how to take a screenshot of a page.

import asyncio
from pyppeteer import launch

async def main():
    browser = await launch()
    page = await browser.newPage()
    await page.goto('http://example.com')
    await page.screenshot({'path': 'example.png'})
    await browser.close()

asyncio.get_event_loop().run_until_complete(main())

Let's try that with our page. Note that I pass the fullPage option otherwise the page is cut.

In [10]:
import asyncio
from pyppeteer import launch


async def main():
    browser = await launch()
    page = await browser.newPage()
    await page.goto('http://results.neptron.se/#/lundaloppet2018/?sortOrder=Place&raceId=99&page=0&pageSize=25')
    await page.screenshot({'path': 'pyppeteer_screenshot.png', 'fullPage': True})
    await browser.close()

asyncio.get_event_loop().run_until_complete(main())

Here is the screenshot taken: Pyppeteer screenshot

Nice, no? This example showed us how to load a page:

  • create a browser
  • create a new page
  • goto a page

There are several functions that can be used to retrieve elements from the page, like querySelector or querySelectorEval. This is the function we gonna use to retrieve the table. We use the table selector and apply the outerHTML function to get the HTML representation of the table:

table = await page.querySelectorEval('table', '(element) => element.outerHTML')

We can then pass that to pandas.

One thing we wanted is to wait for the table to be rendered before trying to retrieve it. We can use the waitForSelector function for that. I initially tried to use the table selector but that sometimes returned an empty table. So I chose a class of one row element td.res-startNo to be sure that the table was rendered.

In [11]:
import asyncio
import pandas as pd
from pyppeteer import launch


async def main():
    browser = await launch()
    page = await browser.newPage()
    await page.goto('http://results.neptron.se/#/lundaloppet2018/?sortOrder=Place&raceId=99&page=0&pageSize=25')
    await page.waitForSelector('td.res-startNo')
    table = await page.querySelectorEval('table', '(element) => element.outerHTML')
    await browser.close()
    return pd.read_html(table)[0]

df = asyncio.get_event_loop().run_until_complete(main())
df
Out[11]:
Unnamed: 0 Place(race) Place(cat) Bib no Category Name Unnamed: 6 Association Progress Time Status
0 NaN 1 1 6922 P10 Hans Larsson NaN MAI Finish 33:22 Finished
1 NaN 2 2 6514 P10 Filip Helmroth NaN IK Lerum Friidrott Finish 33:37 Finished
2 NaN 3 3 3920 P10 David Hartman NaN Björnstorps IF Finish 33:39 Finished
3 NaN 4 4 3926 P10 Henrik Orre NaN Björnstorps IF Finish 34:24 Finished
4 NaN 5 5 2666 P10 Jesper Bokefors NaN Malmö AI Finish 34:51 Finished
5 NaN 6 6 5729 P10 Juan Negreira NaN Lunds universitet Finish 35:19 Finished
6 NaN 7 7 3649 P10 Jim Webb NaN NaN Finish 35:23 Finished
7 NaN 8 8 3675 P10 Nils Wetterberg NaN Ekmans Löpare i Lund Finish 35:39 Finished
8 NaN 9 9 4880 P10 Hannes Hjalmarsson NaN Lunds kommun Finish 35:41 Finished
9 NaN 10 10 6929 P10 Freyi Karlsson NaN Ekmans löpare i lund Finish 35:42 Finished
10 NaN 11 11 5995 P10 Shijie Xu NaN Lunds universitet Finish 35:43 Finished
11 NaN 12 12 5276 P10 Stuart Ansell NaN Lunds universitet Finish 36:02 Finished
12 NaN 13 13 3917 P10 Christer Friberg NaN Björnstorps IF Finish 36:15 Finished
13 NaN 14 14 5647 P10 Roger Lindskog NaN Lunds universitet Finish 36:15 Finished
14 NaN 15 15 3616 P10 Andreas Thell NaN Ystads IF Friidrott Finish 36:20 Finished
15 NaN 16 16 6382 P10 Tommy Olofsson NaN Tetra Pak IF Finish 36:20 Finished
16 NaN 17 17 3183 P10 Kristoffer Loo NaN NaN Finish 36:36 Finished
17 NaN 18 18 2664 P10 Alfred Bodenäs NaN Triathlon Syd Finish 36:44 Finished
18 NaN 19 19 6979 P10 Daniel Jonsson NaN NaN Finish 36:54 Finished
19 NaN 20 20 4977 P10 Johan Lindgren NaN Lunds kommun Finish 36:58 Finished
20 NaN 21 21 3495 P10 Erik Schultz-Eklund NaN Agape Lund Finish 37:20 Finished
21 NaN 22 22 3571 P10 Daniel Strandberg NaN Malmö AI Finish 37:28 Finished
22 NaN 23 23 3121 P10 Martin Larsson NaN inQore-part of Qgroup Finish 37:32 Finished
23 NaN 24 24 5955 P10 Johan Vallon-Christersson NaN Lunds universitet Finish 37:33 Finished
24 NaN 25 25 6675 P10 Kristian Haggärde NaN Björnstorps IF Finish 37:34 Finished

That's a bit more code than with requests-HTML but we have finer control. Let's refactor that code to retrieve all the results of the race.

In [12]:
import asyncio
import pandas as pd
from pyppeteer import launch

URL = 'http://results.neptron.se/#/lundaloppet2018/results?sortOrder=Place&raceId=99&pageSize=25&page={}'


async def get_page(browser, url, selector):
    """Return a page after waiting for the given selector"""
    page = await browser.newPage()
    await page.goto(url)
    await page.waitForSelector(selector)
    return page


async def get_num_pages(browser):
    """Return the total number of pages available"""
    page = await get_page(browser, URL.format(0), 'div.ng-isolate-scope')
    num_pages = await page.querySelectorEval(
        'div.ng-isolate-scope',
        '(element) => element.getAttribute("data-num-pages")')
    return int(num_pages)


async def get_table(browser, page_nb):
    """Return the table from the given page number as a pandas dataframe"""
    print(f'Get table from page {page_nb}')
    page = await get_page(browser, URL.format(page_nb), 'td.res-startNo')
    table = await page.querySelectorEval('table', '(element) => element.outerHTML')
    return pd.read_html(table)[0]


async def get_results():
    """Return all the results as a pandas dataframe"""
    browser = await launch()
    num_pages = await get_num_pages(browser)
    print(f'Number of pages: {num_pages}')
    # Python 3.6 asynchronous comprehensions! Nice!
    dfs = [await get_table(browser, page_nb) for page_nb in range(0, num_pages)]
    await browser.close()
    df = pd.concat(dfs, ignore_index=True)
    return df

This code could be made a bit more generic but that's good enough for what I want. I think it's quite straightforward. We first get the total number of pages and then load each page to retrieve the table. Once done, we just have to concatenate all those tables in one.

One thing to note is the use of Python asynchronous comprehensions. This is a Python 3.6 feature and makes it really Pythonic. It just works as it would with synchronous functions:

dfs = [await get_table(browser, page_nb) for page_nb in range(0, num_pages)]

Let's run that code!

In [13]:
df = asyncio.get_event_loop().run_until_complete(get_results())
Number of pages: 115
Get table from page 0
Get table from page 1
Get table from page 2
Get table from page 3
Get table from page 4
Get table from page 5
Get table from page 6
Get table from page 7
Get table from page 8
Get table from page 9
Get table from page 10
Get table from page 11
Get table from page 12
Get table from page 13
Get table from page 14
Get table from page 15
Get table from page 16
Get table from page 17
Get table from page 18
Get table from page 19
Get table from page 20
Get table from page 21
Get table from page 22
Get table from page 23
Get table from page 24
Get table from page 25
Get table from page 26
Get table from page 27
Get table from page 28
Get table from page 29
Get table from page 30
Get table from page 31
Get table from page 32
Get table from page 33
Get table from page 34
Get table from page 35
Get table from page 36
Get table from page 37
Get table from page 38
Get table from page 39
Get table from page 40
Get table from page 41
Get table from page 42
Get table from page 43
Get table from page 44
Get table from page 45
Get table from page 46
Get table from page 47
Get table from page 48
Get table from page 49
Get table from page 50
Get table from page 51
Get table from page 52
Get table from page 53
Get table from page 54
Get table from page 55
Get table from page 56
Get table from page 57
Get table from page 58
Get table from page 59
Get table from page 60
Get table from page 61
Get table from page 62
Get table from page 63
Get table from page 64
Get table from page 65
Get table from page 66
Get table from page 67
Get table from page 68
Get table from page 69
Get table from page 70
Get table from page 71
Get table from page 72
Get table from page 73
Get table from page 74
Get table from page 75
Get table from page 76
Get table from page 77
Get table from page 78
Get table from page 79
Get table from page 80
Get table from page 81
Get table from page 82
Get table from page 83
Get table from page 84
Get table from page 85
Get table from page 86
Get table from page 87
Get table from page 88
Get table from page 89
Get table from page 90
Get table from page 91
Get table from page 92
Get table from page 93
Get table from page 94
Get table from page 95
Get table from page 96
Get table from page 97
Get table from page 98
Get table from page 99
Get table from page 100
Get table from page 101
Get table from page 102
Get table from page 103
Get table from page 104
Get table from page 105
Get table from page 106
Get table from page 107
Get table from page 108
Get table from page 109
Get table from page 110
Get table from page 111
Get table from page 112
Get table from page 113
Get table from page 114

That's it! We got all the results from the Lundaloppet 2018 in a nice pandas DataFrame.

In [14]:
len(df)
Out[14]:
2872
In [15]:
df.head()
Out[15]:
Unnamed: 0 Place(race) Place(cat) Bib no Category Name Unnamed: 6 Association Progress Time Status
0 NaN 1.0 1.0 6922 P10 Hans Larsson NaN MAI Finish 33:22 Finished
1 NaN 2.0 2.0 6514 P10 Filip Helmroth NaN IK Lerum Friidrott Finish 33:37 Finished
2 NaN 3.0 3.0 3920 P10 David Hartman NaN Björnstorps IF Finish 33:39 Finished
3 NaN 4.0 4.0 3926 P10 Henrik Orre NaN Björnstorps IF Finish 34:24 Finished
4 NaN 5.0 5.0 2666 P10 Jesper Bokefors NaN Malmö AI Finish 34:51 Finished
In [16]:
df.tail()
Out[16]:
Unnamed: 0 Place(race) Place(cat) Bib no Category Name Unnamed: 6 Association Progress Time Status
2867 NaN NaN NaN 6855 T10 porntepin sooksaengprasit NaN Lunds universitet NaN NaN Not started
2868 NaN NaN NaN 6857 P10 Gabriel Teku NaN Lunds universitet NaN NaN Not started
2869 NaN NaN NaN 6888 P10 Viktor Karlsson NaN Genarps if NaN NaN Not started
2870 NaN NaN NaN 6892 P10 Emil Larsson NaN NaN NaN NaN Not started
2871 NaN NaN NaN 6893 P10 Göran Larsson NaN NaN NaN NaN Not started

Let's save the result to a csv file

In [17]:
df.to_csv('lundaloppet2018.csv', index=False)

Summary

With frameworks like AngularJS, React, Vue.js... more and more websites use client-side rendering. To parse those websites, you can't just request HTML from the server. Parsing requires to run some JavaScript.

Pyppeteer makes that possible. Thanks to Headless Chomium, it gives you access to the full power of a browser from Python. I find that really impressive!

I tried to use Selenium in the past but didn't find it very easy to start with. That wasn't the case with Pyppeteer. To be fair, it was a while ago and both projects are quite different. It's not just about browser automation. Selenium allows you to perform cross browser testing. Pyppeteer is limited to Chrome/Chromium. Anyway, I'll probably look more at Pyppeteer for web application testing.

For simple tasks, Requests-HTML is a nice wrapper and gives you a simple API. If you want more control, use directly Pyppeteer.

One last note. To run this code in a Jupyter notebook, you should use tornado 4. asyncio code doesn't play well with ipython and tornado 5. See this Github issue: asyncio will be running by default with tornado 5. There is some work in progress for a nice integration.

What about the Lundaloppet results you might ask? I'll explore them in another post!

Parsing HTML Tables in Python with pandas

Not long ago, I needed to parse some HTML tables from our confluence website at work. I first thought: I'm gonna need requests and BeautifulSoup. As HTML tables are well defined, I did some quick googling to see if there was some recipe or lib to parse them and I found a link to pandas. What? Can pandas do that too?

I have been using pandas for quite some time and have used read_csv, read_excel, even read_sql, but I had missed read_html!

Reading excel file with pandas

Before to look at HTML tables, I want to show a quick example on how to read an excel file with pandas. The API is really nice. If I have to look at some excel data, I go directly to pandas.

So let's download a sample file file:

In [1]:
import io
import requests
import pandas as pd
from zipfile import ZipFile
In [2]:
r = requests.get('http://www.contextures.com/SampleData.zip')
ZipFile(io.BytesIO(r.content)).extractall()

This created the SampleData.xlsx file that includes four sheets: Instructions, SalesOrders, SampleNumbers and MyLinks. Only the SalesOrders sheet includes tabular data: SampleData So let's read it.

In [3]:
df = pd.read_excel('SampleData.xlsx', sheet_name='SalesOrders')
In [4]:
df.head()
Out[4]:
OrderDate Region Rep Item Units Unit Cost Total
0 2016-01-06 East Jones Pencil 95 1.99 189.05
1 2016-01-23 Central Kivell Binder 50 19.99 999.50
2 2016-02-09 Central Jardine Pencil 36 4.99 179.64
3 2016-02-26 Central Gill Pen 27 19.99 539.73
4 2016-03-15 West Sorvino Pencil 56 2.99 167.44

That's it. One line and you have your data in a DataFrame that you can easily manipulate, filter, convert and display in a jupyter notebook. Can it be easier than that?

Parsing HTML Tables

So let's go back to HTML tables and look at pandas.read_html.

The function accepts:

A URL, a file-like object, or a raw string containing HTML.

Let's start with a basic HTML table in a raw string.

Parsing raw string

In [5]:
html_string = """
<table>
  <thead>
    <tr>
      <th>Programming Language</th>
      <th>Creator</th> 
      <th>Year</th>
    </tr>
  </thead>
  <tbody>
    <tr>
      <td>C</td>
      <td>Dennis Ritchie</td> 
      <td>1972</td>
    </tr>
    <tr>
      <td>Python</td>
      <td>Guido Van Rossum</td> 
      <td>1989</td>
    </tr>
    <tr>
      <td>Ruby</td>
      <td>Yukihiro Matsumoto</td> 
      <td>1995</td>
    </tr>
  </tbody>
</table>
"""

We can render the table using IPython display_html function:

In [6]:
from IPython.display import display_html
display_html(html_string, raw=True)
Programming Language Creator Year
C Dennis Ritchie 1972
Python Guido Van Rossum 1989
Ruby Yukihiro Matsumoto 1995

Let's import this HTML table in a DataFrame. Note that the function read_html always returns a list of DataFrame objects:

In [7]:
dfs = pd.read_html(html_string)
dfs
Out[7]:
[  Programming Language             Creator  Year
 0                    C      Dennis Ritchie  1972
 1               Python    Guido Van Rossum  1989
 2                 Ruby  Yukihiro Matsumoto  1995]
In [8]:
df = dfs[0]
df
Out[8]:
Programming Language Creator Year
0 C Dennis Ritchie 1972
1 Python Guido Van Rossum 1989
2 Ruby Yukihiro Matsumoto 1995

This looks quite similar to the raw string we rendered above, but we are printing a pandas DataFrame object here! We can apply any operation we want.

In [9]:
df[df.Year > 1975]
Out[9]:
Programming Language Creator Year
1 Python Guido Van Rossum 1989
2 Ruby Yukihiro Matsumoto 1995

Pandas automatically found the header to use thanks to the <thead> tag. It is not mandatory to define a table and is actually often missing on the web. So what happens if it's not present?

In [10]:
html_string = """
<table>
  <tr>
    <th>Programming Language</th>
    <th>Creator</th> 
    <th>Year</th>
  </tr>
  <tr>
    <td>C</td>
    <td>Dennis Ritchie</td> 
    <td>1972</td>
  </tr>
  <tr>
    <td>Python</td>
    <td>Guido Van Rossum</td> 
    <td>1989</td>
  </tr>
  <tr>
    <td>Ruby</td>
    <td>Yukihiro Matsumoto</td> 
    <td>1995</td>
  </tr>
</table>
"""
In [11]:
pd.read_html(html_string)[0]
Out[11]:
0 1 2
0 Programming Language Creator Year
1 C Dennis Ritchie 1972
2 Python Guido Van Rossum 1989
3 Ruby Yukihiro Matsumoto 1995

In this case, we need to pass the row number to use as header.

In [12]:
pd.read_html(html_string, header=0)[0]
Out[12]:
Programming Language Creator Year
0 C Dennis Ritchie 1972
1 Python Guido Van Rossum 1989
2 Ruby Yukihiro Matsumoto 1995

Parsing a http URL

The same data we read in our excel file is available in a table at the following address: http://www.contextures.com/xlSampleData01.html

Let's pass this url to read_html:

In [13]:
dfs = pd.read_html('http://www.contextures.com/xlSampleData01.html')
In [14]:
dfs
Out[14]:
[             0        1         2        3      4         5        6
 0    OrderDate   Region       Rep     Item  Units  UnitCost    Total
 1     1/6/2016     East     Jones   Pencil     95      1.99   189.05
 2    1/23/2016  Central    Kivell   Binder     50     19.99   999.50
 3     2/9/2016  Central   Jardine   Pencil     36      4.99   179.64
 4    2/26/2016  Central      Gill      Pen     27     19.99   539.73
 5    3/15/2016     West   Sorvino   Pencil     56      2.99   167.44
 6     4/1/2016     East     Jones   Binder     60      4.99   299.40
 7    4/18/2016  Central   Andrews   Pencil     75      1.99   149.25
 8     5/5/2016  Central   Jardine   Pencil     90      4.99   449.10
 9    5/22/2016     West  Thompson   Pencil     32      1.99    63.68
 10    6/8/2016     East     Jones   Binder     60      8.99   539.40
 11   6/25/2016  Central    Morgan   Pencil     90      4.99   449.10
 12   7/12/2016     East    Howard   Binder     29      1.99    57.71
 13   7/29/2016     East    Parent   Binder     81     19.99  1619.19
 14   8/15/2016     East     Jones   Pencil     35      4.99   174.65
 15    9/1/2016  Central     Smith     Desk      2    125.00   250.00
 16   9/18/2016     East     Jones  Pen Set     16     15.99   255.84
 17   10/5/2016  Central    Morgan   Binder     28      8.99   251.72
 18  10/22/2016     East     Jones      Pen     64      8.99   575.36
 19   11/8/2016     East    Parent      Pen     15     19.99   299.85
 20  11/25/2016  Central    Kivell  Pen Set     96      4.99   479.04
 21  12/12/2016  Central     Smith   Pencil     67      1.29    86.43
 22  12/29/2016     East    Parent  Pen Set     74     15.99  1183.26
 23   1/15/2017  Central      Gill   Binder     46      8.99   413.54
 24    2/1/2017  Central     Smith   Binder     87     15.00  1305.00
 25   2/18/2017     East     Jones   Binder      4      4.99    19.96
 26    3/7/2017     West   Sorvino   Binder      7     19.99   139.93
 27   3/24/2017  Central   Jardine  Pen Set     50      4.99   249.50
 28   4/10/2017  Central   Andrews   Pencil     66      1.99   131.34
 29   4/27/2017     East    Howard      Pen     96      4.99   479.04
 30   5/14/2017  Central      Gill   Pencil     53      1.29    68.37
 31   5/31/2017  Central      Gill   Binder     80      8.99   719.20
 32   6/17/2017  Central    Kivell     Desk      5    125.00   625.00
 33    7/4/2017     East     Jones  Pen Set     62      4.99   309.38
 34   7/21/2017  Central    Morgan  Pen Set     55     12.49   686.95
 35    8/7/2017  Central    Kivell  Pen Set     42     23.95  1005.90
 36   8/24/2017     West   Sorvino     Desk      3    275.00   825.00
 37   9/10/2017  Central      Gill   Pencil      7      1.29     9.03
 38   9/27/2017     West   Sorvino      Pen     76      1.99   151.24
 39  10/14/2017     West  Thompson   Binder     57     19.99  1139.43
 40  10/31/2017  Central   Andrews   Pencil     14      1.29    18.06
 41  11/17/2017  Central   Jardine   Binder     11      4.99    54.89
 42   12/4/2017  Central   Jardine   Binder     94     19.99  1879.06
 43  12/21/2017  Central   Andrews   Binder     28      4.99   139.72]

We have one table and can see that we need to pass the row number to use as header (because <thead> is not present).

In [15]:
dfs = pd.read_html('http://www.contextures.com/xlSampleData01.html', header=0)
dfs[0].head()
Out[15]:
OrderDate Region Rep Item Units UnitCost Total
0 1/6/2016 East Jones Pencil 95 1.99 189.05
1 1/23/2016 Central Kivell Binder 50 19.99 999.50
2 2/9/2016 Central Jardine Pencil 36 4.99 179.64
3 2/26/2016 Central Gill Pen 27 19.99 539.73
4 3/15/2016 West Sorvino Pencil 56 2.99 167.44

Nice!

Parsing a https URL

The documentation states that:

Note that lxml only accepts the http, ftp and file url protocols. If you have a URL that starts with 'https' you might try removing the 's'.

This is true, but bs4 + html5lib are used as a fallback when lxml fails. I guess this is why passing a https url does work. We can confirm that with a wikipedia page.

In [16]:
pd.read_html('https://en.wikipedia.org/wiki/Python_(programming_language)', header=0)[1]
Out[16]:
Type mutable Description Syntax example
0 bool immutable Boolean value True False
1 bytearray mutable Sequence of bytes bytearray(b'Some ASCII') bytearray(b"Some ASCI...
2 bytes immutable Sequence of bytes b'Some ASCII' b"Some ASCII" bytes([119, 105, 1...
3 complex immutable Complex number with real and imaginary parts 3+2.7j
4 dict mutable Associative array (or dictionary) of key and v... {'key1': 1.0, 3: False}
5 ellipsis NaN An ellipsis placeholder to be used as an index... ...
6 float immutable Floating point number, system-defined precision 3.1415927
7 frozenset immutable Unordered set, contains no duplicates; can con... frozenset([4.0, 'string', True])
8 int immutable Integer of unlimited magnitude[76] 42
9 list mutable List, can contain mixed types [4.0, 'string', True]
10 set mutable Unordered set, contains no duplicates; can con... {4.0, 'string', True}
11 str immutable A character string: sequence of Unicode codepo... 'Wikipedia' "Wikipedia" """Spanning multiple l...
12 tuple immutable Can contain mixed types (4.0, 'string', True)But we can append element...

But what if the url requires authentiation?

In that case we can use requests to get the HTML and pass the string to pandas!

To demonstrate authentication, we can use http://httpbin.org

We can first confirm that passing a url that requires authentication raises a 401

In [17]:
pd.read_html('https://httpbin.org/basic-auth/myuser/mypasswd')
---------------------------------------------------------------------------
HTTPError                                 Traceback (most recent call last)
<ipython-input-17-7e6b50c9f1f3> in <module>()
----> 1 pd.read_html('https://httpbin.org/basic-auth/myuser/mypasswd')

~/miniconda3/envs/jupyter/lib/python3.6/site-packages/pandas/io/html.py in read_html(io, match, flavor, header, index_col, skiprows, attrs, parse_dates, tupleize_cols, thousands, encoding, decimal, converters, na_values, keep_default_na)
    913                   thousands=thousands, attrs=attrs, encoding=encoding,
    914                   decimal=decimal, converters=converters, na_values=na_values,
--> 915                   keep_default_na=keep_default_na)

~/miniconda3/envs/jupyter/lib/python3.6/site-packages/pandas/io/html.py in _parse(flavor, io, match, attrs, encoding, **kwargs)
    747             break
    748     else:
--> 749         raise_with_traceback(retained)
    750 
    751     ret = []

~/miniconda3/envs/jupyter/lib/python3.6/site-packages/pandas/compat/__init__.py in raise_with_traceback(exc, traceback)
    383         if traceback == Ellipsis:
    384             _, _, traceback = sys.exc_info()
--> 385         raise exc.with_traceback(traceback)
    386 else:
    387     # this version of raise is a syntax error in Python 3

HTTPError: HTTP Error 401: UNAUTHORIZED
In [ ]:
r = requests.get('https://httpbin.org/basic-auth/myuser/mypasswd')
r.status_code

Yes, as expected. Let's pass the username and password with requests.

In [ ]:
r = requests.get('https://httpbin.org/basic-auth/myuser/mypasswd', auth=('myuser', 'mypasswd'))
r.status_code

We could now pass r.text to pandas. http://httpbin.org was used to demonstrate authentication but it only returns JSON-encoded responses and no HTML. It's a testing service. So it doesn't make sense here.

The following example shows how to combine requests and pandas.

In [18]:
r = requests.get('https://en.wikipedia.org/wiki/Python_(programming_language)')
pd.read_html(r.text, header=0)[1]
Out[18]:
Type mutable Description Syntax example
0 bool immutable Boolean value True False
1 bytearray mutable Sequence of bytes bytearray(b'Some ASCII') bytearray(b"Some ASCI...
2 bytes immutable Sequence of bytes b'Some ASCII' b"Some ASCII" bytes([119, 105, 1...
3 complex immutable Complex number with real and imaginary parts 3+2.7j
4 dict mutable Associative array (or dictionary) of key and v... {'key1': 1.0, 3: False}
5 ellipsis NaN An ellipsis placeholder to be used as an index... ...
6 float immutable Floating point number, system-defined precision 3.1415927
7 frozenset immutable Unordered set, contains no duplicates; can con... frozenset([4.0, 'string', True])
8 int immutable Integer of unlimited magnitude[76] 42
9 list mutable List, can contain mixed types [4.0, 'string', True]
10 set mutable Unordered set, contains no duplicates; can con... {4.0, 'string', True}
11 str immutable A character string: sequence of Unicode codepo... 'Wikipedia' "Wikipedia" """Spanning multiple l...
12 tuple immutable Can contain mixed types (4.0, 'string', True)But we can append element...

A more complex example

We looked at some quite simple examples so far. So let's try a page with several tables: https://en.wikipedia.org/wiki/Timeline_of_programming_languages

In [19]:
dfs = pd.read_html('https://en.wikipedia.org/wiki/Timeline_of_programming_languages')
In [20]:
len(dfs)
Out[20]:
13

If we look at the page we have 8 tables (one per decade). Looking at our dfs list, we can see that the first interesting table is the fifth one and that we need to pass the row to use as header.

In [21]:
dfs = pd.read_html('https://en.wikipedia.org/wiki/Timeline_of_programming_languages', header=0)
dfs[4]
Out[21]:
Year Name Chief developer, company Predecessor(s)
0 1943–45 Plankalkül (concept) Konrad Zuse none (unique language)
1 1943–46 ENIAC coding system John von Neumann, John Mauchly, J. Presper Eck... none (unique language)
2 1946 ENIAC Short Code Richard Clippinger, John von Neumann after Ala... ENIAC coding system
3 1946 Von Neumann and Goldstine graphing system (Not... John von Neumann and Herman Goldstine ENIAC coding system
4 1947 ARC Assembly Kathleen Booth[1][2] ENIAC coding system
5 1948 CPC Coding scheme Howard H. Aiken Analytical Engine order code
6 1948 Curry notation system Haskell Curry ENIAC coding system
7 1948 Plankalkül (concept published) Konrad Zuse none (unique language)
8 1949 Short Code John Mauchly and William F. Schmitt ENIAC Short Code
9 Year Name Chief developer, company Predecessor(s)

Notice that the header was repeated in the last row (to make the table easier to read on the HTML page). We can filter that after concatenating together the 8 tables to get one DataFrame.

In [22]:
df = pd.concat(dfs[4:12])
df
Out[22]:
Year Name Chief developer, company Predecessor(s)
0 1943–45 Plankalkül (concept) Konrad Zuse none (unique language)
1 1943–46 ENIAC coding system John von Neumann, John Mauchly, J. Presper Eck... none (unique language)
2 1946 ENIAC Short Code Richard Clippinger, John von Neumann after Ala... ENIAC coding system
3 1946 Von Neumann and Goldstine graphing system (Not... John von Neumann and Herman Goldstine ENIAC coding system
4 1947 ARC Assembly Kathleen Booth[1][2] ENIAC coding system
5 1948 CPC Coding scheme Howard H. Aiken Analytical Engine order code
6 1948 Curry notation system Haskell Curry ENIAC coding system
7 1948 Plankalkül (concept published) Konrad Zuse none (unique language)
8 1949 Short Code John Mauchly and William F. Schmitt ENIAC Short Code
9 Year Name Chief developer, company Predecessor(s)
0 1950 Short Code William F Schmidt, Albert B. Tonik,[3] J.R. Logan Brief Code
1 1950 Birkbeck Assembler Kathleen Booth ARC
2 1951 Superplan Heinz Rutishauser Plankalkül
3 1951 ALGAE Edward A Voorhees and Karl Balke none (unique language)
4 1951 Intermediate Programming Language Arthur Burks Short Code
5 1951 Regional Assembly Language Maurice Wilkes EDSAC
6 1951 Boehm unnamed coding system Corrado Böhm CPC Coding scheme
7 1951 Klammerausdrücke Konrad Zuse Plankalkül
8 1951 OMNIBAC Symbolic Assembler Charles Katz Short Code
9 1951 Stanislaus (Notation) Fritz Bauer none (unique language)
10 1951 Whirlwind assembler Charles Adams and Jack Gilmore at MIT Project ... EDSAC
11 1951 Rochester assembler Nat Rochester EDSAC
12 1951 Sort Merge Generator Betty Holberton none (unique language)
13 1952 A-0 Grace Hopper Short Code
14 1952 Glennie Autocode Alick Glennie after Alan Turing CPC Coding scheme
15 1952 Editing Generator Milly Koss SORT/MERGE
16 1952 COMPOOL RAND/SDC none (unique language)
17 1953 Speedcoding John W. Backus none (unique language)
18 1953 READ/PRINT Don Harroff, James Fishman, George Ryckman none (unique language)
19 1954 Laning and Zierler system Laning, Zierler, Adams at MIT Project Whirlwind none (unique language)
... ... ... ... ...
47 2009 Chapel Brad Chamberlain, Cray Inc. HPF, ZPL
48 2009 Go Google C, Oberon, Limbo, Smalltalk
49 2009 CoffeeScript Jeremy Ashkenas JavaScript, Ruby, Python, Haskell
50 2009 Idris Edwin Brady Haskell, Agda, Coq
51 2009 Parasail S. Tucker Taft, AdaCore Modula, Ada, Pascal, ML
52 2009 Whiley David J. Pearce Java, C, Python
53 Year Name Chief developer, company Predecessor(s)
0 2010 Rust Graydon Hoare, Mozilla Alef, C++, Camlp4, Erlang, Hermes, Limbo, Napi...
1 2011 Ceylon Gavin King, Red Hat Java
2 2011 Dart Google Java, JavaScript, CoffeeScript, Go
3 2011 C++11 C++ ISO/IEC 14882:2011 C++, Standard C, C
4 2011 Kotlin JetBrains Java, Scala, Groovy, C#, Gosu
5 2011 Red Nenad Rakocevic Rebol, Scala, Lua
6 2011 Opa MLstate OCaml, Erlang, JavaScript
7 2012 Elixir José Valim Erlang, Ruby, Clojure
8 2012 Elm Evan Czaplicki Haskell, Standard ML, OCaml, F#
9 2012 TypeScript Anders Hejlsberg, Microsoft JavaScript, CoffeeScript
10 2012 Julia Jeff Bezanson, Stefan Karpinski, Viral Shah, A... MATLAB, Lisp, C, Fortran, Mathematica[9] (stri...
11 2012 P Vivek Gupta: not the politician, Ethan Jackson... NaN
12 2012 Ada 2012 ARA and Ada Europe (ISO/IEC 8652:2012) Ada 2005, ISO/IEC 8652:1995/Amd 1:2007
13 2014 Crystal Ary Borenszweig, Manas Technology Solutions Ruby, C, Rust, Go, C#, Python
14 2014 Hack Facebook PHP
15 2014 Swift Apple Inc. Objective-C, Rust, Haskell, Ruby, Python, C#, CLU
16 2014 C++14 C++ ISO/IEC 14882:2014 C++, Standard C, C
17 2015 Atari 2600 SuperCharger BASIC Microsoft sponsored think tank RelationalFrame... BASIC, Dartmouth BASIC (compiled programming l...
18 2015 Perl 6 The Rakudo Team Perl, Haskell, Python, Ruby
19 2016 Ring Mahmoud Fayed Lua, Python, Ruby, C, C#, BASIC, QML, xBase, S...
20 2017 C++17 C++ ISO/IEC 14882:2017 C++, Standard C, C
21 2017 Atari 2600 Flashback BASIC Microsoft sponsored think tank RelationalFrame... BASIC, Dartmouth BASIC (compiled programming l...
22 Year Name Chief developer, company Predecessor(s)

388 rows × 4 columns

Remove the extra header rows.

In [23]:
prog_lang = df[df.Year != 'Year']
prog_lang
Out[23]:
Year Name Chief developer, company Predecessor(s)
0 1943–45 Plankalkül (concept) Konrad Zuse none (unique language)
1 1943–46 ENIAC coding system John von Neumann, John Mauchly, J. Presper Eck... none (unique language)
2 1946 ENIAC Short Code Richard Clippinger, John von Neumann after Ala... ENIAC coding system
3 1946 Von Neumann and Goldstine graphing system (Not... John von Neumann and Herman Goldstine ENIAC coding system
4 1947 ARC Assembly Kathleen Booth[1][2] ENIAC coding system
5 1948 CPC Coding scheme Howard H. Aiken Analytical Engine order code
6 1948 Curry notation system Haskell Curry ENIAC coding system
7 1948 Plankalkül (concept published) Konrad Zuse none (unique language)
8 1949 Short Code John Mauchly and William F. Schmitt ENIAC Short Code
0 1950 Short Code William F Schmidt, Albert B. Tonik,[3] J.R. Logan Brief Code
1 1950 Birkbeck Assembler Kathleen Booth ARC
2 1951 Superplan Heinz Rutishauser Plankalkül
3 1951 ALGAE Edward A Voorhees and Karl Balke none (unique language)
4 1951 Intermediate Programming Language Arthur Burks Short Code
5 1951 Regional Assembly Language Maurice Wilkes EDSAC
6 1951 Boehm unnamed coding system Corrado Böhm CPC Coding scheme
7 1951 Klammerausdrücke Konrad Zuse Plankalkül
8 1951 OMNIBAC Symbolic Assembler Charles Katz Short Code
9 1951 Stanislaus (Notation) Fritz Bauer none (unique language)
10 1951 Whirlwind assembler Charles Adams and Jack Gilmore at MIT Project ... EDSAC
11 1951 Rochester assembler Nat Rochester EDSAC
12 1951 Sort Merge Generator Betty Holberton none (unique language)
13 1952 A-0 Grace Hopper Short Code
14 1952 Glennie Autocode Alick Glennie after Alan Turing CPC Coding scheme
15 1952 Editing Generator Milly Koss SORT/MERGE
16 1952 COMPOOL RAND/SDC none (unique language)
17 1953 Speedcoding John W. Backus none (unique language)
18 1953 READ/PRINT Don Harroff, James Fishman, George Ryckman none (unique language)
19 1954 Laning and Zierler system Laning, Zierler, Adams at MIT Project Whirlwind none (unique language)
20 1954 Mark I Autocode Tony Brooker Glennie Autocode
... ... ... ... ...
45 2008 Genie Jamie McCracken Python, Boo, D, Object Pascal
46 2008 Pure Albert Gräf Q
47 2009 Chapel Brad Chamberlain, Cray Inc. HPF, ZPL
48 2009 Go Google C, Oberon, Limbo, Smalltalk
49 2009 CoffeeScript Jeremy Ashkenas JavaScript, Ruby, Python, Haskell
50 2009 Idris Edwin Brady Haskell, Agda, Coq
51 2009 Parasail S. Tucker Taft, AdaCore Modula, Ada, Pascal, ML
52 2009 Whiley David J. Pearce Java, C, Python
0 2010 Rust Graydon Hoare, Mozilla Alef, C++, Camlp4, Erlang, Hermes, Limbo, Napi...
1 2011 Ceylon Gavin King, Red Hat Java
2 2011 Dart Google Java, JavaScript, CoffeeScript, Go
3 2011 C++11 C++ ISO/IEC 14882:2011 C++, Standard C, C
4 2011 Kotlin JetBrains Java, Scala, Groovy, C#, Gosu
5 2011 Red Nenad Rakocevic Rebol, Scala, Lua
6 2011 Opa MLstate OCaml, Erlang, JavaScript
7 2012 Elixir José Valim Erlang, Ruby, Clojure
8 2012 Elm Evan Czaplicki Haskell, Standard ML, OCaml, F#
9 2012 TypeScript Anders Hejlsberg, Microsoft JavaScript, CoffeeScript
10 2012 Julia Jeff Bezanson, Stefan Karpinski, Viral Shah, A... MATLAB, Lisp, C, Fortran, Mathematica[9] (stri...
11 2012 P Vivek Gupta: not the politician, Ethan Jackson... NaN
12 2012 Ada 2012 ARA and Ada Europe (ISO/IEC 8652:2012) Ada 2005, ISO/IEC 8652:1995/Amd 1:2007
13 2014 Crystal Ary Borenszweig, Manas Technology Solutions Ruby, C, Rust, Go, C#, Python
14 2014 Hack Facebook PHP
15 2014 Swift Apple Inc. Objective-C, Rust, Haskell, Ruby, Python, C#, CLU
16 2014 C++14 C++ ISO/IEC 14882:2014 C++, Standard C, C
17 2015 Atari 2600 SuperCharger BASIC Microsoft sponsored think tank RelationalFrame... BASIC, Dartmouth BASIC (compiled programming l...
18 2015 Perl 6 The Rakudo Team Perl, Haskell, Python, Ruby
19 2016 Ring Mahmoud Fayed Lua, Python, Ruby, C, C#, BASIC, QML, xBase, S...
20 2017 C++17 C++ ISO/IEC 14882:2017 C++, Standard C, C
21 2017 Atari 2600 Flashback BASIC Microsoft sponsored think tank RelationalFrame... BASIC, Dartmouth BASIC (compiled programming l...

380 rows × 4 columns

In what year was Python created?

In [24]:
prog_lang[prog_lang.Name == 'Python']
Out[24]:
Year Name Chief developer, company Predecessor(s)
9 1991 Python Guido van Rossum ABC, ALGOL 68, Icon, Modula-3

Conclusion

The last example should say it all.

In [25]:
import pandas as pd

dfs = pd.read_html('https://en.wikipedia.org/wiki/Timeline_of_programming_languages', header=0)
df = pd.concat(dfs[4:12])
prog_lang = df[df.Year != 'Year']

Four lines of code (including the import) and we have one DataFrame containing the data from 8 different HTML tables on one wikipedia page!

Do I need to say why I love Python and pandas? :-)

This post was written in a jupyter notebook. You can find the notebook on GitHub and download the conda environment.yml file to get all the dependencies I used.

In [ ]:
 

Logging to a Tkinter ScrolledText Widget

I've been programming in Python for almost 10 years. I did many CLI tools, some web applications (mainly using Flask), but I had never built a GUI.

PyQt seems to be one of the most popular framework. I had a look at it but I was not hooked. It looks like you really need to embrace the Qt world. You shouldn't try to use Python Thread but use QtThread instead. Need pySerial? Wait there is QtSerial. I guess this can be a pro or con depending on your background.

I looked more in tkinter. I must say that in my mind it was a bit old and wasn't looking very modern. I didn't know that Tk 8.5 came with an entirely new themed widget set to address the dated appearance. The official tutorial is quite nice and comes with code examples in different languages (including Python).

The GUI I needed to write wasn't very advanced. I wanted to have a kind of console where to display log messages.

TextHandler

I quickly found an example on StackOverflow to send Python logging to a tkinter Text widget:

class TextHandler(logging.Handler):
    """This class allows you to log to a Tkinter Text or ScrolledText widget"""

    def __init__(self, text):
        # run the regular Handler __init__
        logging.Handler.__init__(self)
        # Store a reference to the Text it will log to
        self.text = text

    def emit(self, record):
        msg = self.format(record)

        def append():
            self.text.configure(state='normal')
            self.text.insert(tk.END, msg + '\n')
            self.text.configure(state='disabled')
            # Autoscroll to the bottom
            self.text.yview(tk.END)
        # This is necessary because we can't modify the Text from other threads
        self.text.after(0, append)

This looks nice but doesn't work if you try to send a log message from another thread (despite the comment)... because we are passing the text widget with the logging handler to the other thread. And you can only write to a tkinter widget from the main thread.

This is explained in another StackOverflow question but I didn't like the proposed solution. If you implement specific methods as explained (put_line_to_queue), you lose the advantage of just calling the log function from different parts of the program.

QueueHandler

Using a Queue is indeed the way to share data between threads. So I implemented a simple QueueHandler:

class QueueHandler(logging.Handler):
    """Class to send logging records to a queue

    It can be used from different threads
    """

    def __init__(self, log_queue):
        super().__init__()
        self.log_queue = log_queue

    def emit(self, record):
        self.log_queue.put(record)

The handler only puts the message in a queue. I created a ConsoleUi class to poll the messages from the queue and display them in a scrolled text widget:

logger = logging.getLogger(__name__)


class ConsoleUi:
    """Poll messages from a logging queue and display them in a scrolled text widget"""

    def __init__(self, frame):
        self.frame = frame
        # Create a ScrolledText wdiget
        self.scrolled_text = ScrolledText(frame, state='disabled', height=12)
        self.scrolled_text.grid(row=0, column=0, sticky=(N, S, W, E))
        self.scrolled_text.configure(font='TkFixedFont')
        self.scrolled_text.tag_config('INFO', foreground='black')
        self.scrolled_text.tag_config('DEBUG', foreground='gray')
        self.scrolled_text.tag_config('WARNING', foreground='orange')
        self.scrolled_text.tag_config('ERROR', foreground='red')
        self.scrolled_text.tag_config('CRITICAL', foreground='red', underline=1)
        # Create a logging handler using a queue
        self.log_queue = queue.Queue()
        self.queue_handler = QueueHandler(self.log_queue)
        formatter = logging.Formatter('%(asctime)s: %(message)s')
        self.queue_handler.setFormatter(formatter)
        logger.addHandler(self.queue_handler)
        # Start polling messages from the queue
        self.frame.after(100, self.poll_log_queue)

    def display(self, record):
        msg = self.queue_handler.format(record)
        self.scrolled_text.configure(state='normal')
        self.scrolled_text.insert(tk.END, msg + '\n', record.levelname)
        self.scrolled_text.configure(state='disabled')
        # Autoscroll to the bottom
        self.scrolled_text.yview(tk.END)

    def poll_log_queue(self):
        # Check every 100ms if there is a new message in the queue to display
        while True:
            try:
                record = self.log_queue.get(block=False)
            except queue.Empty:
                break
            else:
                self.display(record)
        self.frame.after(100, self.poll_log_queue)

I can safely use the logger from different threads because only a queue is passed with the handler, no tkinter widget.

To demonstrate that, I created a separate thread to display the time every seconds:

class Clock(threading.Thread):
    """Class to display the time every seconds

    Every 5 seconds, the time is displayed using the logging.ERROR level
    to show that different colors are associated to the log levels
    """

    def __init__(self):
        super().__init__()
        self._stop_event = threading.Event()

    def run(self):
        logger.debug('Clock started')
        previous = -1
        while not self._stop_event.is_set():
            now = datetime.datetime.now()
        while not self._stop_event.is_set():
            now = datetime.datetime.now()
            if previous != now.second:
                previous = now.second
                if now.second % 5 == 0:
                    level = logging.ERROR
                else:
                    level = logging.INFO
                logger.log(level, now)
            time.sleep(0.2)

    def stop(self):
        self._stop_event.set()

The full code is available on github. If you checkout the version v0.1.0 and run it, you'll see something like that:

/images/tkinter/logging_handler.png

3-pane layout

The ConsoleUi class takes a frame as argument. It makes it easy to integrate in another layout. Let's see an example with a Paned Window widget to implement the common 3-pane layout.

Let's first create two new classes. The first one will be used to display a simple form to send a message via logging. The user can select the desired logging level:

class FormUi:

    def __init__(self, frame):
        self.frame = frame
        # Create a combobbox to select the logging level
        values = ['DEBUG', 'INFO', 'WARNING', 'ERROR', 'CRITICAL']
        self.level = tk.StringVar()
        ttk.Label(self.frame, text='Level:').grid(column=0, row=0, sticky=W)
        self.combobox = ttk.Combobox(
            self.frame,
            textvariable=self.level,
            width=25,
            state='readonly',
            values=values
        )
        self.combobox.current(0)
        self.combobox.grid(column=1, row=0, sticky=(W, E))
        # Create a text field to enter a message
        self.message = tk.StringVar()
        ttk.Label(self.frame, text='Message:').grid(column=0, row=1, sticky=W)
        ttk.Entry(self.frame, textvariable=self.message, width=25).grid(column=1, row=1, sticky=(W, E))
        # Add a button to log the message
        self.button = ttk.Button(self.frame, text='Submit', command=self.submit_message)
        self.button.grid(column=1, row=2, sticky=W)

    def submit_message(self):
        # Get the logging level numeric value
        lvl = getattr(logging, self.level.get())
        logger.log(lvl, self.message.get())

The other class is a dummy one to show the 3-pane layout:

class ThirdUi:

    def __init__(self, frame):
        self.frame = frame
        ttk.Label(self.frame, text='This is just an example of a third frame').grid(column=0, row=1, sticky=W)
        ttk.Label(self.frame, text='With another line here!').grid(column=0, row=4, sticky=W)

With those new classes, the only change required is in the App class to create a vertical and horizontal ttk.PanedWindow. The horizontal pane is splitted in two frames (the form and console):

 class App:

     def __init__(self, root):
@@ -109,11 +148,24 @@ class App:
         root.title('Logging Handler')
         root.columnconfigure(0, weight=1)
         root.rowconfigure(0, weight=1)
-        console_frame = ttk.Frame(root)
-        console_frame.grid(column=0, row=0, sticky=(N, W, E, S))
+        # Create the panes and frames
+        vertical_pane = ttk.PanedWindow(self.root, orient=VERTICAL)
+        vertical_pane.grid(row=0, column=0, sticky="nsew")
+        horizontal_pane = ttk.PanedWindow(vertical_pane, orient=HORIZONTAL)
+        vertical_pane.add(horizontal_pane)
+        form_frame = ttk.Labelframe(horizontal_pane, text="MyForm")
+        form_frame.columnconfigure(1, weight=1)
+        horizontal_pane.add(form_frame, weight=1)
+        console_frame = ttk.Labelframe(horizontal_pane, text="Console")
         console_frame.columnconfigure(0, weight=1)
         console_frame.rowconfigure(0, weight=1)
+        horizontal_pane.add(console_frame, weight=1)
+        third_frame = ttk.Labelframe(vertical_pane, text="Third Frame")
+        vertical_pane.add(third_frame, weight=1)
+        # Initialize all frames
+        self.form = FormUi(form_frame)
         self.console = ConsoleUi(console_frame)
+        self.third = ThirdUi(third_frame)
         self.clock = Clock()
         self.clock.start()
         self.root.protocol('WM_DELETE_WINDOW', self.quit)

Note that the Clock and ConsoleUi classes were left untouched. We just pass a ttk.LabelFrame instead of a ttk.Frame to the ConsoleUi class.

This looks more like what could be a real application:

/images/tkinter/paned_window.png

The main window and the different panes can be resized nicely:

/images/tkinter/paned_window_resized.png

As already mentioned, the full example is available on github. You can checkout the version v0.2.0 to see the 3-pane layout.

Conclusion

I want to give some credit to tkinter. It doesn't have a steep learning curve and allows to easily create some nice GUI. You can continue using what you know in Python (Queue, Threads, modules like pySerial). I can only recomment it if you are familiar with Python and want to create a simple GUI. That being said, I'll probably try to dive more in PyQt when I have more time.

Experimenting with asyncio on a Raspberry Pi

In a previous post, I described how I built a LEGO Macintosh Classic with a Raspberry Pi and e-paper display.

For testing purpose I installed the clock demo which is part of the Embedded Artists repository. Of course I wanted to do more than displaying the time on this little box. I also wanted to take advantage of the button I had integrated.

One idea was to create a small web server so that I could receive and display messages. The application would basically:

  • display the time (every minute)

  • when receiving a message, stop the clock and display the message

  • when the button is pressed, start the clock again

/images/legomac/press_button.gif

I don't know about you, but this really makes me think event loop! I learnt asynchronous programming with Dave Peticolas Twisted Introduction a few years ago. If you are not familiar with asynchronous programming, I really recommend it. I wrote a few applications using Twisted but I haven't had the opportunity to use asyncio yet. Here is a very good occasion!

asyncio

REST API using aiohttp

There are already several asyncio web frameworks to build an HTTP server. I decided to go with aiohttp which is kind of the default one.

Using this tutorial I wrote a simple REST API using aiohttp. It uses JSON Web Tokens which is something else I have been wanted to try.

The API has only 3 endpoints:

def setup_routes(app):
    app.router.add_get('/', index)
    app.router.add_post('/login', login)
    app.router.add_post('/messages', post_message)
  • / to check that our token is valid

  • /login to login

  • /messages to post messages

async def login(request):
    config = request.app['config']
    data = await request.json()
    try:
        user = data['username']
        passwd = data['password']
    except KeyError:
        return web.HTTPBadRequest(reason='Invalid arguments')
    # We have only one user hard-coded in the config file...
    if user != config['username'] or passwd != config['password']:
        return web.HTTPBadRequest(reason='Invalid credentials')
    payload = {
        'user_id': 1,
        'exp': datetime.datetime.utcnow() + datetime.timedelta(seconds=config['jwt_exp_delta_seconds'])
    }
    jwt_token = jwt.encode(payload, config['jwt_secret'], config['jwt_algorithm'])
    logger.debug(f'JWT token created for {user}')
    return web.json_response({'token': jwt_token.decode('utf-8')})


@login_required
async def post_message(request):
    if request.content_type != 'application/json':
        return web.HTTPBadRequest()
    data = await request.json()
    try:
        message = data['message']
    except KeyError:
        return web.HTTPBadRequest()
    logger.debug(f'Message received from {request.user}: {message}')
    return web.json_response({'message': message}, status=201)


@login_required
async def index(request):
    return web.json_response({'message': 'Welcome to LegoMac {}!'.format(request.user)})

Raspberry Pi GPIO and asyncio

The default Python package to control the Raspberry Pi GPIO seems to be RPi.GPIO. That's at least what is used in the ImageDemoButton.py from Embedded Artists.

An alternative is the pigpio library which provides a daemon to access the Raspberry Pi GPIO via a pipe or socket interface. And someone (Pierre Rust) already created an aysncio based Python client for the pigpio daemon: apigpio.

Exactly what I needed! It's basically a (incomplete) port of the original Python client provided with pigpio, but far sufficient for my need. I just want to get a notification when pressing the button on top of the screen.

There is an example how to achieve that: gpio_notification.py.

E-paper display and asyncio

The last remaining piece is to make the e-paper display play nicely with asyncio.

The EPD driver uses the fuse library. It allows the display to be represented as a virtual directory of files. So sending a command consists of writing to a file.

There is a library to add file support to asyncio: aiofiles. The only thing I had to do was basically to wrap the file IO in EPD.py with aiofiles:

async def _command(self, c):
    async with aiofiles.open(os.path.join(self._epd_path, 'command'), 'wb') as f:
        await f.write(c)

You can't use await in a class __init__ method. So following some recommendations from stackoverflow, I used the factory pattern and moved the actions requiring some IO to a classmethod:

@classmethod
async def create(cls, *args, **kwargs):
    self = EPD(*args, **kwargs)
    async with aiofiles.open(os.path.join(self._epd_path, 'version')) as f:
        version = await f.readline()
        self._version = version.rstrip('\n')
    async with aiofiles.open(os.path.join(self._epd_path, 'panel')) as f:
        line = await f.readline()
        m = self.PANEL_RE.match(line.rstrip('\n'))
        if m is None:
            raise EPDError('invalid panel string')
        ...

To create an instance of the EPD class, use:

epd = await EPD.create([path='/path/to/epd'], [auto=boolean])

Putting everything together with aiohttp

Running the clock as a background task

For the clock, I adapted the clock demo from Embedded Artists repository.

As described in aiohttp documentation I created a background task to display the clock every minute:

async def display_clock(app):
    """Background task to display clock every minute"""
    clock = Clock(app['epd'])
    first_start = True
    try:
        while True:
            while True:
                now = datetime.datetime.today()
                if now.second == 0 or first_start:
                    first_start = False
                    break
                await asyncio.sleep(0.5)
            logger.debug('display clock')
            await clock.display(now)
    except asyncio.CancelledError:
        logger.debug('display clock cancel')


async def start_background_tasks(app):
     app['epd'] = await EPD.create(auto=True)
     app['clock'] = app.loop.create_task(display_clock(app))


async def cleanup_background_tasks(app):
    app['clock'].cancel()
    await app['clock']


def init_app():
    """Create and return the aiohttp Application object"""
    app = web.Application()
    app.on_startup.append(start_background_tasks)
    app.on_cleanup.append(cleanup_background_tasks)
    ...

Stop the clock and display a message

When receiving a message, I first cancel the clock background task and send the messages to the e-paper display using ensure_future so that I can return a json response without having to wait for the message to be displayed as it takes about 5 seconds:

@login_required
async def post_message(request):
    if request.content_type != 'application/json':
        return web.HTTPBadRequest()
    data = await request.json()
    try:
        message = data['message']
    except KeyError:
        return web.HTTPBadRequest()
    # cancel the display clock
    request.app['clock'].cancel()
    logger.debug(f'Message received from {request.user}: {message}')
    now = datetime.datetime.now(request.app['timezone'])
    helpers.ensure_future(request.app['epd'].display_message(message, request.user, now))
    return web.json_response({'message': message}, status=201)

Start the clock when pressing the button

To be able to restart the clock when pressing the button, I connect to the pigpiod when starting the app (in start_background_tasks) and register the on_input callback:

async def start_background_tasks(app):
    app['pi'] = apigpio.Pi(app.loop)
    address = (app['config']['pigpiod_host'], app['config']['pigpiod_port'])
    await app['pi'].connect(address)
    await app['pi'].set_mode(BUTTON_GPIO, apigpio.INPUT)
    app['cb'] = await app['pi'].add_callback(
            BUTTON_GPIO,
            edge=apigpio.RISING_EDGE,
            func=functools.partial(on_input, app))
    ...

In the on_input callback, I re-create the clock background task but only if the previous task is done:

def on_input(app, gpio, level, tick):
    """Callback called when pressing the button on the e-paper display"""
    logger.info('on_input {} {} {}'.format(gpio, level, tick))
    if app['clock'].done():
        logger.info('restart clock')
        app['clock'] = app.loop.create_task(display_clock(app))

Running on the Pi

You might have noticed that I used some syntax that is Python 3.6 only. I don't really see myself using something else when starting a new project today :-) There are so many new things (like f-strings) that make your programs look cleaner.

On raspbian, if you install Python 3, you get 3.4... So how do you get Python 3.6 on a Raspberry Pi?

On desktop/server I usually use conda. It makes it so easy to install the Python version you want and many dependencies. There are no official installer for the armv6 architecture but I found berryconda which is a conda based distribution for the Raspberry Pi! Really nice!

Another alternative is to use docker. There are official arm32v6 images based on alpine and some from resin.io.

I could have gone with berryconda, but there's one thing I wanted as well. I'll have to open the HTTP server to the outside world meaning I need HTTPS. As mentionned in another post, traefik makes that very easy if you use docker. So that's what I chose.

I created 3 containers:

  • traefik

  • pigpiod

  • aiolegomac

traefik

There are no official Traefik docker images for arm yet, but an issue is currently opened. So it should arrive soon!

In the meantime I created my own:

FROM arm32v6/alpine:3.6

RUN apk --update upgrade \
  && apk --no-cache --no-progress add ca-certificates \
  && apk add openssl \
  && rm -rf /var/cache/apk/*

RUN wget -O /usr/local/bin/traefik https://github.com/containous/traefik/releases/download/v1.3.3/traefik_linux-arm \
  && chmod a+x /usr/local/bin/traefik

ENTRYPOINT ["/usr/local/bin/traefik"]

pigpiod

For pigpiod, I first created an image based on arm32v6/alpine but I noticed I couldn't send a SIGTERM to the daemon to stop it properly... I'm not sure why. Alpine being based on musl instead of glibc might be the problem. Here is the Dockerfile I tried:

FROM arm32v6/alpine:3.6

RUN apk add --no-cache --virtual .build-deps \
  gcc \
  make \
  musl-dev \
  tar \
  && wget -O /tmp/pigpio.tar abyz.co.uk/rpi/pigpio/pigpio.tar \
  && tar -xf /tmp/pigpio.tar -C /tmp \
  && sed -i "/ldconfig/d" /tmp/PIGPIO/Makefile \
  && make -C /tmp/PIGPIO \
  && make -C /tmp/PIGPIO install \
  && rm -rf /tmp/PIGPIO /tmp/pigpio.tar \
  && apk del .build-deps

EXPOSE 8888

ENTRYPOINT ["/usr/local/bin/pigpiod", "-g"]

I even tried using tini as entrypoint without luck. So if someone as the explanation, please share it in the comments.

I tried with resin/rpi-raspbian image and I got it working properly right away:

FROM resin/rpi-raspbian:jessie

RUN apt-get update \
  && apt-get install -y \
     make \
     gcc \
     libc6-dev \
  && apt-get clean \
  && rm -rf /var/lib/apt/lists/*

RUN curl -o /tmp/pigpio.tar abyz.co.uk/rpi/pigpio/pigpio.tar \
  && tar -xf /tmp/pigpio.tar -C /tmp \
  && make -C /tmp/PIGPIO \
  && make -C /tmp/PIGPIO install \
  && rm -rf /tmp/pigpio.tar /tmp/PIGPIO

EXPOSE 8888

ENTRYPOINT ["/usr/local/bin/pigpiod", "-g"]

Note that the container has to run in privileged mode to access the GPIO.

aiolegomac

For the main application, the Dockerfile is quite standard for a Python application:

FROM resin/raspberry-pi-python:3.6

RUN apt-get update \
  && apt-get install -y \
     fonts-liberation \
     fonts-dejavu  \
     libjpeg-dev \
     libfreetype6-dev \
     libtiff5-dev \
     liblcms2-dev \
     libwebp-dev \
     zlib1g-dev \
     libyaml-0-2 \
  && apt-get autoremove \
  && apt-get clean \
  && rm -rf /var/lib/apt/lists/*

WORKDIR /app

COPY requirements.txt /app/requirements.txt
RUN python -m venv /opt/legomac \
  && /opt/legomac/bin/pip install -r requirements.txt

COPY . /app

ENTRYPOINT ["/opt/legomac/bin/python"]
CMD ["run.py"]

What about the EPD driver? As it uses libfuse to represent the e-paper display as a virtual directory of files, the easiest was to install it on the host and to mount it as a volume inside the docker container.

Deployment

To install all that on the Pi, I wrote a small Ansible playbook.

  1. Configure the Pi as described in my previous post.

  2. Clone the playbook:

    $ git clone https://github.com/beenje/legomac.git
    $ cd legomac
  3. Create a file host_vars/legomac with your variables (assuming the hostname of the Pi is legomac):

    aiolegomac_hostname: myhost.example.com
    aiolegomac_username: john
    aiolegomac_password: mypassword
    aiolegomac_jwt_secret: secret
    traefik_letsencrypt_email: youremail@example.com
    traefik_letsencrypt_production: true
  4. Run the playbook:

    $ ansible-playbook -i hosts -k playbook.yml

This will install docker and the EPD driver, download the aiolegomac repository, build the 3 docker images and start everything.

Building the main application docker image on a Raspberry Pi Zero takes quite some time. So be patient :-) Just go and do something else.

When the full playbook is complete (it took about 55 minutes for me), you'll have a server with HTTPS support (thanks to Let's Encrypt) running on the Pi. It's displaying the clock every minute and you can send messages to it!

Client

HTTPie

To test the server you can of course use curl but I really like HTTPie. It's much more user friendly.

Let's try to access our new server:

$ http GET https://myhost.example.com
HTTP/1.1 401 Unauthorized
Content-Length: 25
Content-Type: application/json; charset=utf-8
Date: Sun, 16 Jul 2017 06:22:42 GMT
Server: Python/3.6 aiohttp/2.2.3

{
    "error": "Unauthorized"
}

Good, we need to login:

$ http POST https://myhost.example.com/login username=john password=foo
HTTP/1.1 400 Bad Request
Content-Length: 32
Content-Type: application/json; charset=utf-8
Date: Sun, 16 Jul 2017 06:18:39 GMT
Server: Python/3.6 aiohttp/2.2.3

{
    "error": "Invalid credentials"
}

Oops, wrong password:

$ http POST https://myhost.example.com/login username=john password='mypassword'
HTTP/1.1 200 OK
Content-Length: 134
Content-Type: application/json; charset=utf-8
Date: Sun, 16 Jul 2017 06:21:14 GMT
Server: Python/3.6 aiohttp/2.2.3

{
    "token": "eyK0eXAiOiJRV5QiLCJhbGciOiJIUzI1NiJ9.eyJ1c3VyX2lkIjoxLCJleHAiOjE1MDB5MTIwOTh9.hECnj4u2mxvZ2r8IEC-db1T-eKTplM4kWJKZoHhtLxQ"
}

We got a token that we can use:

$ http GET https://myhost.example.com 'Authorization: eyK0eXAiOiJRV5QiLCJhbGciOiJIUzI1NiJ9.eyJ1c3VyX2lkIjoxLCJleHAiOjE1MDB5MTIwOTh9.hECnj4u2mxvZ2r8IEC-db1T-eKTplM4kWJKZoHhtLxQ'
HTTP/1.1 200 OK
Content-Length: 43
Content-Type: application/json; charset=utf-8
Date: Sun, 16 Jul 2017 06:22:25 GMT
Server: Python/3.6 aiohttp/2.2.3

{
    "message": "Welcome to LegoMac john!"
}

Authentication is working, so we can send a message:

$ http POST https://myhost.example.com/messages message='Hello World!' 'Authorization: eyK0eXAiOiJRV5QiLCJhbGciOiJIUzI1NiJ9.eyJ1c3VyX2lkIjoxLCJleHAiOjE1MDB5MTIwOTh9.hECnj4u2mxvZ2r8IEC-db1T-eKTplM4kWJKZoHhtLxQ'
HTTP/1.1 201 Created
Content-Length: 27
Content-Type: application/json; charset=utf-8
Date: Sun, 16 Jul 2017 06:23:46 GMT
Server: Python/3.6 aiohttp/2.2.3

{
    "message": "Hello World!"
}

Message sent! HTTPie is nice for testing, but we can make a small script to easily send messages from the command line.

requests

requests is of course the HTTP library to use in Python.

So let's write a small script to send messages to our server. We'll store the server url and username to use in a small yaml configuration file. If we don't have a token yet or if the saved one is no longer valid, the script will retrieve one after prompting us for a password. The token is saved in the configuration file for later use.

The following script could be improved with some nicer error messages by catching exceptions. But it does the job:

import os
import click
import requests
import yaml


def get_config(filename):
    with open(filename) as f:
        config = yaml.load(f)
    return config


def save_config(filename, config):
    with open(filename, 'w') as f:
        yaml.dump(config, f, default_flow_style=False)


def get_token(url, username):
    password = click.prompt('Password', hide_input=True)
    payload = {'username': username, 'password': password}
    r = requests.post(url + '/login', json=payload)
    r.raise_for_status()
    return r.json()['token']


def send_message(url, token, message):
    payload = {'message': message}
    headers = {'Authorization': token}
    r = requests.post(url + '/messages', json=payload, headers=headers)
    r.raise_for_status()


@click.command()
@click.option('--conf', '-c', default='~/.pylegomac.yml',
              help='Configuration file [default: "~/.pylegomac.yml"]')
@click.argument('message')
@click.version_option()
def pylegomac(message, conf):
    """Send message to aiolegomac server"""
    filename = os.path.expanduser(conf)
    config = get_config(filename)
    url = config['url']
    username = config['username']
    if 'token' in config:
        try:
            send_message(url, config['token'], message)
        except requests.exceptions.HTTPError as err:
            # Token no more valid
            pass
        else:
            click.echo('Message sent')
            return
    token = get_token(url, username)
    send_message(url, token, message)
    config['token'] = token
    save_config(filename, config)


if __name__ == '__main__':
    pylegomac()

Let's first create a configuration file:

$ cat ~/.pylegomac.yml
url: https://myhost.example.com
username: john

Send a message:

$ python pylegomac.py 'Beautiful is better than ugly. Explicit is better than implicit. Simple is better than complex. Complex is better than complicated.'
Password:
Message sent
/images/legomac/zen_of_python.jpg

Sending a new message won't request the password as the token was saved in the config file.

Conclusion

I have a nice little aiohttp server running on my Raspberry Pi that can receive and display messages. asyncio is quite pleasant to work with. I really like the async/await syntax.

All the code is on github:

  • aiolegomac (the server and client script)

  • legomac (the Ansible playbook to deploy the server)

Why did I only write a command line script to send messages and no web interface? Don't worry, that's planned! I could have used Jinja2. But I'd like to try a javascript framework. So that will be the subject of another post.